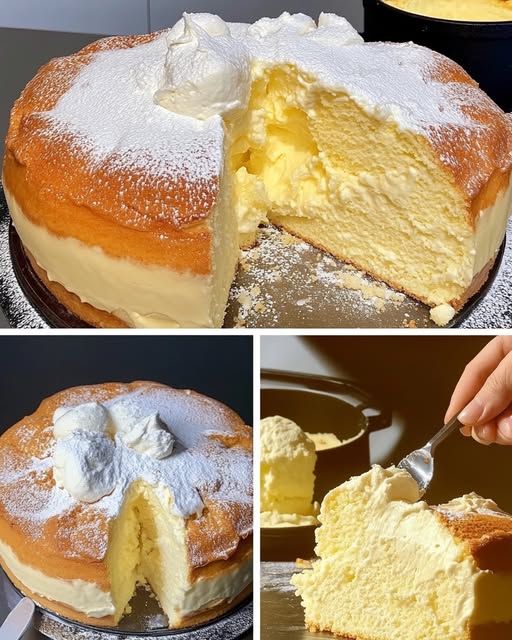
Author: admin1

  • Chocolate Frostys

    Chocolate Frostys

    Introduction
    Chocolate Frostys are a thick creamy frozen dessert inspired by the classic chocolate shake style treat. They have a smooth texture rich chocolate flavor and are perfect as a refreshing dessert or sweet snack. This homemade version uses simple ingredients and clear measurements making it ideal for a blog or website recipe.

    Ingredients
    Two cups whole milk
    One cup heavy cream
    Half cup sweetened condensed milk
    Quarter cup cocoa powder
    Half cup chocolate syrup
    One teaspoon vanilla extract
    Two cups ice cubes

    Equipment Needed
    A blender
    Measuring cups
    Measuring spoons
    Freezer safe glasses or serving cups

    Preparation
    Before starting make sure all ingredients are cold. Using chilled ingredients helps achieve the thick frosty texture. Measure all ingredients accurately for the best flavor balance.

    Blending Method
    Add the whole milk heavy cream sweetened condensed milk cocoa powder chocolate syrup and vanilla extract to the blender. Blend on medium speed for thirty seconds until the mixture is smooth and fully combined.

    Add the ice cubes to the blender. Blend on high speed until the mixture becomes thick smooth and creamy. This may take one to two minutes depending on blender strength. Stop and scrape down the sides if needed to ensure even blending.

    Adjusting Texture
    If the mixture is too thick add one to two tablespoons of milk and blend again. If it is too thin add a few more ice cubes and blend until the desired consistency is reached. The final texture should be thick enough to eat with a spoon but smooth enough to sip.
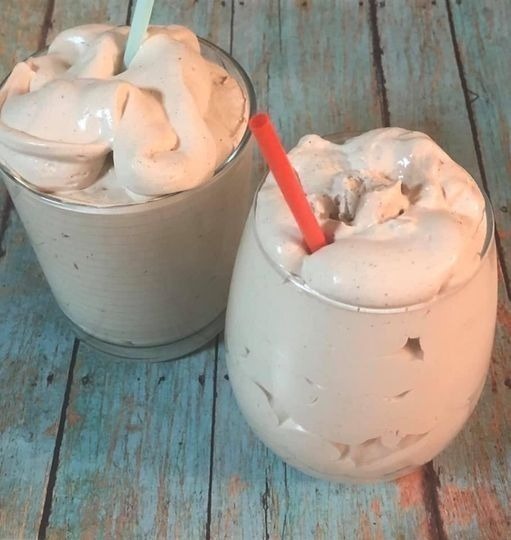
    Serving
    Pour the chocolate frostys into chilled serving glasses. Serve immediately for the best texture and flavor. These are best enjoyed fresh while cold and creamy.

    Optional Variations
    For a richer flavor add one tablespoon melted dark chocolate.
    For a lighter version replace heavy cream with additional milk.
    For a mocha flavor add half teaspoon instant coffee powder.

    Storage
    Chocolate frostys are best consumed immediately. If needed they can be stored in the freezer for up to one hour. Stir or reblend before serving to restore smoothness.

    Tips for Best Results
    Use high quality cocoa powder for deeper chocolate flavor.
    Blend thoroughly to avoid ice chunks.
    Serve immediately to maintain the frosty texture.
    Adjust sweetness by increasing or reducing chocolate syrup.

    Conclusion
    Chocolate frostys are an easy and indulgent frozen dessert made with simple ingredients and precise measurements. This homemade version delivers a creamy chocolate treat perfect for warm days dessert cravings or casual entertaining.

  • Air Fryer Pasta Chips

    Air Fryer Pasta Chips

    Introduction
    Air fryer pasta chips are a trendy and crunchy snack made by cooking pasta until tender and then air frying it until crisp. They are flavorful bite sized and perfect as a snack appetizer or party food. This recipe delivers clear measurements and step by step instructions for reliable and repeatable results suitable for a blog or website.

    Ingredients
    Two cups uncooked short pasta such as farfalle penne or rigatoni
    Six cups water for boiling
    One tablespoon olive oil
    Half teaspoon salt or to taste
    Half teaspoon garlic powder
    Half teaspoon paprika
    Quarter teaspoon black pepper
    Quarter cup grated parmesan cheese optional
    One teaspoon dried Italian seasoning optional

    Equipment Needed
    An air fryer
    A large pot
    A colander
    A large mixing bowl

    Cooking the Pasta
    Bring six cups of water to a rolling boil in a large pot. Add one teaspoon salt to the water. Add the pasta and cook according to package instructions until just tender. Do not overcook the pasta as it will continue to cook in the air fryer.

    Drain the pasta in a colander and allow excess water to drain completely. Let the pasta cool for five minutes so it dries slightly. Removing excess moisture helps achieve a crisp texture.

    Seasoning the Pasta
    Transfer the cooked pasta to a large mixing bowl. Add one tablespoon olive oil and toss until all pasta pieces are evenly coated. Sprinkle salt garlic powder paprika black pepper and Italian seasoning over the pasta. Mix well to ensure even seasoning.

    If using parmesan cheese add it at this stage and toss gently. The cheese will crisp and add extra flavor during air frying.

    Cooking Method
    Preheat the air fryer to three hundred and eighty degrees Fahrenheit. Place the seasoned pasta in the air fryer basket in a single layer. Avoid overcrowding and cook in batches if needed.

    Air fry for twelve to fifteen minutes shaking the basket every four minutes to ensure even cooking. The pasta should turn golden brown and crispy on the outside.

    Checking for Doneness
    The pasta chips are ready when they are firm crunchy and lightly browned. If some pieces are softer return them to the air fryer for two to three additional minutes.

    Cooling and Serving
    Remove the pasta chips from the air fryer and allow them to cool for a few minutes. They will become crispier as they cool. Taste and adjust salt if needed.

    Serve pasta chips on their own or with dipping sauces such as marinara alfredo ranch or garlic yogurt sauce.

    Storage
    Allow the pasta chips to cool completely before storing. Place them in an airtight container at room temperature for up to two days. For best texture enjoy them fresh.

    Tips for Best Results
    Use sturdy short pasta shapes that hold up well to air frying.
    Do not overcook the pasta before air frying.
    Ensure the pasta is well drained and slightly dry before seasoning.
    Cook in batches for even crisping.
    Adjust seasoning to suit your flavor preference.

    Conclusion
    Air fryer pasta chips are a crunchy and flavorful snack made with simple ingredients and clear measurements. This method transforms everyday pasta into a unique and crowd pleasing dish perfect for snacking entertaining or casual gatherings.

  • Air fryer potato chips

    Air fryer potato chips

    Introduction
    Air fryer potato chips are a healthier and homemade alternative to traditional deep fried chips. They are crispy flavorful and easy to prepare using simple ingredients. This method significantly reduces oil while still delivering a satisfying crunch. These chips are perfect as a snack side dish or party appetizer and can be customized with different seasonings to suit your taste.

    Ingredients
    Fresh potatoes such as russet or Yukon gold
    Cooking oil such as olive oil or vegetable oil
    Salt to taste
    Optional seasonings such as paprika garlic powder onion powder or black pepper

    Equipment Needed
    An air fryer
    A sharp knife or mandoline slicer
    A large bowl
    Paper towels

    Preparation
    Wash the potatoes thoroughly to remove any dirt. You may peel them if you prefer or leave the skins on for extra texture and flavor. Slice the potatoes very thin using a sharp knife or mandoline. Thin even slices are essential for achieving crisp chips.

    Place the sliced potatoes in a bowl of cold water and soak them for at least thirty minutes. This step removes excess starch which helps the chips become crispier. After soaking drain the potatoes and pat them completely dry using paper towels. Removing moisture is crucial for proper crisping in the air fryer.

    Seasoning the Potatoes
    Transfer the dried potato slices to a clean bowl. Add a small amount of oil and toss gently to coat each slice evenly. Use just enough oil to lightly coat the potatoes. Sprinkle salt and any optional seasonings over the slices and mix until evenly distributed.

    Cooking Method
    Preheat the air fryer to three hundred and sixty degrees Fahrenheit. Place the potato slices in the air fryer basket in a single layer. Avoid overcrowding as this can cause uneven cooking. You may need to cook the chips in batches depending on the size of your air fryer.

    Cook the potatoes for twelve to fifteen minutes shaking the basket every four to five minutes to ensure even cooking. Keep a close eye during the last few minutes as chips can brown quickly.

    Checking for Doneness
    The chips are done when they are golden brown and crisp to the touch. Some slices may cook faster than others so remove finished chips as needed while allowing thicker slices to continue cooking.

    Cooling and Crisping
    Once cooked transfer the chips to a plate lined with paper towels. As they cool they will continue to crisp slightly. Taste and add more salt if needed while they are still warm.

    Serving Suggestions
    Air fryer potato chips can be served on their own or with dips such as ketchup salsa sour cream or yogurt based dips. They also make a great side for sandwiches burgers or wraps.

    Storage
    Allow the chips to cool completely before storing. Keep them in an airtight container at room temperature for up to two days. For best texture consume them fresh as homemade chips may lose crispness over time.

    Tips for Best Results
    Slice potatoes as evenly and thinly as possible.
    Soak and dry the potatoes thoroughly before cooking.
    Do not overcrowd the air fryer basket.
    Adjust cooking time based on potato thickness and air fryer model.

    Conclusion
    Air fryer potato chips are a simple and delicious snack that combines crunch and flavor with less oil than traditional frying methods. With the right preparation and attention to detail you can achieve crispy golden chips that are perfect for any occasion.

  • Air Fryer Poached

    Air Fryer Poached

    Introduction
    Air fryer poached eggs are a simple and modern way to enjoy perfectly cooked eggs without using a stovetop or simmering water. This method delivers tender whites and soft creamy yolks with minimal effort. It is ideal for breakfast brunch or as a topping for toast salads and grain bowls. The air fryer provides consistent heat which helps the eggs cook evenly while maintaining their delicate texture.

    What Are Poached Eggs
    Poached eggs are eggs cooked gently without their shells in hot water or steam. The goal is to set the egg whites while keeping the yolk soft and runny. Using an air fryer recreates this gentle cooking environment by combining hot circulating air with water placed in a heat safe dish.

    Ingredients
    You will need fresh large eggs clean drinking water and optional salt or black pepper added after cooking. Fresh eggs are important because their whites hold together better during cooking which creates a neater final result.

    Equipment Needed
    An air fryer
    Heat safe ramekins or small oven safe bowls
    A kettle or saucepan to heat water
    A spoon for removing the eggs

    Preparation
    Start by preheating the air fryer to three hundred and fifty degrees Fahrenheit. Preheating ensures even cooking from the moment the eggs are placed inside. While the air fryer heats bring water to a very hot temperature just below boiling. This water will help gently cook the eggs.

    Lightly grease the ramekins with a small amount of oil if desired. This step is optional but can help prevent sticking. Pour hot water into each ramekin filling it about halfway. Carefully crack one egg into each ramekin making sure the yolk stays intact and centered.

    Cooking Method
    Place the ramekins carefully into the air fryer basket. Make sure they sit flat and do not tip over. Cook the eggs for six to eight minutes depending on how soft you want the yolk. Six minutes will give a very runny yolk while eight minutes will produce a slightly firmer center.

    During cooking avoid shaking or opening the air fryer too often as this can disturb the eggs. The circulating air and hot water will gently cook the whites while protecting the yolk from direct heat.

    Checking for Doneness
    Once the cooking time is complete carefully remove one ramekin and check the egg. The whites should be fully set and opaque while the yolk should still feel soft when gently touched with a spoon. If the whites need more time return the ramekins to the air fryer and cook for one additional minute at a time.

    Removing the Eggs
    Use a spoon to gently lift the egg out of the water. Let excess water drain off before serving. If the egg sticks slightly run a spoon around the edges to release it.

    Serving Suggestions
    Air fryer poached eggs are excellent served over toasted bread avocado toast English muffins or sautéed vegetables. They also pair well with breakfast bowls smoked salmon or fresh salads. Season with salt and pepper after cooking to taste.

    Storage and Reheating
    Poached eggs are best enjoyed immediately. However they can be stored in cold water in the refrigerator for up to one day. To reheat place the egg in hot water for about one minute until warmed through. Avoid reheating in the air fryer as this can overcook the yolk.

    Tips for Best Results
    Always use fresh eggs for the best shape and texture.
    Do not overcrowd the air fryer basket.
    Adjust cooking time based on your air fryer model since heat intensity can vary.
    Use heat safe dishes that fit comfortably inside the basket.

    Conclusion
    Air fryer poached eggs are an easy and reliable alternative to traditional poaching methods. They require minimal supervision and deliver consistent results making them perfect for home cooks of all skill levels. This technique is especially useful for preparing multiple eggs at once without the stress of boiling water on the stove.

  • Air Fryer Garlic Toast Pizza Recipe – Quick, Crispy, and Cheesy

    Air Fryer Garlic Toast Pizza Recipe – Quick, Crispy, and Cheesy

    If you’re craving a quick, cheesy, and flavorful snack, this Air Fryer Garlic Toast Pizza recipe is perfect. With crispy garlic bread as the base, melty cheese, and your favorite pizza toppings, this recipe is a game-changer for a fast lunch, dinner, or snack. Using the air fryer makes the toast crispy without using too much oil, giving you the perfect garlic pizza every time.


    Ingredients for Air Fryer Garlic Toast Pizza

    For the Garlic Toast Base

    • 4 slices of bread (white, whole wheat, or sourdough)
    • 2 tablespoons butter, softened
    • 2 cloves garlic, minced
    • ½ teaspoon dried oregano
    • ½ teaspoon dried basil
    • Pinch of salt

    For the Pizza Toppings

    • ½ cup pizza sauce or marinara sauce
    • 1 cup shredded mozzarella cheese
    • ¼ cup grated Parmesan cheese (optional)
    • ½ cup diced vegetables (bell peppers, tomatoes, onions, mushrooms – optional)
    • ¼ cup cooked meat toppings (pepperoni, cooked chicken, ham – optional)
    • Fresh basil or parsley for garnish

    Step-by-Step Instructions for Air Fryer Garlic Toast Pizza

    1. Prepare the garlic butter

    In a small bowl, combine softened butter, minced garlic, dried oregano, dried basil, and a pinch of salt. Mix well until it forms a smooth, fragrant garlic butter.

    2. Spread the garlic butter on bread

    Take your slices of bread and spread the prepared garlic butter evenly on one side of each slice. This will form the flavorful, crispy base of your garlic toast pizza.

    3. Preheat the air fryer

    Preheat your air fryer to 370°F (185°C) for 3–5 minutes. Preheating ensures that your garlic toast comes out crispy and evenly cooked.

    4. Toast the garlic bread

    Place the garlic-buttered bread slices in the air fryer basket, buttered side up. Air fry for 3–5 minutes until the edges are slightly golden and crispy.

    5. Add pizza toppings

    Remove the toasted bread from the air fryer. Spread a thin layer of pizza sauce on each slice. Sprinkle with shredded mozzarella and Parmesan cheese. Add your choice of vegetables and cooked meats evenly on top.

    6. Cook the garlic toast pizza in the air fryer

    Return the topped bread slices to the air fryer. Cook at 370°F (185°C) for 4–6 minutes, or until the cheese is fully melted and bubbly.

    • Check halfway to ensure the edges don’t burn.
    • Cooking times may vary depending on the thickness of the bread and the air fryer model.

    7. Serve and garnish

    Remove the garlic toast pizza from the air fryer. Garnish with fresh basil or parsley. Serve hot as a snack, appetizer, or quick meal.


    Tips for Perfect Air Fryer Garlic Toast Pizza

    • Use thick slices of bread for better structure and to hold toppings without getting soggy.
    • Don’t overload toppings; too many vegetables or meats can make the bread soggy.
    • Customize your pizza: Use different cheeses like cheddar, provolone, or a pizza blend for extra flavor.
    • Optional spice: Add red chili flakes or a drizzle of hot sauce for a spicy twist.
    • Crispier crust: Lightly brush the edges with extra butter before air frying.

    Storage and Reheating

    • Store leftover garlic toast pizza in an airtight container in the refrigerator for up to 1 day.
    • Reheat in the air fryer at 350°F (175°C) for 2–3 minutes to restore crispiness. Avoid microwaving, which can make it soggy.

    Why This Air Fryer Garlic Toast Pizza Recipe Works

    This Air Fryer Garlic Toast Pizza recipe delivers a crispy, buttery base with melty cheese and savory toppings in minutes. Perfect for busy days, lunch, snacks, or parties, it combines the flavors of garlic bread and pizza into one delicious treat.

  • Air Fryer Ham and Cheese and puff

    Air Fryer Ham and Cheese and puff

    If you’re looking for a quick and easy Air Fryer Ham and Cheese Puff Pastry recipe, this guide is perfect. With golden, flaky puff pastry, melty cheese, and savory ham, these bites are perfect for breakfast, brunch, or a party snack. Using an air fryer makes them crispy without deep frying.


    Ingredients for Air Fryer Ham and Cheese Puff Pastry

    • 1 sheet puff pastry (store-bought, thawed if frozen)
    • 4–6 slices of deli ham (your choice: smoked, honey, or black forest ham)
    • 1 cup shredded cheese (cheddar, mozzarella, or a mix)
    • 1 egg, beaten (for egg wash)
    • Optional: Dijon mustard, herbs (like thyme or parsley) for extra flavor

    Step-by-Step Instructions for Air Fryer Ham and Cheese Puff Pastry

    1. Prepare the puff pastry

    If using frozen puff pastry, allow it to thaw completely according to package instructions. Roll out the pastry sheet on a lightly floured surface into a rectangle about ¼ inch thick.

    2. Assemble the ham and cheese

    Place slices of ham evenly over half of the pastry sheet, leaving a small border around the edges. Sprinkle the shredded cheese on top of the ham. If using, spread a thin layer of Dijon mustard for added flavor.

    3. Fold or roll the pastry

    Fold the pastry over the ham and cheese to create a sealed rectangle, or roll it into a log for pinwheel-style bites. Press the edges gently to seal and prevent cheese from oozing out during cooking.

    4. Apply egg wash

    Brush the top of the pastry with beaten egg. This gives the puff pastry a golden, shiny finish. Optionally, sprinkle with sesame seeds, poppy seeds, or herbs for decoration.

    5. Preheat the air fryer

    Preheat your air fryer to 375°F (190°C) for 3–5 minutes. Preheating ensures even cooking and a crispy exterior.

    6. Air fry the puff pastry

    Place the prepared pastry in the air fryer basket. Air fry at 375°F (190°C) for 12–15 minutes, or until golden brown and puffed. Check halfway through and rotate if needed for even browning.

    • Make sure not to overcrowd the basket; cook in batches if necessary.
    • Cooking time may vary slightly depending on the size of the pastry and air fryer model.

    7. Cool and serve

    Remove the puff pastry from the air fryer and let it cool for 2–3 minutes before slicing. Serve warm as a snack, appetizer, or breakfast treat.


    Tips for Perfect Air Fryer Ham and Cheese Puff Pastry

    • Thaw puff pastry fully: Partially frozen pastry may not cook evenly.
    • Seal the edges well: Prevents cheese from leaking out.
    • Don’t overcrowd the air fryer: Ensures crisp, golden pastry.
    • Customize the filling: Add spinach, cooked mushrooms, or different cheeses for variety.
    • Egg wash: Gives a golden, glossy finish that makes it look bakery-ready.

    Storage and Reheating

    • Store leftover pastries in an airtight container in the refrigerator for up to 2 days.
    • Reheat in the air fryer at 350°F (175°C) for 3–5 minutes to restore crispiness.
    • Avoid microwaving, as it can make the puff pastry soggy.

    Why This Air Fryer Ham and Cheese Puff Pastry Recipe Works

    This recipe produces crispy, golden puff pastry with melty cheese and savory ham inside, perfect for a quick snack or breakfast. It’s easy, fast, and requires minimal cleanup thanks to the air fryer.

  • Chicken Noodle Soup Recipe – Comforting, Homemade, and Delicious

    Chicken Noodle Soup Recipe – Comforting, Homemade, and Delicious

    Nothing says comfort like homemade chicken noodle soup. This recipe yields a rich, flavorful broth filled with tender chicken, soft noodles, and fresh vegetables. Perfect for lunch, dinner, or when you’re feeling under the weather.


    Ingredients for Chicken Noodle Soup

    For the Soup Base

    • 1 whole chicken breast or 2–3 bone-in chicken thighs (about 1–1.5 pounds)
    • 8 cups (2 liters) chicken broth (homemade or store-bought)
    • 1 medium onion, chopped
    • 3 cloves garlic, minced
    • 2 medium carrots, peeled and sliced
    • 2 celery stalks, sliced
    • 1 bay leaf
    • 1 teaspoon dried thyme
    • 1 teaspoon dried parsley (or 2 tablespoons fresh parsley)
    • Salt and black pepper, to taste
    • 1 tablespoon olive oil

    For the Noodles

    • 2 cups egg noodles or your favorite pasta
    • Optional: additional parsley for garnish

    Step-by-Step Instructions for Chicken Noodle Soup

    1. Prepare the chicken

    If using raw chicken, rinse and pat dry. Season lightly with salt and pepper. For extra flavor, you can sauté the chicken in olive oil for 3–4 minutes per side until lightly browned.

    2. Sauté the aromatics

    In a large pot, heat 1 tablespoon olive oil over medium heat. Add onion, garlic, carrots, and celery. Sauté for 3–5 minutes until softened and fragrant. This builds a flavorful base for your soup.

    3. Add broth and chicken

    Pour in the chicken broth and add the chicken. Stir in bay leaf, thyme, and parsley. Bring the soup to a gentle boil, then reduce the heat to low. Cover and simmer for 20–25 minutes, or until the chicken is fully cooked.

    4. Remove and shred the chicken

    Remove the chicken from the soup and let it cool slightly. Shred the meat using two forks and discard any bones if using bone-in chicken. Return the shredded chicken to the pot.

    5. Cook the noodles

    Add the egg noodles to the soup and simmer for 6–8 minutes (or according to package instructions) until tender. Stir occasionally to prevent sticking.

    6. Season the soup

    Taste and adjust salt, pepper, and herbs as needed. For extra freshness, add a sprinkle of chopped parsley before serving.

    7. Serve

    Ladle the chicken noodle soup into bowls while hot. Serve with crusty bread or crackers for a comforting meal.


    Tips for Perfect Chicken Noodle Soup

    • Use homemade broth for maximum flavor, or enhance store-bought broth with sautéed vegetables.
    • Don’t overcook noodles: Add them toward the end so they stay tender.
    • Shred chicken carefully: Larger chunks give texture; smaller bits distribute throughout the soup.
    • Customize vegetables: Add peas, corn, or mushrooms for extra nutrition and flavor.
    • Optional seasoning: A squeeze of lemon juice or a pinch of crushed red pepper adds brightness.

    Storage and Reheating

    • Store leftover soup in an airtight container in the refrigerator for 2–3 days.
    • Reheat gently on the stove over medium heat. Avoid boiling for too long to prevent the noodles from becoming mushy.
    • Soup can also be frozen for up to 2 months; add noodles fresh when reheating.

    Why This Chicken Noodle Soup Recipe Works

    This homemade chicken noodle soup combines a rich, aromatic broth with tender chicken, fresh vegetables, and perfectly cooked noodles. It’s comforting, healthy, and easy to make, making it a classic favorite for families and meal prep.

  • Cloud Cake Recipe – Fluffy, Light, and Soft Dessert

    Cloud Cake Recipe – Fluffy, Light, and Soft Dessert

    If you’re looking for a light, airy, and melt-in-your-mouth cake, this Cloud Cake recipe is perfect. Known for its soft, spongy texture, this cake is sometimes called a “Japanese cloud cake” or “fluffy chiffon cake.” It’s easy to make and perfect for birthdays, celebrations, or a simple dessert treat.


    Ingredients for Cloud Cake

    Dry Ingredients

    • 1 cup (120 g) all-purpose flour
    • ½ cup (100 g) granulated sugar, divided
    • ½ teaspoon baking powder
    • ¼ teaspoon salt

    Wet Ingredients

    • 4 large eggs, separated
    • ¼ cup (60 ml) milk
    • ¼ cup (60 ml) vegetable oil or melted butter
    • 1 teaspoon vanilla extract
    • ¼ teaspoon cream of tartar (optional, for stabilizing egg whites)

    Optional Toppings

    • Powdered sugar for dusting
    • Fresh berries or fruit
    • Whipped cream

    Step-by-Step Instructions for Cloud Cake

    1. Preheat the oven

    Preheat your oven to 325°F (160°C). Grease a 7–8 inch round cake pan and line the bottom with parchment paper. Lightly flour the sides, or use an ungreased pan for better rise.

    2. Prepare the dry ingredients

    In a medium bowl, sift together the flour, baking powder, and salt. Sifting ensures the cake is light and airy without lumps.

    3. Separate the eggs

    Separate the egg yolks from the whites into two clean bowls. Make sure no yolk gets into the whites, as this can prevent them from whipping properly.

    4. Mix wet ingredients with yolks

    In a bowl with the egg yolks, add milk, oil, and vanilla extract. Whisk until smooth and well combined. Gradually fold in the sifted dry ingredients to form a smooth batter.

    5. Whip the egg whites

    In a clean, grease-free bowl, beat the egg whites with cream of tartar until soft peaks form. Gradually add ¼ cup sugar while continuing to beat until stiff peaks form. The egg whites should be glossy and hold their shape.

    6. Fold egg whites into batter

    Gently fold one-third of the egg whites into the yolk batter to lighten it. Then fold in the remaining whites carefully in two additions. Use a spatula and fold from bottom to top to preserve the airiness. Do not overmix.

    7. Bake the cloud cake

    Pour the batter into the prepared pan and smooth the top. Bake at 325°F (160°C) for 35–45 minutes, or until a toothpick inserted into the center comes out clean. The cake should be golden on top and springy to the touch.

    8. Cool the cake

    Remove the cake from the oven and let it cool in the pan for 10–15 minutes. Then transfer to a wire rack to cool completely. This prevents condensation from making the cake soggy.

    9. Serve

    Dust with powdered sugar, top with fresh berries, or serve with whipped cream. Slice carefully, as the cake is very soft and fluffy.


    Tips for Perfect Cloud Cake

    • Separate eggs carefully: Even a small amount of yolk can prevent whites from whipping properly.
    • Fold gently: Maintain the airiness for a light texture.
    • Use room temperature eggs: They whip more easily and give better volume.
    • Avoid overbaking: Cloud cakes are delicate; overbaking dries them out.
    • Optional flavor variations: Add lemon zest, cocoa powder, or almond extract for different flavors.

    Storage and Reheating

    • Store in an airtight container at room temperature for up to 2 days.
    • Do not refrigerate, as the cake may dry out.
    • Serve fresh for the best texture and fluffiness.

    Why This Cloud Cake Recipe Works

    This Cloud Cake recipe is light, soft, and airy thanks to whipped egg whites and gentle folding techniques. It’s easy enough for beginners yet impressive enough for special occasions. Perfect for anyone craving a fluffy, melt-in-your-mouth cake

  • Air Fryer Turkish Bread Recipe – Soft, Fluffy, and Delicious

    Air Fryer Turkish Bread Recipe – Soft, Fluffy, and Delicious

    If you’re looking for the best Air Fryer Turkish Bread recipe, you’re in the right place. This recipe yields soft, fluffy, and golden Turkish bread that’s perfect for sandwiches, dipping in hummus, or serving alongside your favorite Middle Eastern dishes. Using an air fryer makes it quick, easy, and perfectly baked without turning on a full oven.


    Ingredients for Air Fryer Turkish Bread

    • 3 cups (360 g) all-purpose flour
    • 1 teaspoon salt
    • 1 tablespoon sugar
    • 1 tablespoon instant yeast
    • 1 cup (240 ml) warm water (around 110°F / 43°C)
    • 2 tablespoons olive oil (plus extra for brushing)
    • Optional toppings: sesame seeds, nigella seeds, or za’atar

    Step-by-Step Instructions for Air Fryer Turkish Bread

    1. Prepare the yeast mixture

    In a small bowl, combine warm water, sugar, and instant yeast. Stir gently and let it sit for 5–10 minutes until frothy. This ensures your yeast is active and ready to make the bread rise.

    2. Make the dough

    In a large mixing bowl, combine the flour and salt. Gradually add the yeast mixture and 2 tablespoons olive oil. Mix until a soft dough forms.

    3. Knead the dough

    Turn the dough onto a floured surface and knead for 8–10 minutes until smooth and elastic. Alternatively, use a stand mixer with a dough hook for 5–7 minutes. Proper kneading helps develop gluten, giving the bread its signature soft texture.

    4. First rise

    Place the dough in a lightly oiled bowl and cover with a damp cloth or plastic wrap. Let it rise in a warm place for 1–1.5 hours, or until it doubles in size.

    5. Shape the bread

    After the first rise, punch down the dough gently to release air. Divide it into 2–3 portions depending on your air fryer size. Shape each portion into a flat oval or round shape, about ½ inch thick.

    6. Second rise

    Place the shaped dough on parchment paper and cover lightly. Let it rise for another 15–20 minutes while you preheat the air fryer.

    7. Preheat the air fryer

    Preheat your air fryer to 360°F (180°C) for 3–5 minutes. Preheating ensures even cooking and a golden crust.

    8. Prepare for baking

    Brush the top of each dough portion with olive oil. Sprinkle optional toppings like sesame seeds, nigella seeds, or za’atar for authentic Turkish flavor.

    9. Air fry the Turkish bread

    Carefully place one or two pieces of dough (depending on your air fryer size) in the basket. Air fry at 360°F (180°C) for 10–12 minutes, or until the bread is golden brown and cooked through.

    • Check the bread halfway and rotate if necessary for even browning.
    • Avoid overcrowding to ensure proper airflow and a soft, fluffy interior.

    10. Cool and serve

    Remove the Turkish bread from the air fryer and let it cool slightly on a wire rack. Serve warm with dips like hummus, tzatziki, or use for sandwiches.


    Tips for Perfect Air Fryer Turkish Bread

    • Warm water for yeast: Ensure the water is not too hot, as it can kill the yeast.
    • Kneading is key: Knead well for a soft, elastic dough.
    • Do not overcrowd the air fryer: Cook in batches for the best results.
    • Use parchment paper: Prevents sticking and makes handling easier.
    • Optional toppings: Sesame, nigella, or za’atar add authentic flavor and texture.

    Storage and Reheating

    • Store cooled bread in an airtight container at room temperature for up to 2 days.
    • Reheat in the air fryer at 350°F (175°C) for 3–5 minutes to restore softness and warmth.

    Why This Air Fryer Turkish Bread Recipe is Delicious

    This Air Fryer Turkish Bread recipe produces bread that is soft, fluffy, and golden brown, with a tender interior and slightly crisp exterior. It’s easy, quick, and perfect for anyone who wants authentic Turkish bread without baking a full loaf in the oven.

  • Potato Pancakes Recipe – Crispy and Delicious Homemade Latkes

    Potato Pancakes Recipe – Crispy and Delicious Homemade Latkes

    If you’re looking for the best potato pancakes recipe, this guide will show you how to make crispy, golden, and flavorful potato pancakes right at home. Perfect for breakfast, brunch, or a side dish, these homemade latkes are easy to make with simple ingredients.


    Ingredients for Potato Pancakes

    • 4 large potatoes (Russet or Yukon Gold work best)
    • 1 small onion, grated or finely chopped
    • 2 large eggs
    • ¼ cup all-purpose flour (or potato starch for gluten-free version)
    • 1 teaspoon salt
    • ½ teaspoon black pepper
    • ½ teaspoon garlic powder (optional, for extra flavor)
    • Oil for frying (vegetable, canola, or sunflower oil works best)

    Optional Garnishes

    • Sour cream or Greek yogurt
    • Applesauce
    • Chopped chives or parsley

    Step-by-Step Instructions to Make Potato Pancakes

    1. Prepare the potatoes

    Peel the potatoes and grate them using a box grater or food processor. Place the grated potatoes in a clean kitchen towel or cheesecloth and squeeze out as much moisture as possible. Removing excess water is key to crispy potato pancakes.

    2. Grate the onion

    Grate or finely chop the onion. Combine the onion with the drained grated potatoes in a large mixing bowl. The onion adds flavor and moisture to the pancakes.

    3. Make the potato pancake batter

    Add the eggs, flour, salt, black pepper, and optional garlic powder to the potato and onion mixture. Mix thoroughly until the batter comes together. The mixture should hold together when scooped; if too wet, add a little extra flour.

    4. Heat the oil

    Pour enough oil into a large skillet to cover the bottom by about ¼ inch. Heat over medium-high heat until shimmering. To test if the oil is ready, drop a small amount of batter into the pan; it should sizzle immediately.

    5. Fry the potato pancakes

    Scoop about ¼ cup of the batter for each pancake and carefully place it in the hot oil. Flatten slightly with a spatula. Fry for 3–5 minutes per side, or until golden brown and crispy. Adjust the heat as needed to prevent burning.

    6. Drain and keep warm

    Remove the cooked potato pancakes from the skillet and place them on a plate lined with paper towels to drain excess oil. Keep warm in a low oven (200°F / 90°C) while frying the remaining pancakes.

    7. Serve

    Serve the potato pancakes hot, garnished with sour cream, applesauce, or fresh herbs. They are perfect as a breakfast, brunch, or side dish.


    Tips for Perfect Potato Pancakes

    • Remove excess moisture: Squeezing the potatoes is essential for crispy pancakes.
    • Uniform size: Make pancakes roughly the same size to ensure even cooking.
    • Use a non-stick or well-seasoned skillet: Prevents sticking and makes flipping easier.
    • Don’t overcrowd the pan: Fry in batches for the best crispiness.
    • Optional flavor variations: Add grated carrot, zucchini, or fresh herbs to the batter for a twist.

    Storing and Reheating

    • Store leftover potato pancakes in an airtight container in the refrigerator for up to 2 days.
    • Reheat in a skillet over medium heat or in an air fryer at 350°F (175°C) for 3–5 minutes to restore crispiness. Avoid microwaving, as it can make them soggy.

    Why This Potato Pancakes Recipe Works

    This recipe produces crispy, golden potato pancakes with a tender interior every time. With simple ingredients and step-by-step instructions, even beginners can make perfect latkes at home.

    Keywords optimized: potato pancakes recipe, homemade latkes, crispy potato pancakes, easy potato pancakes, best potato pancakes, potato fritters.