Category: Uncategorized

  • Chicken Noodle Soup Recipe – Comforting, Homemade, and Delicious

    Chicken Noodle Soup Recipe – Comforting, Homemade, and Delicious

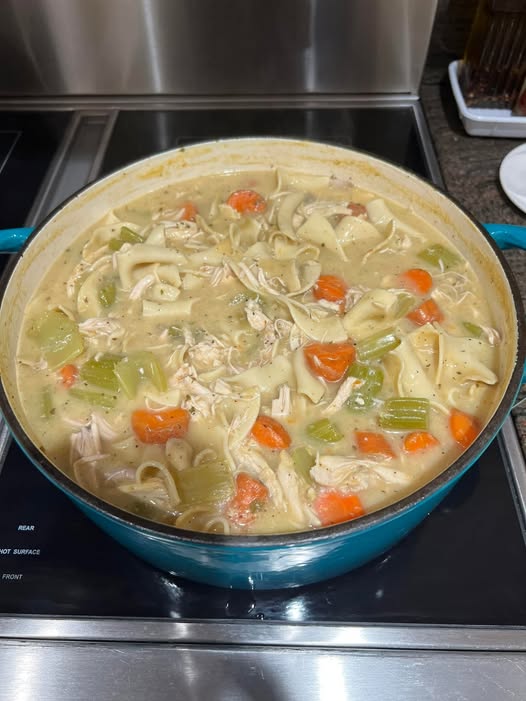
    Nothing says comfort like homemade chicken noodle soup. This recipe yields a rich, flavorful broth filled with tender chicken, soft noodles, and fresh vegetables. Perfect for lunch, dinner, or when you’re feeling under the weather.


    Ingredients for Chicken Noodle Soup

    For the Soup Base

    • 1 whole chicken breast or 2–3 bone-in chicken thighs (about 1–1.5 pounds)
    • 8 cups (2 liters) chicken broth (homemade or store-bought)
    • 1 medium onion, chopped
    • 3 cloves garlic, minced
    • 2 medium carrots, peeled and sliced
    • 2 celery stalks, sliced
    • 1 bay leaf
    • 1 teaspoon dried thyme
    • 1 teaspoon dried parsley (or 2 tablespoons fresh parsley)
    • Salt and black pepper, to taste
    • 1 tablespoon olive oil

    For the Noodles

    • 2 cups egg noodles or your favorite pasta
    • Optional: additional parsley for garnish

    Step-by-Step Instructions for Chicken Noodle Soup

    1. Prepare the chicken

    If using raw chicken, rinse and pat dry. Season lightly with salt and pepper. For extra flavor, you can sauté the chicken in olive oil for 3–4 minutes per side until lightly browned.

    2. Sauté the aromatics

    In a large pot, heat 1 tablespoon olive oil over medium heat. Add onion, garlic, carrots, and celery. Sauté for 3–5 minutes until softened and fragrant. This builds a flavorful base for your soup.

    3. Add broth and chicken

    Pour in the chicken broth and add the chicken. Stir in bay leaf, thyme, and parsley. Bring the soup to a gentle boil, then reduce the heat to low. Cover and simmer for 20–25 minutes, or until the chicken is fully cooked.

    4. Remove and shred the chicken

    Remove the chicken from the soup and let it cool slightly. Shred the meat using two forks and discard any bones if using bone-in chicken. Return the shredded chicken to the pot.

    5. Cook the noodles

    Add the egg noodles to the soup and simmer for 6–8 minutes (or according to package instructions) until tender. Stir occasionally to prevent sticking.

    6. Season the soup

    Taste and adjust salt, pepper, and herbs as needed. For extra freshness, add a sprinkle of chopped parsley before serving.

    7. Serve

    Ladle the chicken noodle soup into bowls while hot. Serve with crusty bread or crackers for a comforting meal.


    Tips for Perfect Chicken Noodle Soup

    • Use homemade broth for maximum flavor, or enhance store-bought broth with sautéed vegetables.
    • Don’t overcook noodles: Add them toward the end so they stay tender.
    • Shred chicken carefully: Larger chunks give texture; smaller bits distribute throughout the soup.
    • Customize vegetables: Add peas, corn, or mushrooms for extra nutrition and flavor.
    • Optional seasoning: A squeeze of lemon juice or a pinch of crushed red pepper adds brightness.

    Storage and Reheating

    • Store leftover soup in an airtight container in the refrigerator for 2–3 days.
    • Reheat gently on the stove over medium heat. Avoid boiling for too long to prevent the noodles from becoming mushy.
    • Soup can also be frozen for up to 2 months; add noodles fresh when reheating.

    Why This Chicken Noodle Soup Recipe Works

    This homemade chicken noodle soup combines a rich, aromatic broth with tender chicken, fresh vegetables, and perfectly cooked noodles. It’s comforting, healthy, and easy to make, making it a classic favorite for families and meal prep.

  • Cloud Cake Recipe – Fluffy, Light, and Soft Dessert

    Cloud Cake Recipe – Fluffy, Light, and Soft Dessert

    If you’re looking for a light, airy, and melt-in-your-mouth cake, this Cloud Cake recipe is perfect. Known for its soft, spongy texture, this cake is sometimes called a “Japanese cloud cake” or “fluffy chiffon cake.” It’s easy to make and perfect for birthdays, celebrations, or a simple dessert treat.


    Ingredients for Cloud Cake

    Dry Ingredients

    • 1 cup (120 g) all-purpose flour
    • ½ cup (100 g) granulated sugar, divided
    • ½ teaspoon baking powder
    • ¼ teaspoon salt

    Wet Ingredients

    • 4 large eggs, separated
    • ¼ cup (60 ml) milk
    • ¼ cup (60 ml) vegetable oil or melted butter
    • 1 teaspoon vanilla extract
    • ¼ teaspoon cream of tartar (optional, for stabilizing egg whites)

    Optional Toppings

    • Powdered sugar for dusting
    • Fresh berries or fruit
    • Whipped cream

    Step-by-Step Instructions for Cloud Cake

    1. Preheat the oven

    Preheat your oven to 325°F (160°C). Grease a 7–8 inch round cake pan and line the bottom with parchment paper. Lightly flour the sides, or use an ungreased pan for better rise.

    2. Prepare the dry ingredients

    In a medium bowl, sift together the flour, baking powder, and salt. Sifting ensures the cake is light and airy without lumps.

    3. Separate the eggs

    Separate the egg yolks from the whites into two clean bowls. Make sure no yolk gets into the whites, as this can prevent them from whipping properly.

    4. Mix wet ingredients with yolks

    In a bowl with the egg yolks, add milk, oil, and vanilla extract. Whisk until smooth and well combined. Gradually fold in the sifted dry ingredients to form a smooth batter.

    5. Whip the egg whites

    In a clean, grease-free bowl, beat the egg whites with cream of tartar until soft peaks form. Gradually add ¼ cup sugar while continuing to beat until stiff peaks form. The egg whites should be glossy and hold their shape.

    6. Fold egg whites into batter

    Gently fold one-third of the egg whites into the yolk batter to lighten it. Then fold in the remaining whites carefully in two additions. Use a spatula and fold from bottom to top to preserve the airiness. Do not overmix.

    7. Bake the cloud cake

    Pour the batter into the prepared pan and smooth the top. Bake at 325°F (160°C) for 35–45 minutes, or until a toothpick inserted into the center comes out clean. The cake should be golden on top and springy to the touch.

    8. Cool the cake

    Remove the cake from the oven and let it cool in the pan for 10–15 minutes. Then transfer to a wire rack to cool completely. This prevents condensation from making the cake soggy.

    9. Serve

    Dust with powdered sugar, top with fresh berries, or serve with whipped cream. Slice carefully, as the cake is very soft and fluffy.


    Tips for Perfect Cloud Cake

    • Separate eggs carefully: Even a small amount of yolk can prevent whites from whipping properly.
    • Fold gently: Maintain the airiness for a light texture.
    • Use room temperature eggs: They whip more easily and give better volume.
    • Avoid overbaking: Cloud cakes are delicate; overbaking dries them out.
    • Optional flavor variations: Add lemon zest, cocoa powder, or almond extract for different flavors.

    Storage and Reheating

    • Store in an airtight container at room temperature for up to 2 days.
    • Do not refrigerate, as the cake may dry out.
    • Serve fresh for the best texture and fluffiness.

    Why This Cloud Cake Recipe Works

    This Cloud Cake recipe is light, soft, and airy thanks to whipped egg whites and gentle folding techniques. It’s easy enough for beginners yet impressive enough for special occasions. Perfect for anyone craving a fluffy, melt-in-your-mouth cake

  • Air Fryer Turkish Bread Recipe – Soft, Fluffy, and Delicious

    Air Fryer Turkish Bread Recipe – Soft, Fluffy, and Delicious

    If you’re looking for the best Air Fryer Turkish Bread recipe, you’re in the right place. This recipe yields soft, fluffy, and golden Turkish bread that’s perfect for sandwiches, dipping in hummus, or serving alongside your favorite Middle Eastern dishes. Using an air fryer makes it quick, easy, and perfectly baked without turning on a full oven.


    Ingredients for Air Fryer Turkish Bread

    • 3 cups (360 g) all-purpose flour
    • 1 teaspoon salt
    • 1 tablespoon sugar
    • 1 tablespoon instant yeast
    • 1 cup (240 ml) warm water (around 110°F / 43°C)
    • 2 tablespoons olive oil (plus extra for brushing)
    • Optional toppings: sesame seeds, nigella seeds, or za’atar

    Step-by-Step Instructions for Air Fryer Turkish Bread

    1. Prepare the yeast mixture

    In a small bowl, combine warm water, sugar, and instant yeast. Stir gently and let it sit for 5–10 minutes until frothy. This ensures your yeast is active and ready to make the bread rise.

    2. Make the dough

    In a large mixing bowl, combine the flour and salt. Gradually add the yeast mixture and 2 tablespoons olive oil. Mix until a soft dough forms.

    3. Knead the dough

    Turn the dough onto a floured surface and knead for 8–10 minutes until smooth and elastic. Alternatively, use a stand mixer with a dough hook for 5–7 minutes. Proper kneading helps develop gluten, giving the bread its signature soft texture.

    4. First rise

    Place the dough in a lightly oiled bowl and cover with a damp cloth or plastic wrap. Let it rise in a warm place for 1–1.5 hours, or until it doubles in size.

    5. Shape the bread

    After the first rise, punch down the dough gently to release air. Divide it into 2–3 portions depending on your air fryer size. Shape each portion into a flat oval or round shape, about ½ inch thick.

    6. Second rise

    Place the shaped dough on parchment paper and cover lightly. Let it rise for another 15–20 minutes while you preheat the air fryer.

    7. Preheat the air fryer

    Preheat your air fryer to 360°F (180°C) for 3–5 minutes. Preheating ensures even cooking and a golden crust.

    8. Prepare for baking

    Brush the top of each dough portion with olive oil. Sprinkle optional toppings like sesame seeds, nigella seeds, or za’atar for authentic Turkish flavor.

    9. Air fry the Turkish bread

    Carefully place one or two pieces of dough (depending on your air fryer size) in the basket. Air fry at 360°F (180°C) for 10–12 minutes, or until the bread is golden brown and cooked through.

    • Check the bread halfway and rotate if necessary for even browning.
    • Avoid overcrowding to ensure proper airflow and a soft, fluffy interior.

    10. Cool and serve

    Remove the Turkish bread from the air fryer and let it cool slightly on a wire rack. Serve warm with dips like hummus, tzatziki, or use for sandwiches.


    Tips for Perfect Air Fryer Turkish Bread

    • Warm water for yeast: Ensure the water is not too hot, as it can kill the yeast.
    • Kneading is key: Knead well for a soft, elastic dough.
    • Do not overcrowd the air fryer: Cook in batches for the best results.
    • Use parchment paper: Prevents sticking and makes handling easier.
    • Optional toppings: Sesame, nigella, or za’atar add authentic flavor and texture.

    Storage and Reheating

    • Store cooled bread in an airtight container at room temperature for up to 2 days.
    • Reheat in the air fryer at 350°F (175°C) for 3–5 minutes to restore softness and warmth.

    Why This Air Fryer Turkish Bread Recipe is Delicious

    This Air Fryer Turkish Bread recipe produces bread that is soft, fluffy, and golden brown, with a tender interior and slightly crisp exterior. It’s easy, quick, and perfect for anyone who wants authentic Turkish bread without baking a full loaf in the oven.

  • Potato Pancakes Recipe – Crispy and Delicious Homemade Latkes

    Potato Pancakes Recipe – Crispy and Delicious Homemade Latkes

    If you’re looking for the best potato pancakes recipe, this guide will show you how to make crispy, golden, and flavorful potato pancakes right at home. Perfect for breakfast, brunch, or a side dish, these homemade latkes are easy to make with simple ingredients.


    Ingredients for Potato Pancakes

    • 4 large potatoes (Russet or Yukon Gold work best)
    • 1 small onion, grated or finely chopped
    • 2 large eggs
    • ¼ cup all-purpose flour (or potato starch for gluten-free version)
    • 1 teaspoon salt
    • ½ teaspoon black pepper
    • ½ teaspoon garlic powder (optional, for extra flavor)
    • Oil for frying (vegetable, canola, or sunflower oil works best)

    Optional Garnishes

    • Sour cream or Greek yogurt
    • Applesauce
    • Chopped chives or parsley

    Step-by-Step Instructions to Make Potato Pancakes

    1. Prepare the potatoes

    Peel the potatoes and grate them using a box grater or food processor. Place the grated potatoes in a clean kitchen towel or cheesecloth and squeeze out as much moisture as possible. Removing excess water is key to crispy potato pancakes.

    2. Grate the onion

    Grate or finely chop the onion. Combine the onion with the drained grated potatoes in a large mixing bowl. The onion adds flavor and moisture to the pancakes.

    3. Make the potato pancake batter

    Add the eggs, flour, salt, black pepper, and optional garlic powder to the potato and onion mixture. Mix thoroughly until the batter comes together. The mixture should hold together when scooped; if too wet, add a little extra flour.

    4. Heat the oil

    Pour enough oil into a large skillet to cover the bottom by about ¼ inch. Heat over medium-high heat until shimmering. To test if the oil is ready, drop a small amount of batter into the pan; it should sizzle immediately.

    5. Fry the potato pancakes

    Scoop about ¼ cup of the batter for each pancake and carefully place it in the hot oil. Flatten slightly with a spatula. Fry for 3–5 minutes per side, or until golden brown and crispy. Adjust the heat as needed to prevent burning.

    6. Drain and keep warm

    Remove the cooked potato pancakes from the skillet and place them on a plate lined with paper towels to drain excess oil. Keep warm in a low oven (200°F / 90°C) while frying the remaining pancakes.

    7. Serve

    Serve the potato pancakes hot, garnished with sour cream, applesauce, or fresh herbs. They are perfect as a breakfast, brunch, or side dish.


    Tips for Perfect Potato Pancakes

    • Remove excess moisture: Squeezing the potatoes is essential for crispy pancakes.
    • Uniform size: Make pancakes roughly the same size to ensure even cooking.
    • Use a non-stick or well-seasoned skillet: Prevents sticking and makes flipping easier.
    • Don’t overcrowd the pan: Fry in batches for the best crispiness.
    • Optional flavor variations: Add grated carrot, zucchini, or fresh herbs to the batter for a twist.

    Storing and Reheating

    • Store leftover potato pancakes in an airtight container in the refrigerator for up to 2 days.
    • Reheat in a skillet over medium heat or in an air fryer at 350°F (175°C) for 3–5 minutes to restore crispiness. Avoid microwaving, as it can make them soggy.

    Why This Potato Pancakes Recipe Works

    This recipe produces crispy, golden potato pancakes with a tender interior every time. With simple ingredients and step-by-step instructions, even beginners can make perfect latkes at home.

    Keywords optimized: potato pancakes recipe, homemade latkes, crispy potato pancakes, easy potato pancakes, best potato pancakes, potato fritters.

  • Air Fryer Roasted Potatoes Recipe

    Air Fryer Roasted Potatoes Recipe

    Air fryer toasted potatoes are crispy on the outside, tender on the inside, and perfectly seasoned. They’re ideal as a side dish, snack, or breakfast addition. Using an air fryer reduces oil while still giving them that golden, crunchy texture.


    Ingredients

    • 1 pound (450 g) potatoes (russet, Yukon gold, or red potatoes work best)
    • 1–2 tablespoons olive oil or melted butter
    • 1 teaspoon garlic powder
    • 1 teaspoon onion powder
    • 1 teaspoon paprika
    • ½ teaspoon dried rosemary or thyme (optional)
    • Salt and black pepper, to taste
    • Optional garnish: chopped parsley, chives, or grated Parmesan cheese

    Instructions

    1. Prepare the potatoes

    Wash the potatoes thoroughly. Peel them if you prefer, though leaving the skin on adds extra texture and flavor. Cut the potatoes into evenly sized cubes or wedges, about 1-inch pieces, so they cook evenly.

    2. Preheat the air fryer

    Preheat your air fryer to 400°F (200°C) for 3–5 minutes. Preheating helps the potatoes cook evenly and get crispy.

    3. Season the potatoes

    In a large mixing bowl, toss the potato pieces with olive oil, garlic powder, onion powder, paprika, dried herbs (if using), salt, and black pepper. Make sure all pieces are evenly coated with oil and seasoning.

    4. Arrange in the air fryer

    Place the potatoes in the air fryer basket in a single layer, leaving space between the pieces for proper air circulation. Overcrowding will prevent them from getting crispy. Cook in batches if necessary.

    5. Air fry the potatoes

    Cook the potatoes at 400°F (200°C) for 15–20 minutes. Shake the basket or toss the potatoes halfway through cooking to ensure even browning.

    • For extra crispiness, you can spray a light coating of oil on top halfway through cooking.
    • Cooking times may vary slightly depending on the size of the potato pieces and the model of your air fryer.

    6. Check for doneness

    Potatoes are done when they are golden brown, crispy on the outside, and tender on the inside. Test a piece with a fork to ensure it’s soft inside.

    7. Serve

    Transfer the toasted potatoes to a serving plate. Garnish with fresh parsley, chives, or a sprinkle of Parmesan cheese if desired. Serve immediately as a side dish with breakfast, lunch, or dinner.


    Tips for Perfect Air Fryer Toasted Potatoes

    • Cut potatoes into uniform pieces to ensure even cooking.
    • Use a light coating of oil for crispiness without greasiness.
    • Shake or toss the basket halfway through cooking to prevent sticking.
    • Season after cooking if you want extra flavor or a fresh garnish.

    Storage and Reheating

    • Store leftovers in an airtight container in the refrigerator for up to 2 days.
    • Reheat in the air fryer at 375°F (190°C) for 4–6 minutes to restore crispiness. Avoid microwaving, which can make them soggy.
  • Cheese Scones Recipe – Easy, Fluffy, and Cheesy Scones

    Cheese Scones Recipe – Easy, Fluffy, and Cheesy Scones

    If you’re looking for the best cheese scones recipe, you’ve come to the right place. These fluffy, savory scones are loaded with cheddar cheese, lightly seasoned, and perfect for breakfast, brunch, or as a snack. They’re quick to make and baked to golden perfection.


    Ingredients for Cheese Scones

    Dry Ingredients

    • 2 cups (250 g) all-purpose flour
    • 1 tablespoon baking powder
    • ½ teaspoon baking soda
    • ½ teaspoon salt
    • ½ teaspoon black pepper
    • ½ teaspoon mustard powder (optional, enhances flavor)

    Cheese

    • 1½ cups (150 g) sharp cheddar cheese, grated
    • Optional: ¼ cup Parmesan or Gruyère cheese for extra flavor

    Wet Ingredients

    • ¾ cup (180 ml) buttermilk
    • 2 tablespoons unsalted butter, melted
    • 1 large egg

    Topping

    • 1 egg, beaten, for brushing
    • Extra grated cheese for garnish (optional)

    Step-by-Step Instructions to Make Cheese Scones

    1. Preheat the Oven

    Set your oven to 425°F (220°C). Line a baking sheet with parchment paper or lightly grease it to prevent sticking. Preheating ensures your scones bake evenly and become golden brown.

    2. Prepare the Dry Ingredients

    In a large mixing bowl, whisk together flour, baking powder, baking soda, salt, black pepper, and mustard powder. This ensures your cheese scones rise evenly and have a light, fluffy texture.

    3. Add the Cheese

    Stir in the grated cheddar (and optional Parmesan) until the cheese is coated in flour. Coating the cheese helps prevent it from sinking during baking and ensures even distribution throughout your scones.

    4. Mix the Wet Ingredients

    In a separate bowl, whisk together buttermilk, melted butter, and egg until smooth. Buttermilk adds tenderness and a subtle tang to the scones.

    5. Combine Wet and Dry Ingredients

    Make a well in the dry mixture and pour in the wet ingredients. Gently fold with a spatula or wooden spoon until just combined. The dough should be slightly sticky; overmixing can make your scones dense.

    6. Shape the Scones

    Turn the dough onto a lightly floured surface. Pat it into a round shape about 1 inch thick. Use a knife or biscuit cutter to cut into 8 wedges or rounds.

    7. Add Topping

    Place the scones on the baking sheet with space in between. Brush the tops with beaten egg for a golden finish and sprinkle extra cheese if desired.

    8. Bake the Cheese Scones

    Bake at 425°F (220°C) for 15–20 minutes, or until golden brown and cooked through. Scones should sound hollow when tapped lightly on the bottom.

    9. Cool and Serve

    Allow the cheese scones to cool for 5 minutes on a wire rack. Serve warm with butter, soups, or salads for a delicious snack or brunch treat.


    Tips for Making Perfect Cheese Scones

    • Use cold butter: This helps create flaky, tender scones.
    • Don’t overmix: Handle the dough gently to avoid dense scones.
    • Cheese selection matters: Sharp cheddar gives the best flavor, but you can mix cheeses for variety.
    • Serve fresh: Cheese scones are best enjoyed warm; they may dry out if stored too long.

    Storing and Reheating Cheese Scones

    • Store in an airtight container at room temperature for up to 2 days.
    • Reheat in the oven at 350°F (175°C) for 5–7 minutes to restore freshness and crispness. Avoid microwaving to keep the scones flaky.

    Why This Recipe is the Best Cheese Scones Recipe

    This cheese scones recipe is simple, reliable, and yields scones that are soft, cheesy, and golden brown every time. With minimal ingredients and easy steps, it’s perfect for beginners and seasoned bakers alike.

  • Air Fryer Crab Shack Style Crab Cakes

    Air Fryer Crab Shack Style Crab Cakes

    These crab cakes are inspired by the classic Crab Shack style: light, flaky, and packed with crab flavor, with a crispy exterior from the air fryer instead of deep frying. Perfect as an appetizer or main course.


    Ingredients

    Crab Cakes

    • 1 pound lump crab meat, picked over for shells
    • ½ cup mayonnaise
    • 1 large egg
    • 1 tablespoon Dijon mustard
    • 1 teaspoon Worcestershire sauce
    • 1 teaspoon Old Bay seasoning (or seafood seasoning)
    • ½ teaspoon garlic powder
    • ½ teaspoon onion powder
    • 1 teaspoon fresh lemon juice
    • 2 tablespoons chopped fresh parsley
    • ½ cup breadcrumbs (plus extra for coating)
    • Salt and black pepper, to taste

    For Air Frying

    • 1–2 tablespoons olive oil or melted butter (for brushing)
    • Nonstick cooking spray

    Optional Serving

    • Lemon wedges
    • Tartar sauce, remoulade, or aioli
    • Fresh herbs for garnish

    Instructions

    1. Prepare the crab mixture

    In a large mixing bowl, gently combine the crab meat, mayonnaise, egg, Dijon mustard, Worcestershire sauce, Old Bay seasoning, garlic powder, onion powder, lemon juice, parsley, and ½ cup breadcrumbs. Be careful not to break up the crab too much—you want chunks for texture.

    Taste the mixture and adjust salt and pepper as needed.

    2. Form the crab cakes

    Divide the mixture into 8 equal portions (for smaller cakes) or 4 larger portions. Shape each portion into a patty about ¾–1 inch thick. For extra crispiness, lightly coat each patty with additional breadcrumbs.

    Place the formed crab cakes on a plate or tray lined with parchment paper. Chill in the refrigerator for 15–30 minutes. Chilling helps the crab cakes hold together during air frying.

    3. Preheat the air fryer

    Preheat your air fryer to 375°F (190°C) for 3–5 minutes. Preheating ensures even cooking and crisping.

    4. Prepare for air frying

    Lightly spray the air fryer basket with nonstick cooking spray. Brush the crab cakes with a small amount of olive oil or melted butter on both sides. This will help them brown evenly.

    5. Air fry the crab cakes

    Carefully place the crab cakes in a single layer in the air fryer basket, leaving space between them. Cook at 375°F (190°C) for 10–12 minutes, flipping halfway through.

    The crab cakes should be golden brown and firm to the touch. If they are larger or thicker, cook for an extra 2–3 minutes.

    6. Serve

    Remove the crab cakes from the air fryer and let them rest for 1–2 minutes. Serve hot with lemon wedges and your favorite dipping sauce, such as tartar sauce, remoulade, or a garlic aioli. Garnish with fresh parsley if desired.


    Tips for Best Results

    • Use lump crab meat for a premium texture; avoid imitation crab.
    • Chill the patties before air frying to prevent them from falling apart.
    • Do not overcrowd the air fryer; cook in batches if necessary.
    • Light brushing of oil helps achieve that golden, crispy exterior without deep frying.
    • Add chopped green onions or bell peppers to the mixture for extra flavor.

    Storage and Reheating

    • Store leftover crab cakes in an airtight container in the refrigerator for up to 2 days.
    • Reheat in the air fryer at 350°F (175°C) for 3–5 minutes to restore crispiness. Avoid microwaving to keep the exterior crunchy.
  • Creamy Tuscan Chicken Recipe

    Creamy Tuscan Chicken Recipe

    Creamy Tuscan chicken is a restaurant-style dish that combines juicy chicken breasts with a garlicky, creamy sauce, sun-dried tomatoes, and fresh spinach. It can be served with pasta, rice, or crusty bread.


    Ingredients

    Chicken

    • 4 boneless, skinless chicken breasts
    • Salt and black pepper, to taste
    • 1 teaspoon garlic powder
    • 1 teaspoon paprika
    • 2 tablespoons olive oil (or butter)

    Creamy Tuscan Sauce

    • 2 tablespoons butter
    • 3–4 cloves garlic, minced
    • 1 cup heavy cream
    • ½ cup chicken broth
    • ½ cup grated Parmesan cheese
    • ½ teaspoon Italian seasoning
    • Salt and black pepper, to taste
    • ½ cup sun-dried tomatoes, chopped (oil-packed or rehydrated)
    • 2 cups fresh baby spinach leaves
    • Optional: ¼ teaspoon crushed red pepper flakes for heat

    Instructions

    1. Prepare the chicken

    Pat the chicken breasts dry with paper towels. Season both sides with salt, black pepper, garlic powder, and paprika.

    2. Cook the chicken

    Heat olive oil (or butter) in a large skillet over medium-high heat. Once hot, add the chicken breasts. Cook for 5–7 minutes on each side, depending on thickness, until golden brown and fully cooked (internal temperature should reach 165°F or 74°C). Remove the chicken from the skillet and set aside. Cover loosely with foil to keep warm.

    3. Make the creamy sauce

    In the same skillet, reduce heat to medium. Add the butter and minced garlic. Sauté for 30–60 seconds until fragrant, being careful not to burn the garlic.

    Add the heavy cream and chicken broth. Stir well to combine, scraping up any browned bits from the pan for extra flavor. Let the mixture simmer gently for 3–5 minutes.

    4. Add cheese and seasoning

    Stir in the Parmesan cheese and Italian seasoning. Simmer for another 2–3 minutes until the sauce thickens slightly. Taste and adjust seasoning with salt, pepper, and optional red pepper flakes.

    5. Add sun-dried tomatoes and spinach

    Add the chopped sun-dried tomatoes to the sauce and stir. Then add the fresh spinach, stirring until wilted. The sauce should be creamy, rich, and slightly thickened.

    6. Combine chicken and sauce

    Return the cooked chicken breasts to the skillet. Spoon the sauce over the chicken and simmer for 2–3 minutes to heat through and allow the flavors to meld.


    Serving Suggestions

    • Serve over cooked pasta, mashed potatoes, or rice.
    • Garnish with extra Parmesan cheese or fresh herbs like basil or parsley.
    • Pair with a side of garlic bread or roasted vegetables.

    Storage and Reheating

    • Store leftovers in an airtight container in the refrigerator for up to 3 days.
    • Reheat gently in a skillet over low heat or in the microwave. Add a splash of milk or cream if the sauce has thickened too much.

    Tips for Best Results

    • Pound the chicken breasts to an even thickness for uniform cooking.
    • Use fresh garlic and freshly grated Parmesan for the best flavor.
    • If you prefer a thicker sauce, let it simmer a little longer before adding the spinach.
    • Oil-packed sun-dried tomatoes add more richness, but rehydrated dried tomatoes work well too
  • Classic Macaroni and Cheese Recipe

    Classic Macaroni and Cheese Recipe

    Classic Macaroni and Cheese Recipe

    Macaroni and cheese is a comforting, creamy dish made with tender pasta and a rich cheese sauce. This recipe focuses on a smooth, flavorful sauce and can be served as a main dish or a side.


    Ingredients

    Pasta

    • 2 cups elbow macaroni
    • Water, for boiling
    • 1 tablespoon salt

    Cheese Sauce

    • 3 tablespoons butter
    • 3 tablespoons all-purpose flour
    • 2½ cups milk, warm
    • 1 cup shredded sharp cheddar cheese
    • ½ cup shredded mozzarella or Monterey Jack cheese
    • ¼ cup grated Parmesan cheese
    • ½ teaspoon salt (adjust to taste)
    • ½ teaspoon black pepper
    • ¼ teaspoon paprika or mustard powder (optional)

    Optional Topping

    • ½ cup breadcrumbs
    • 1 tablespoon melted butter
    • 2 tablespoons grated Parmesan cheese

    Instructions

    1. Cook the macaroni

    Bring a large pot of water to a boil. Add salt, then add the macaroni. Cook according to the package instructions until al dente. Drain the pasta and set it aside.

    2. Prepare the cheese

    Shred all the cheeses in advance and keep them at room temperature. Pre-shredded cheese can be used, but freshly shredded cheese melts more smoothly.

    3. Make the roux

    In a medium saucepan, melt the butter over medium heat. Once melted, add the flour and whisk constantly for about 1 to 2 minutes. The mixture should look smooth and slightly bubbly, but not browned. This roux helps thicken the sauce.

    4. Add the milk

    Slowly pour in the warm milk while whisking continuously. This prevents lumps from forming. Continue whisking for 3 to 5 minutes, until the mixture thickens and coats the back of a spoon.

    5. Season the sauce

    Add salt, black pepper, and paprika or mustard powder if using. Stir well to evenly distribute the seasoning.

    6. Melt the cheese

    Reduce the heat to low. Add the shredded cheeses gradually, stirring constantly until fully melted and smooth. Do not let the sauce boil, as high heat can cause the cheese to become grainy.

    7. Combine pasta and sauce

    Add the cooked macaroni to the cheese sauce. Stir gently until all the pasta is evenly coated with the sauce.


    Optional Baked Version

    8. Prepare the topping

    In a small bowl, mix the breadcrumbs, melted butter, and Parmesan cheese.

    9. Bake the macaroni and cheese

    Preheat the oven to 375°F (190°C). Transfer the macaroni and cheese to a greased baking dish. Sprinkle the breadcrumb topping evenly over the top.

    Bake for 20 to 25 minutes, or until the top is golden brown and the sauce is bubbling around the edges. Let it rest for 5 minutes before serving.


    Serving Suggestions

    • Serve hot as a main dish or side.
    • Add cooked vegetables, chicken, or turkey for a complete meal.
    • Sprinkle extra cheese or herbs on top before serving.

    Storage and Reheating

    • Store leftovers in an airtight container in the refrigerator for up to 3 days.
    • Reheat gently on the stove or in the oven with a splash of milk to loosen the sauce.

    Tips for Best Macaroni and Cheese

    • Warm milk helps prevent a lumpy sauce.
    • Use a blend of cheeses for better flavor and texture.
    • Avoid high heat once the cheese is added.
    • Slightly undercook the pasta if baking, as it will continue cooking in the oven.
  • Air-fried Crispy Cauliflower

    Air-fried Crispy Cauliflower

    Air-Fried Crispy Cauliflower Recipe

    Air-fried crispy cauliflower is a flavorful and crunchy dish that works well as a snack, appetizer, or side. The air fryer gives the cauliflower a crisp exterior while keeping the inside tender, using much less oil than traditional frying.


    Ingredients

    Cauliflower

    • 1 large head of cauliflower
    • Water, for washing

    Batter (for extra crispiness)

    • ½ cup all-purpose flour
    • ½ cup milk (dairy or unsweetened plant milk)
    • 1 teaspoon garlic powder
    • 1 teaspoon onion powder
    • ½ teaspoon paprika
    • ½ teaspoon salt
    • ¼ teaspoon black pepper

    Breadcrumb Coating

    • ¾ cup breadcrumbs or panko breadcrumbs
    • 2 tablespoons cornstarch (optional, for extra crunch)
    • ½ teaspoon salt
    • ½ teaspoon black pepper

    For Cooking

    • Cooking spray or 1–2 tablespoons oil

    Optional Seasonings or Sauces

    • Chili powder, cayenne, or smoked paprika
    • Buffalo sauce, barbecue sauce, or garlic sauce
    • Fresh herbs for garnish

    Instructions

    1. Prepare the cauliflower

    Remove the outer leaves and core from the cauliflower. Cut it into medium-sized florets, keeping them as uniform as possible so they cook evenly. Wash the florets thoroughly and pat them completely dry with a clean towel. Dry cauliflower helps the coating stick better.

    2. Make the batter

    In a mixing bowl, whisk together the flour, milk, garlic powder, onion powder, paprika, salt, and black pepper. The batter should be smooth and thick enough to coat the cauliflower without dripping too much. If it feels too thick, add a small amount of milk. If it is too thin, add a little flour.

    3. Prepare the breadcrumb coating

    In a separate bowl, combine the breadcrumbs, cornstarch (if using), salt, and black pepper. Mix well so the seasoning is evenly distributed.

    4. Coat the cauliflower

    Dip each cauliflower floret into the batter, making sure it is fully coated. Let any excess batter drip off, then roll the floret in the breadcrumb mixture. Press gently so the crumbs stick well. Place the coated florets on a plate or tray and repeat until all cauliflower is coated.

    5. Preheat the air fryer

    Preheat the air fryer to 375°F (190°C) for about 3 to 5 minutes. Preheating helps the cauliflower start crisping as soon as it goes in.

    6. Arrange in the air fryer

    Lightly spray the air fryer basket with cooking spray or brush with a small amount of oil. Arrange the cauliflower florets in a single layer, leaving space between them. Do not overcrowd the basket; cook in batches if needed.

    7. Air fry the cauliflower

    Air fry at 375°F (190°C) for 12 to 15 minutes. Halfway through cooking, open the air fryer and gently shake the basket or turn the florets to ensure even browning. Lightly spray the tops with oil if they look dry.

    For extra crispiness, increase the temperature to 400°F (205°C) and cook for an additional 3 to 5 minutes.

    8. Check for doneness

    The cauliflower should be golden brown and crisp on the outside, with a tender interior. If needed, cook for a few more minutes until the desired crispness is reached.


    Optional Sauce Coating

    If you want saucy cauliflower, toss the hot, crispy florets in warmed buffalo sauce, barbecue sauce, or garlic sauce. After coating with sauce, you can return them to the air fryer for 2 to 3 minutes to help the sauce set.


    Serving Suggestions

    • Serve hot as an appetizer with dipping sauces such as ranch, blue cheese, or yogurt dip.
    • Use as a filling for wraps, tacos, or bowls.
    • Sprinkle with fresh herbs or grated cheese before serving.

    Storage and Reheating

    • Store leftovers in an airtight container in the refrigerator for up to 2 days.
    • Reheat in the air fryer at 375°F (190°C) for 4 to 6 minutes to restore crispiness. Avoid microwaving, as it softens the coating.

    Tips for Best Results

    • Dry the cauliflower well before coating.
    • Panko breadcrumbs give the crispiest texture.
    • Avoid overcrowding the air fryer basket.
    • Serve immediately for the best crunch.