A whole roast chicken is one of those meals that never goes out of style. It is satisfying, easy to prepare, and can be enjoyed in many different ways. Using an air fryer makes the process even more convenient because it cooks the chicken evenly while creating a golden, crispy skin and keeping the meat juicy on the inside.
This air fryer roast chicken recipe uses simple pantry seasonings that bring out the natural flavor of the chicken without overpowering it. There is no need for complicated marinades or long preparation times. After seasoning the chicken, the air fryer does most of the work, making it an excellent recipe for busy weekdays, weekend family dinners, or weekly meal preparation.
Another advantage of cooking a whole chicken is that one meal can easily become several. Freshly carved chicken is delicious for dinner, while any leftovers can be used in sandwiches, salads, wraps, soups, or rice dishes during the following days. Preparing one whole chicken at home is also an economical choice compared to buying pre-cooked chicken from the store.
Whether you are using your air fryer for the first time or already cook with it regularly, this recipe is straightforward and delivers consistent results every time.
Why You’ll Love This Recipe
There are many reasons to make roast chicken in the air fryer instead of using a conventional oven.
Crispy Skin
The circulating hot air cooks the outside evenly, creating beautifully crisp skin with only a small amount of olive oil.
Tender and Juicy Meat
Cooking the chicken at the right temperature helps keep the breast and thigh meat moist instead of dry.
Easy Preparation
Only a few everyday ingredients are needed, and preparing the chicken takes just a few minutes.
Perfect for Meal Prep
A whole chicken provides enough cooked meat for several meals throughout the week.
Family-Friendly
The mild seasoning makes this recipe suitable for both adults and children.
What Makes This Recipe Stand Out?
This recipe focuses on simple ingredients and proper cooking techniques instead of complicated seasoning blends.
Some of the reasons it works so well include:
- Uses common pantry spices.
- No marinating is required.
- Crispy skin without deep frying.
- Easy enough for beginners.
- Great for lunch or dinner.
- Suitable for meal planning.
- Budget-friendly.
- Minimal cleanup.
- Requires very little hands-on cooking.
- Easy to customize with different side dishes.
Ingredients Overview
The ingredients are simple, but each one contributes to the final flavor and texture of the chicken.
Whole Chicken
A whole chicken weighing around 1.5 kilograms fits comfortably inside many medium-sized air fryers.
Using a chicken of the correct size allows the hot air to circulate evenly, helping every part cook properly.
If using a frozen chicken, make sure it is completely thawed before beginning.
Salt
Salt is the foundation of the seasoning.
It enhances the natural flavor of the chicken and helps every bite taste well balanced.
Dried Thyme
Dried thyme adds a pleasant herbal aroma that pairs perfectly with roasted chicken.
Although only a small quantity is used, it provides a classic roast chicken flavor.
Garlic Powder
Garlic powder spreads evenly across the chicken and develops a rich roasted flavor while cooking.
It blends smoothly with the other spices and creates a savory seasoning mixture.
Smoked Paprika
Smoked paprika gives the chicken its attractive golden color while adding a mild smoky flavor.
It also helps create an appetizing appearance once the chicken has finished cooking.
Onion Powder
A small amount of onion powder adds extra depth to the seasoning.
It complements the garlic powder without becoming overpowering.
Black Pepper
Ground black pepper adds gentle warmth and balances the other seasonings.
Olive Oil
Olive oil serves two important purposes:
- Helps the seasoning stick evenly.
- Encourages the skin to crisp beautifully during cooking.
Only one tablespoon is needed to coat the entire chicken.
Equipment You’ll Need
Preparing this recipe requires only a few kitchen tools.
Air Fryer
Choose an air fryer that is large enough for the chicken to fit comfortably.
Adequate airflow is essential for even cooking.
Meat Thermometer
A meat thermometer is one of the most useful tools for cooking poultry.
Instead of guessing whether the chicken is done, simply check the thickest part of the meat. Once it reaches 75°C (165°F), the chicken is ready to remove from the air fryer.
Mixing Bowl
A small bowl is useful for combining all of the dry seasonings before coating the chicken.
Paper Towels
Drying the chicken thoroughly before seasoning helps create crisp skin during cooking.
Helpful Tips Before You Begin
Keeping a few simple tips in mind makes the cooking process much easier.
- Choose a chicken that fits comfortably inside the air fryer basket.
- Pat the chicken completely dry before adding oil or seasoning.
- Mix the spices together before applying them.
- Coat every side evenly for the best flavor.
- Avoid overcrowding the air fryer basket.
- Always check the internal temperature before serving.
- Allow the chicken to rest before carving.
- Save any leftovers for easy meals later.
Why Drying the Chicken Is Important
- Many people overlook this small step, but it makes a noticeable difference.
- When excess moisture remains on the surface, it creates steam while cooking. Steam prevents the skin from becoming crisp.
- Using paper towels to remove as much moisture as possible allows the olive oil and seasoning to stick better and encourages beautiful browning during cooking.
- This takes only a minute but greatly improves the final texture.
Preparing the Seasoning
Instead of sprinkling each spice directly onto the chicken, combine them together first.
Mixing the seasonings ensures every bite contains the same balanced flavor.
The seasoning blend combines:
- Salt
- Dried thyme
- Garlic powder
- Smoked paprika
- Onion powder
- Black pepper
Once mixed, it becomes much easier to coat the chicken evenly.
Coating the Chicken
After drying the chicken, rub olive oil over every surface.
Next, sprinkle the seasoning mixture evenly across the chicken.
Use your hands to gently rub the spices over:
- The breast
- The back
- The thighs
- The drumsticks
- The wings
Taking a little extra time during this step ensures every part of the chicken develops excellent flavor while cooking.
Once evenly coated, the chicken is ready to be placed into the air fryer.
Benefits of Cooking a Whole Chicken
Preparing a whole chicken offers several advantages beyond serving a delicious dinner.
Some of the biggest benefits include:
- More affordable than buying cooked chicken.
- Can feed multiple people.
- Leftovers can be used in several recipes.
- Excellent source of protein.
- Easy to portion for meal preparation.
- Less food waste compared to buying individual pieces.
- Suitable for both everyday meals and special occasions.
With the chicken fully seasoned and prepared, the next step is cooking it correctly in the air fryer to achieve crisp skin, juicy meat, and even browning throughout.
Cooking the Chicken in the Air Fryer
Once the chicken is fully seasoned, it is ready to cook. The air fryer circulates hot air around the chicken, allowing it to cook evenly while creating a crispy outer layer. Unlike traditional roasting, this method requires very little attention after the chicken is placed in the basket.
Start by placing the chicken breast-side down in the air fryer basket. This position helps protect the breast meat from drying out during the first stage of cooking because the natural juices flow toward the breast.
Cook the chicken at 180°C (350°F) for the first 30 minutes.
After the first cooking stage, carefully flip the chicken so the breast faces upward. Continue cooking for another 20 to 30 minutes, depending on the size of the chicken. Always use a meat thermometer to confirm that the thickest part of the chicken has reached 75°C (165°F) before removing it from the air fryer.
Avoid relying only on cooking time, as different air fryer models and chicken sizes may cook slightly differently.
Let the Chicken Rest
Although it may be tempting to carve the chicken immediately, allowing it to rest is an important step.
Leave the cooked chicken on a serving plate or cutting board for 5 to 10 minutes before slicing.
Resting allows the juices to redistribute throughout the meat instead of running out onto the cutting board.
The result is:
- Juicier chicken
- Better texture
- Easier carving
- More flavorful meat
Skipping this step may cause the chicken to lose much of its moisture.
Serving Suggestions
This air fryer roast chicken pairs well with many homemade side dishes, making it suitable for both casual meals and family dinners.
Some favorite serving ideas include:
- Air fryer roasted potatoes
- Steamed vegetables
- Roasted carrots
- Broccoli or broccolini
- Green beans
- Fresh garden salad
- Buttered rice
- Mashed potatoes
- Dinner rolls
- Corn on the cob
You can also serve the chicken with your favorite dipping sauce or a light gravy if desired.
Ways to Use Leftover Chicken
One of the biggest advantages of cooking a whole chicken is having leftovers ready for quick meals.
Shredded or sliced chicken can be added to many recipes, including:
- Sandwiches
- Wraps
- Chicken salads
- Green salads
- Soups
- Pasta dishes
- Fried rice
- Noodle bowls
- Grain bowls
- Baked casseroles
Keeping cooked chicken in the refrigerator makes preparing meals much quicker throughout the week.
Storage Tips
Proper storage helps keep the chicken fresh while maintaining its flavor and texture.
After the chicken has cooled completely:
- Store it in an airtight container.
- Refrigerate for 3 to 4 days.
- Keep whole pieces or shred the meat before storing.
- Separate portions if preparing meals in advance.
Avoid leaving cooked chicken at room temperature for long periods.
Freezing Instructions
If you would like to keep the chicken longer, freezing is an excellent option.
For best results:
- Remove the meat from the bones.
- Divide into meal-sized portions.
- Place in freezer-safe containers or freezer bags.
- Remove as much air as possible before sealing.
The cooked chicken can be frozen for up to 3 months.
Label each container with the freezing date so it is easy to keep track of freshness.
Reheating Tips
Reheating properly helps keep the chicken moist.
In the Air Fryer
Place the chicken in the basket and heat at 180°C (350°F) for 5 to 8 minutes until warmed through.
In the Microwave
Heat in 30-second intervals, checking frequently to avoid drying out the meat.
Adding a small splash of water before microwaving can also help retain moisture.
Helpful Tips for the Best Results
A few simple techniques can make a noticeable difference in the finished chicken.
For Crispy Skin
- Dry the chicken thoroughly.
- Use the recommended amount of olive oil.
- Do not overcrowd the air fryer.
- Cook with enough space around the chicken.
- Flip the chicken halfway through cooking.
For Juicy Meat
- Avoid overcooking.
- Always use a meat thermometer.
- Let the chicken rest before carving.
- Slice only when ready to serve.
Common Mistakes to Avoid
Even a simple recipe can be affected by small mistakes. Avoid these common issues for the best results.
Choosing a Chicken That Is Too Large
A chicken that barely fits inside the basket blocks airflow and cooks unevenly.
Skipping the Drying Step
Moisture prevents the skin from becoming crisp.
Forgetting to Flip the Chicken
Turning the chicken during cooking helps both sides brown evenly.
Not Checking the Temperature
Cooking time alone cannot guarantee that the chicken is fully cooked.
Cutting Too Soon
Allowing the chicken to rest helps retain its natural juices.
Frequently Asked Questions
How do I know the chicken is fully cooked?
Insert a meat thermometer into the thickest part of the breast or inner thigh. Once it reaches 75°C (165°F), the chicken is ready.
Can I cook a larger chicken?
Yes. A larger chicken will simply require additional cooking time. Continue checking the internal temperature until it reaches the recommended level.
Can I cook a smaller chicken?
Absolutely. Smaller chickens usually cook faster, so begin checking the temperature a little earlier.
Do I need to preheat the air fryer?
Many air fryers work well without preheating, but if your appliance recommends preheating, you can follow the manufacturer’s instructions.
Can I change the seasoning?
Yes. The seasoning blend in this recipe creates a classic roasted chicken flavor, but you can customize it with your preferred herbs and spices while keeping the cooking method the same.
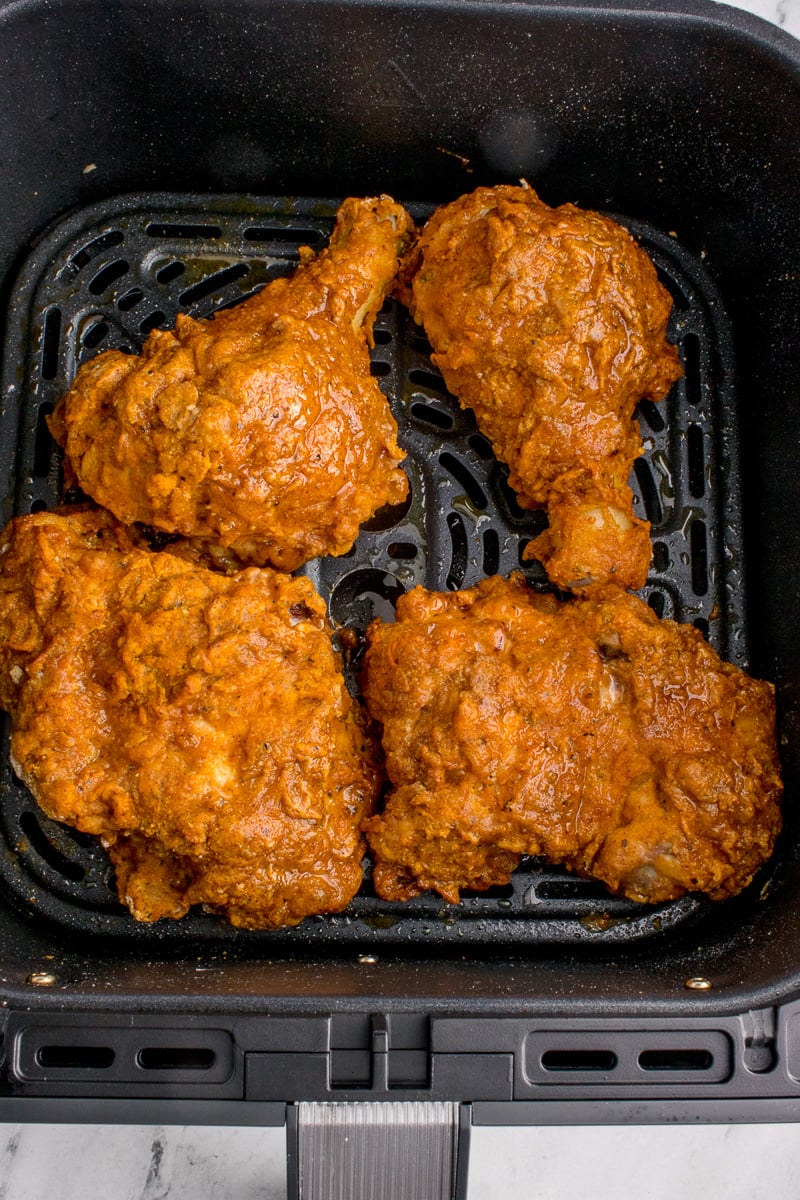
Air Fryer Roast Chicken
 Recipe by admin1
This air fryer roast chicken is a simple homemade meal that delivers tender, juicy meat with perfectly crispy skin. Seasoned with a blend of everyday spices and cooked until golden, it is ideal for a family dinner, meal prep, or using in a variety of recipes throughout the week.
6
servings10
minutes1
hour281
kcalIngredients
1.5 kilograms whole chicken
1 teaspoon salt
½ teaspoon dried thyme
½ teaspoon garlic powder
½ teaspoon smoked paprika
½ teaspoon onion powder
½ teaspoon ground black pepper
1 tablespoon olive oil
Directions
- Prepare the Chicken
Remove the whole chicken from its packaging and discard any excess liquid. Pat the chicken dry on all sides with paper towels to remove as much moisture as possible. - Mix the Seasoning
In a small bowl, combine:
Salt
Dried thyme
Garlic powder
Smoked paprika
Onion powder
Ground black pepper
Mix until the spices are evenly blended. - Season the Chicken
Rub the olive oil over the entire chicken, making sure every side is lightly coated.
Sprinkle the seasoning mixture evenly over the chicken and gently rub it into the skin so every part is well covered. - Begin Air Frying
Place the chicken breast-side down in the air fryer basket.
Cook at 180°C (350°F) for 30 minutes. - Turn the Chicken
Carefully flip the chicken so the breast side is facing up.
Continue cooking for another 20–30 minutes, or until the internal temperature reaches 75°C (165°F) when checked at the thickest part of the chicken using a meat thermometer - Rest Before Serving
Transfer the cooked chicken to a serving plate or cutting board.
Allow it to rest for 5–10 minutes before carving to help the juices settle throughout the meat. - Serve
Slice the chicken and serve immediately with your favorite side dishes.
Notes
- Patting the chicken dry helps create crispier skin.
- Use a meat thermometer for accurate cooking results.
- Cooking time may vary slightly depending on the size of the chicken and the model of your air fryer.
- Avoid overcrowding the air fryer basket so hot air can circulate properly.
- Let the chicken rest before carving to keep the meat juicy.
Nutrition Facts
- Fat: 20g
- Saturated Fat: 6g
- Trans Fat: 0.1g
- Polyunsaturated Fat: 4g
- Monounsaturated Fat: 9g
- Cholesterol: 90mg
- Sodium: 472mg
- Potassium: 236mg
- Carbohydrates: 0.4g
- Fiber: 0.1g
- Sugar: 0.03g
- Protein: 22g
- Vitamin A: 254mcg
- Vitamin C: 2mg
- Calcium: 16mg
- Iron: 1mg