Ingredients
For the pastry layers
- Ready-made puff pastry sheets – 2 sheets
- All-purpose flour – for dusting
For the vanilla custard filling
- Full-fat milk – 4 cups
- Granulated sugar – 1 cup
- Cornflour – 6 tablespoons
- Egg yolks – 4
- Unsalted butter – 3 tablespoons
- Vanilla essence or vanilla bean paste – 2 teaspoons
- Salt – a small pinch
For topping
- Powdered sugar – for dusting
Preparing the Puff Pastry
- Remove the puff pastry sheets from the refrigerator and allow them to rest at room temperature for about ten minutes. This makes them easier to handle and prevents cracking.
- Preheat the oven to 180 degrees Celsius.
- Lightly dust a clean surface with flour and gently roll out each pastry sheet to even thickness.
- Place the pastry sheets on a baking tray lined with baking paper.
- Prick the pastry all over with a fork to prevent excessive puffing during baking.
- Place another sheet of baking paper on top and weigh it down with another tray to keep the pastry flat.
- Bake the pastry sheets for fifteen to twenty minutes until lightly golden and crisp.
- Remove from the oven and allow them to cool completely.
- Once cooled, trim the edges neatly so both sheets are equal in size.
Preparing the Vanilla Custard Filling
- Pour the milk into a heavy-bottomed saucepan and place it on medium heat.
- Heat the milk until it is hot but not boiling. Stir occasionally to prevent sticking.
- In a separate bowl, add the sugar, cornflour, egg yolks, and salt.
- Whisk the mixture thoroughly until smooth and pale, making sure there are no lumps.
- Slowly pour the hot milk into the egg mixture while whisking continuously. This step prevents the eggs from curdling.
- Transfer the mixture back into the saucepan.
- Cook on medium heat while stirring constantly using a whisk or spatula.
- Continue stirring until the custard thickens significantly and reaches a smooth, creamy consistency.
- Once thickened, remove the saucepan from the heat.
- Add butter and vanilla essence to the custard.
- Stir well until the butter melts completely and the custard becomes glossy and smooth.
- Allow the custard to cool slightly, stirring occasionally to prevent a skin from forming.
Assembling the Vanilla Custard Slice
- Place one baked puff pastry sheet on a flat serving tray or baking dish.
- Pour the warm vanilla custard evenly over the pastry layer.
- Use a spatula to spread the custard smoothly and evenly, ensuring all corners are filled.
- Gently place the second pastry sheet on top of the custard.
- Press lightly so the layers settle without squeezing out the filling.
- Allow the assembled pastry to cool completely at room temperature.
- Once cooled, refrigerate for at least four to six hours, or overnight, to allow the custard to fully set.
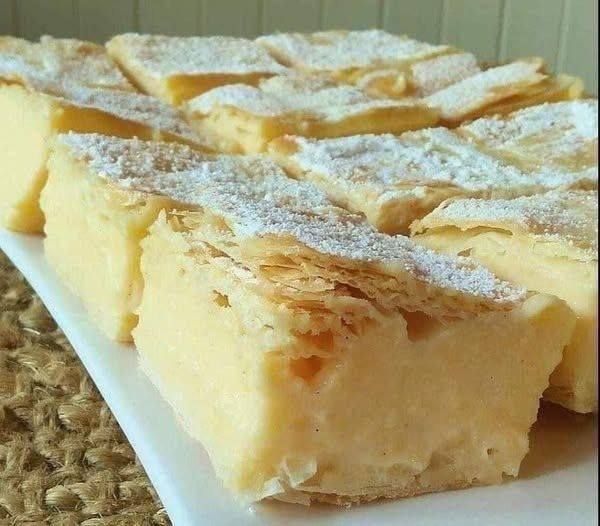
Cutting and Finishing
- Before cutting, dust the top generously with powdered sugar.
- Use a sharp knife to cut the pastry into neat square or rectangular slices.
- Wipe the knife clean between cuts to maintain clean edges and layers.
Serving Suggestions
- Serve the vanilla custard slices chilled for the best texture and flavor.
- These slices pair perfectly with tea or coffee.
- They can be served as a dessert for gatherings, parties, or special occasions.
Storage Instructions
- Store the custard slices in an airtight container in the refrigerator.
- They remain fresh for up to two to three days.
- Avoid freezing, as freezing can affect the texture of the custard and pastry.
Helpful Tips for Perfect Results
- Always stir the custard continuously to avoid lumps and burning.
- Use full-fat milk for a rich and creamy custard.
- Allow sufficient chilling time for clean slicing and proper setting.
- Pricking and weighing down the pastry ensures flat, professional-looking layers.
- Vanilla bean paste can be used for a more intense vanilla flavor and visible vanilla specks.