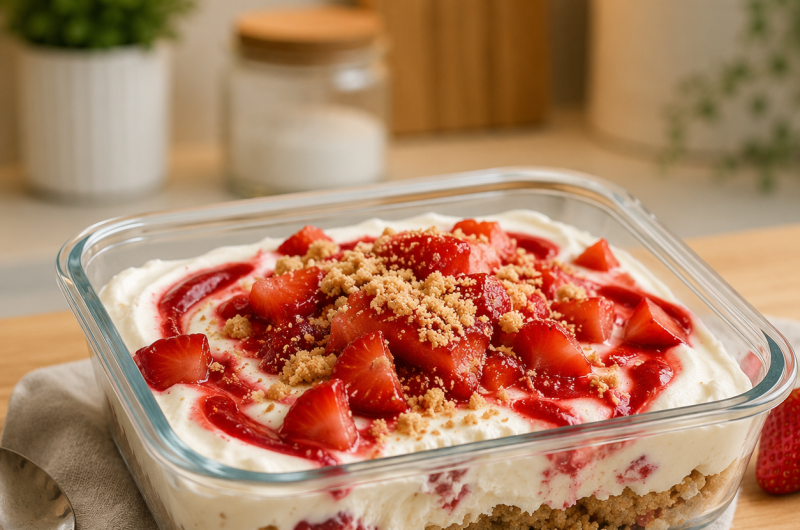
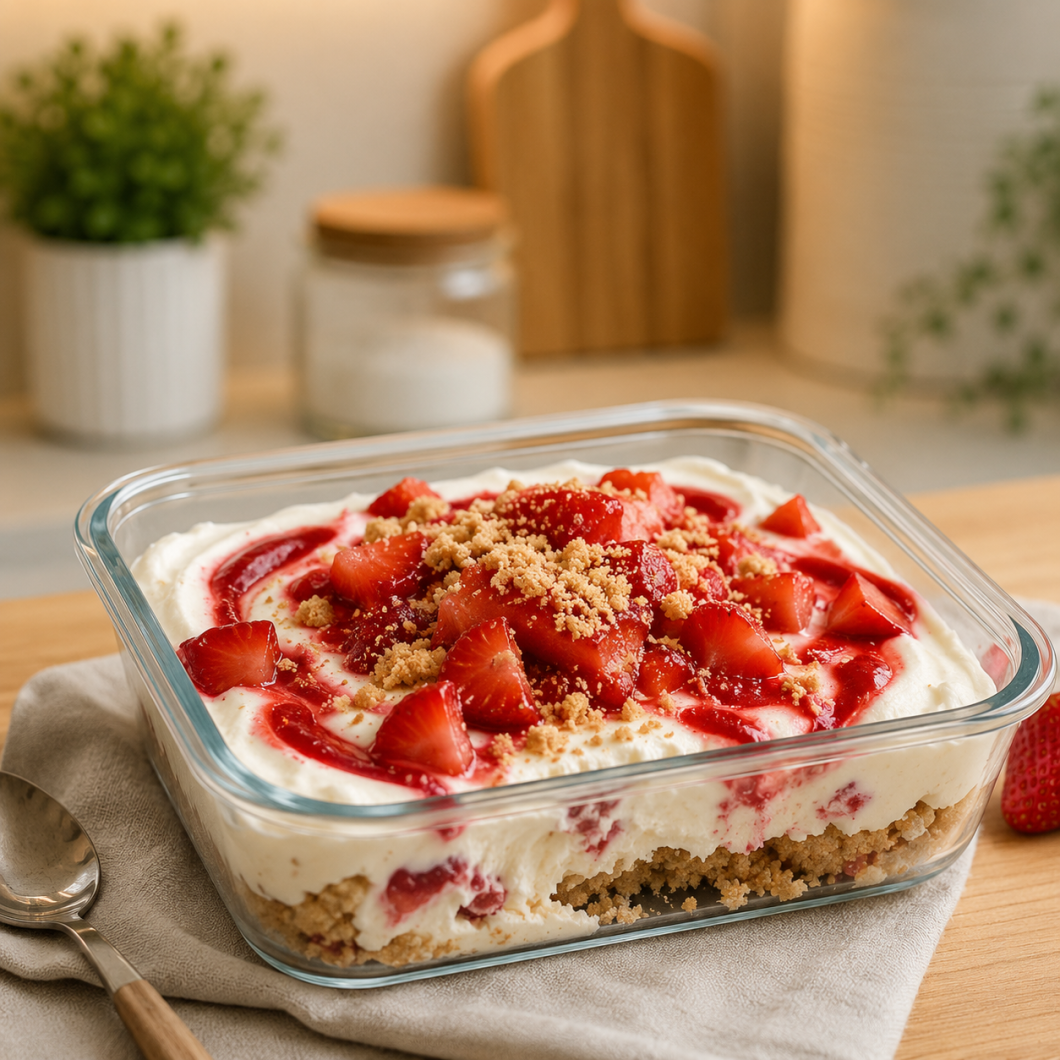
This high protein strawberry cheesecake is a creamy baked dessert made with cream cheese, cottage cheese, Greek yogurt, and protein powder. A crisp oat cookie crust gives each slice a pleasant base, while strawberry chia jam creates a fruity swirl across the top. The result is a rich cheesecake with a smooth texture and a fresh strawberry flavor that works well for dessert or a special weekend treat.
A Creamy Cheesecake With More Protein
Traditional cheesecake is known for its rich filling and buttery crust, but this version adds protein powder, cottage cheese, and Greek yogurt to the mixture. These ingredients create a creamy filling while increasing the protein content of each serving. The cheesecake still has the familiar baked texture you expect, with a soft center and a firm outer edge once it has been properly chilled.
Why This Strawberry Cheesecake Works
The combination of ingredients gives this cheesecake several layers of texture and flavor. The oat cookie crumbs form a firm crust, while melted butter helps hold everything together during baking. The filling combines cream cheese with cottage cheese and Greek yogurt for a smooth consistency. Strawberry chia jam adds color, sweetness, and small bursts of fruity flavor throughout the creamy filling.
Oat Cookie Crust
The crust begins with oat cookie crumbs, vanilla protein powder, melted butter, and a pinch of salt. These ingredients are mixed together before being pressed firmly into a parchment-lined springform pan. Baking the crust before adding the filling helps it become more stable and gives the finished cheesecake a distinct base. Allowing the crust to cool slightly also helps prepare it for the creamy filling.
Vanilla Protein Powder
Vanilla protein powder is included in the crust mixture rather than being added directly to the cheesecake filling. It adds a vanilla note while contributing protein to the finished dessert. The original recipe uses Botanica Vanilla Protein Powder, so that ingredient should remain unchanged when preparing the recipe as written. Mixing it thoroughly with the cookie crumbs helps distribute it evenly through the crust.
Cream Cheese Filling
The filling is built around cream cheese, cottage cheese, and Greek yogurt. Using the ingredients at room temperature makes blending easier and helps create a smoother mixture. Cream cheese provides the familiar cheesecake richness, while cottage cheese and Greek yogurt give the filling a soft, creamy texture. The combination is blended until there are no obvious lumps remaining.
Why Room Temperature Ingredients Matter
Room temperature dairy ingredients are easier to blend into a uniform cheesecake batter. Cold cream cheese can remain in small pieces during processing, which may leave the filling less smooth. Allowing the cream cheese, cottage cheese, Greek yogurt, and eggs to come to room temperature before preparation makes the blending step easier. This small preparation detail can make a noticeable difference in the final texture.
Preparing the Springform Pan
A springform pan is useful for cheesecake because the sides can be removed after the dessert has chilled. Before adding the crust mixture, line the pan with parchment paper. This helps prevent the cheesecake from sticking and makes serving easier later. Press the oat cookie mixture firmly into the prepared pan so the crust forms an even layer across the bottom.
Baking the Cheesecake Crust
The crust is baked first at 350°F for 15 minutes. This short baking period helps the crumb mixture set before the cheesecake filling is added. Once the crust has finished baking, remove it from the oven and set it aside to cool. While it cools, the oven temperature can be reduced to 300°F in preparation for baking the cheesecake.
Blending the Cheesecake Batter
Once the crust is ready, place the cream cheese, cottage cheese, Greek yogurt, eggs, vanilla, sugar, and salt into a food processor. Blend the mixture until it becomes smooth and creamy. Taking time during this stage is helpful because the texture of the blended filling affects the texture of the baked cheesecake. When the batter is smooth, pour it evenly over the cooled crust.
Adding the Strawberry Chia Jam
The strawberry chia jam is used as a swirl rather than being mixed completely into the cheesecake batter. Spoon small dollops of jam across the surface of the filling. Then use a knife to gently move through the jam and cheesecake mixture. This creates streaks of strawberry throughout the top without completely blending the jam into the filling.
Creating a Strawberry Swirl
The swirling step is simple, but it gives the finished cheesecake a more attractive appearance. Insert a knife gently into the top of the batter and move it through the strawberry jam in loose motions. Avoid stirring too much because the goal is to keep visible ribbons of strawberry. A few deliberate movements are enough to create a natural swirl across the cheesecake.
Baking at a Lower Temperature
After the crust has been baked at 350°F, the oven temperature is reduced to 300°F for the cheesecake. The lower temperature gives the filling time to bake without rushing the process. Place the springform pan on a cookie sheet before putting it into the oven. Bake the cheesecake for approximately 55 to 60 minutes, following the recipe’s timing.
Knowing When Cheesecake Is Done
A cheesecake does not need to look completely firm when it first comes out of the oven. The center should still have a little jiggle after the baking time is complete. This is an important part of the recipe because the cheesecake continues to settle as it cools and chills. Avoid extending the baking time simply because the center is not completely firm while hot.
Cooling the Cheesecake
Once baking is finished, allow the cheesecake to rest at room temperature. It should cool enough before being transferred to the refrigerator. Moving a very hot cheesecake directly into the refrigerator is not ideal for the cooling process. Giving it time to cool gradually also makes it easier to handle before the long chilling stage that gives the cheesecake its final texture.
Chilling for the Best Texture
The cheesecake needs several hours in the refrigerator before serving. The original recipe recommends chilling it for four to six hours or leaving it overnight for the best results. This resting period allows the filling to firm up and makes slicing much easier. Although the cheesecake may smell ready immediately after baking, waiting through the chilling stage is important.
Why Overnight Chilling Helps
An overnight rest gives the cheesecake plenty of time to become firm and fully chilled. The creamy filling becomes easier to slice after spending several hours in the refrigerator. Chilling also makes the dessert more refreshing and helps the strawberry swirl stand out against the pale cheesecake filling. If you have enough time, preparing the dessert the day before serving is a convenient option.
Serving Strawberry Cheesecake
Once the cheesecake has chilled, remove it carefully from the springform pan and slice it into four servings. Fresh berries can be used to finish each portion, adding a simple fruity touch. The cheesecake can be served cold directly from the refrigerator. A sharp knife can help create cleaner slices, especially when the dessert has been thoroughly chilled overnight.
Fresh Berries for Serving
Fresh berries are suggested for serving and provide a natural finishing touch. They complement the strawberry chia jam while adding fresh color to each slice. You can place a few berries beside or on top of each serving without changing the cheesecake itself. Since the original recipe specifically suggests fresh berries, they are best treated as a serving suggestion rather than an ingredient in the cheesecake mixture.
High Protein Dessert Option
This recipe is designed as a higher-protein twist on a classic baked cheesecake. Each serving contains the protein contributed by the protein powder, cottage cheese, Greek yogurt, cream cheese, eggs, and other ingredients. According to the supplied nutrition information, one serving provides 23 grams of protein. The dessert remains rich and creamy while offering more protein than many traditional cheesecake recipes.
Greek Yogurt Cheesecake Texture
Greek yogurt contributes to the creamy texture of the filling and works alongside the cream cheese and cottage cheese. Because the ingredients are blended together, the finished cheesecake does not have the texture of plain yogurt. Instead, baking transforms the mixture into a soft cheesecake filling that becomes firmer after refrigeration. Using room temperature ingredients also supports a smoother batter.
Cottage Cheese Cheesecake Filling
Cottage cheese is another important part of the filling. When blended thoroughly in the food processor, it becomes much smoother and combines with the other dairy ingredients. This makes it possible to use cottage cheese without leaving large curds throughout the finished cheesecake. The result is a creamy filling that keeps the familiar appearance of a baked strawberry cheesecake.
A Balanced Strawberry Flavor
The strawberry chia jam provides the main strawberry element in this recipe. Rather than adding a large quantity of fruit directly to the batter, the jam is placed on top and swirled through the filling. This keeps the cheesecake creamy while giving certain bites a stronger strawberry flavor. Fresh berries served alongside the cheesecake can add another layer of fresh fruit.
Sweetness in the Filling
A quarter cup of sugar is used in the cheesecake filling. The sugar works with the vanilla and strawberry chia jam to create the dessert’s sweetness. Because the recipe contains several dairy ingredients, the sugar also helps balance their rich and tangy flavors. Keeping the amount as provided maintains the intended balance of the original recipe.
The Role of Vanilla
One teaspoon of vanilla is added to the cheesecake filling. Vanilla gives the mixture a familiar dessert flavor and works naturally with both the strawberry and cream cheese. It also complements the vanilla protein powder used in the crust. Because vanilla is blended with the rest of the filling ingredients, its flavor is spread evenly throughout the cheesecake.
The Pinch of Salt
Salt appears in both the crust and cheesecake filling in the original ingredient list. Although only a small amount is used, salt can help balance sweetness and bring the other flavors into better focus. It is not intended to make the cheesecake taste salty. Instead, the small amount supports the overall flavor of the cookie crust and creamy filling.
Preparing the Crust Evenly
When pressing the crust into the springform pan, try to create an even layer. Areas that are much thicker or thinner than others may bake differently. Firm pressure helps the oat cookie crumbs hold together after baking. You can use the back of a spoon or another flat surface to press the mixture into place before putting the pan in the oven.
Pouring the Filling Carefully
After blending, pour the cheesecake batter over the baked crust slowly. Spreading it evenly helps the filling bake at a consistent depth. If the crust is still very hot, allow it to cool further before adding the batter. A slightly cooled crust provides a better base for the creamy mixture and makes the transition between crust and filling more distinct.
Using a Food Processor
The food processor is especially helpful for this recipe because cottage cheese needs to be blended until smooth. Add all of the filling ingredients except the strawberry chia jam to the processor. Blend until the mixture looks creamy and uniform. The jam should not be added during this stage because it is meant to remain visible as a swirl on the cheesecake surface.
Baking on a Cookie Sheet
The springform pan is placed on a cookie sheet before going into the oven. This provides a stable surface for moving the cheesecake in and out of the oven. It can also make handling the springform pan more convenient. Place the prepared cheesecake carefully on the cookie sheet before transferring everything to the oven for the 55-to-60-minute baking period.
Preventing Overbaking
The center of the cheesecake should remain slightly jiggly when the baking time ends. This is different from an underbaked liquid center. The cheesecake should have enough structure around the edges while the middle retains some movement. As it cools and chills, the center becomes firmer. Watching the texture rather than simply extending the baking time can help preserve the creamy consistency.
Making the Recipe Ahead
This strawberry cheesecake is well suited to advance preparation because it needs several hours of chilling. You can bake it earlier in the day and refrigerate it until dessert time. Preparing it the evening before is another convenient choice. The longer refrigeration period gives the cheesecake plenty of time to firm up, making it easier to slice and serve when needed.
Keeping the Cheesecake Chilled
Because the recipe contains cream cheese, cottage cheese, Greek yogurt, and eggs, the finished cheesecake should be kept refrigerated. Store it covered or in a suitable container once it has cooled and chilled. Keeping it cold helps maintain its texture. When serving, take out only the amount you plan to eat and return the remaining cheesecake to the refrigerator.
Strawberry Chia Jam Swirl
The strawberry chia jam is an important visual and flavor element. Small spoonfuls placed over the batter create concentrated strawberry pockets, while the knife movement spreads thin ribbons through the surface. The chia component also gives the jam its characteristic texture. Because the jam is used as a topping and swirl, it does not need to be blended into the main cheesecake mixture.
Notes for a Smooth Cheesecake
For the smoothest filling, bring the cream cheese, cottage cheese, Greek yogurt, and eggs to room temperature before blending. Blend the filling until creamy before pouring it over the crust. Keep the strawberry chia jam separate until the swirling stage. The cheesecake should be allowed to cool before refrigeration, then chilled for four to six hours or overnight before serving.
Notes for the Crust
The oat cookie crumbs should be mixed thoroughly with the melted butter, vanilla protein powder, and salt. Press the mixture firmly into the parchment-lined springform pan so it holds together after baking. Bake the crust for 15 minutes at 350°F, then allow it to cool. This creates a stable base for the cheesecake filling and helps separate the crust from the creamy layer.
Baking ideas
Remember to reduce the oven temperature from 350°F to 300°F after baking the crust. The cheesecake filling requires approximately 55 to 60 minutes at the lower temperature. The center should still have a slight jiggle when the cheesecake is removed from the oven. Cooling and refrigeration are part of the preparation, so the total time is longer than the actual hands-on cooking time.
Serving Options
Serve each chilled slice with fresh berries if desired, following the original serving suggestion. A clean, sharp knife can help cut through the firm crust and creamy filling. Wiping the knife between slices can also make the portions look neater. Keep unused portions refrigerated so the cheesecake maintains its chilled texture and creamy consistency.
High Protein Strawberry Cheesecake
 Recipe by admin
A creamy baked strawberry cheesecake made with Greek yogurt, cottage cheese, cream cheese, and vanilla protein powder.
4
servings15
minutes1
hour15
minutes614
kcal4
hours30
minutes6
hoursIngredients
- Cookie Crust:
1¼ cup oat cookie crumbs
¼ cup Vanilla Protein Powder
4 tbsp butter, melted
Pinch of salt
- Cheesecake Filling:
180 grams cream cheese, room temperature
1 cup cottage cheese, room temperature
1 cup Greek yogurt, room temperature
2 eggs, room temperature
1 tsp vanilla
¼ cup sugar
Pinch of salt
¼ cup strawberry chia jam
Directions
- Preheat the oven to 350°F and line a springform pan with parchment paper.
- Mix the oat cookie crumbs, melted butter, and salt, then press the mixture firmly into the prepared pan and bake for 15 minutes; cool and reduce the oven to 300°F.
- Blend the cream cheese, cottage cheese, Greek yogurt, eggs, vanilla, sugar, and salt in a food processor until smooth and creamy, then pour the filling over the cooled crust.
- Add small dollops of strawberry chia jam over the filling and gently swirl them through the batter with a knife.
- Place the springform pan on a cookie sheet and bake at 300°F for 55 to 60 minutes, leaving the center slightly jiggly; cool at room temperature, then refrigerate for 4 to 6 hours or overnight.
- Slice the chilled cheesecake into four servings and serve with fresh berries.
Notes
- Use room temperature dairy ingredients and eggs for a smoother filling. The center should still jiggle slightly when the cheesecake comes out of the oven. Let it cool before refrigerating, then chill for 4 to 6 hours or overnight. Serve chilled with fresh berries. Nutrition information is based on one serving and may vary with specific ingredients.
Nutrition Facts
- Calories: 614kcal
- Fat: 35g
- Carbohydrates: 55g
- Fiber: 1g
- Sugar: 30g
- Protein: 23g