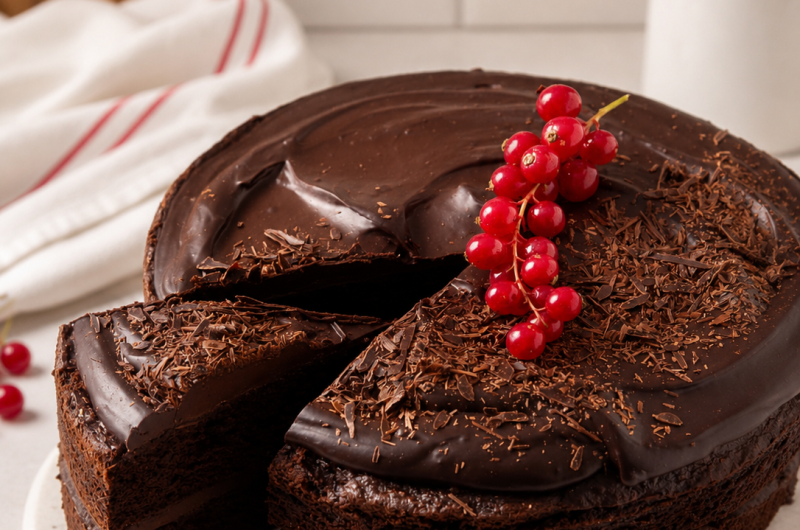
Whenever I want to bake a chocolate cake that feels special without using regular sugar, this recipe is the one I rely on. It has a wonderfully soft crumb, a rich chocolate taste, and a smooth ganache that gives it the look of a celebration cake. Even though it is made without sugar, every slice is deeply chocolatey and satisfying.
Instead of traditional wheat flour, this cake uses a combination of almond flour and coconut flour. These ingredients create a tender texture while keeping the cake suitable for those looking for a lower-carbohydrate dessert. A powdered low-carb sweetener replaces regular sugar, allowing the chocolate flavor to remain the highlight of the cake.
The finished cake is light, moist, and layered with silky chocolate ganache. It is ideal for birthdays, family gatherings, holidays, or simply whenever a homemade chocolate cake is on the menu.
Why I Like Making This Cake
There are many reasons why this cake has become one of my favorite homemade desserts.
- Rich chocolate flavor in every bite.
- Soft and fluffy texture without wheat flour.
- Simple ingredients that blend together easily.
- Smooth chocolate ganache instead of heavy buttercream.
- Perfect for birthdays and celebrations.
- Suitable for anyone looking for a sugar-free chocolate cake.
Although it looks impressive once assembled, the preparation is surprisingly straightforward. The batter comes together quickly, making this recipe approachable even for home bakers with limited experience.
The Ingredients That Make This Cake Special
Every ingredient has an important role in creating the final texture and flavor.
Almond Flour
Blanched almond flour forms the main base of the cake. It creates a tender crumb and adds a mild nutty flavor without overpowering the chocolate.
Coconut Flour
Only a small amount is needed because coconut flour absorbs a great deal of moisture. It helps give the cake structure while keeping it soft.
Cocoa Powder
Cocoa powder is responsible for the deep chocolate flavor. Since chocolate is naturally rich, the cake tastes indulgent without needing regular sugar.
Powdered Sweetener
A powdered low-carb sweetener blends evenly into the batter, creating sweetness without leaving a grainy texture.
Greek Yogurt
One ingredient that makes a noticeable difference is Greek yoghurt. It helps create a moist, fluffy cake while adding richness to the batter. The result is a sponge that stays soft even after cooling.
Eggs
The eggs provide structure and help the cake rise beautifully. Since this recipe is made without traditional flour, they play an important role in creating stability.
Almond Milk
Almond milk keeps the batter smooth and easy to blend while adding moisture throughout the cake.
Butter
Melted butter adds richness and helps produce a soft crumb with a pleasant buttery flavor.
Vanilla Extract
A small amount of vanilla balances the cocoa and rounds out the overall taste.
Baking Powder and Bicarbonate of Soda
Both raising agents work together to produce a light, airy sponge.
Salt
Although only a small quantity is added, salt enhances the chocolate flavor and balances the sweetness.
Preparing the Batter
One thing I appreciate about this recipe is how quickly the batter comes together.
I begin by adding the wet ingredients into the blender first. This simple step helps prevent the dry ingredients from sticking underneath the blades, making the blending process much smoother.
After the liquids are added, I include the almond flour, coconut flour, cocoa powder, sweetener, baking powder, bicarbonate of soda, and salt.
Everything is blended until the mixture becomes completely smooth. Occasionally I stop the blender to scrape down the sides before blending again. Taking this extra minute ensures every ingredient is evenly combined.
If a blender is unavailable, the batter can also be prepared in a large mixing bowl using an electric mixer until smooth.
Preparing the Cake Pans
Before pouring in the batter, I generously grease two round baking pans with butter.
Properly greased pans make removing the cakes much easier after baking. If preferred, baking paper can also be added to the base or sides for extra protection against sticking.
The batter is then divided evenly between both prepared pans to help each layer bake uniformly.
Baking the Cake
The cakes bake until the centers are fully cooked and a skewer inserted into the middle comes out clean.
It is important not to leave them in the oven longer than necessary. The sponge continues to firm up as it cools, so overbaking can reduce the soft texture that makes this cake so enjoyable.
After removing the pans from the oven, I allow the cakes to cool completely before adding the ganache. Cooling fully also helps prevent the frosting from melting when spread over the layers.
What Makes This Cake Stand Out
Unlike many sugar-free cakes that rely on thick frostings to add flavor, this recipe focuses on creating a rich chocolate experience from the sponge itself.
The combination of cocoa powder and chocolate ganache delivers an intense chocolate taste that feels balanced rather than overly sweet. Because the chocolate flavor is so prominent, the sweetener blends naturally into the dessert without dominating it.
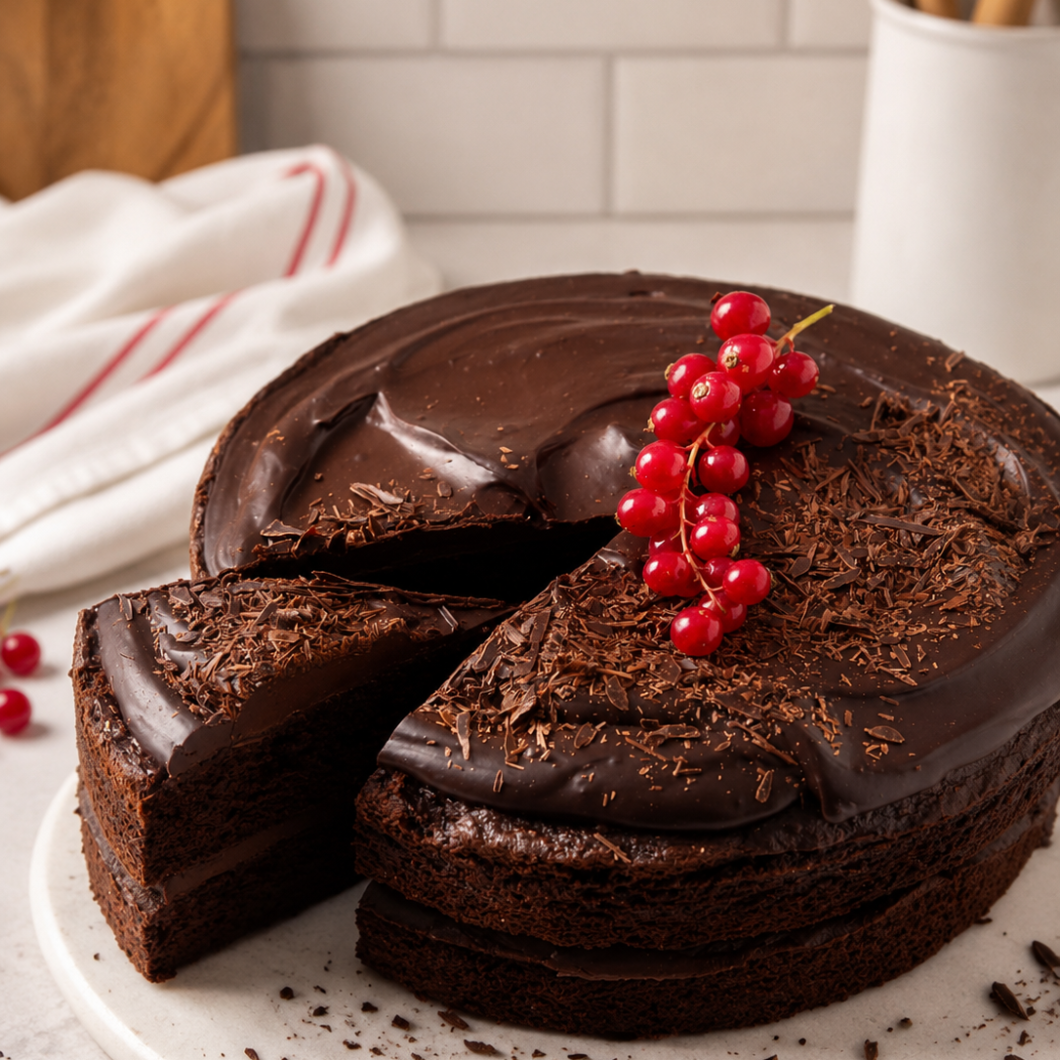
The finished cake has a beautiful appearance with two soft chocolate layers and a generous coating of glossy ganache. It is elegant enough for celebrations while still being simple enough to prepare in a home kitchen.
Whether served after dinner, enjoyed with coffee, or placed at the center of a birthday table, this homemade sugar-free chocolate cake offers the rich flavor and soft texture that every chocolate lover appreciates.
Finishing the Cake and Helpful Baking Tips
Making a Smooth Chocolate Ganache
A rich chocolate ganache is the finishing touch that brings this cake together. Instead of using a traditional buttercream frosting, I prefer a simple ganache because it complements the deep chocolate flavor without making the cake overly sweet. It creates a glossy finish and adds a creamy texture that pairs perfectly with the soft sponge.
To prepare the ganache, I start by heating the heavy cream in a saucepan over medium-low heat. The cream should become hot enough to begin simmering around the edges, but it should never reach a full boil. Once it is hot, I remove the pan from the heat immediately.
Next, I finely chop the dark chocolate or use sugar-free chocolate chips. The chocolate is added directly into the hot cream, but instead of stirring right away, I leave the mixture untouched for about five minutes. This resting time allows the chocolate to soften gradually, helping it melt evenly.
After waiting, I gently stir everything together with a spatula until the mixture becomes smooth, shiny, and completely combined.
Assembling the Cake
Before decorating, I always make sure both cake layers have cooled completely. Even slightly warm cakes can cause the ganache to become too soft, making it difficult to spread evenly.
I place one cake layer onto a serving plate and spread a generous layer of ganache across the top. Then I cover the second cake layer with another layer of ganache before carefully stacking it over the first.
If any ganache remains, it can be spread around the sides for a neat finish. Allowing the cake to rest for a short time gives the ganache a chance to set, making each slice easier to cut while maintaining a beautiful appearance.
Tips for the Best Results
A few simple techniques can make a noticeable difference when baking this cake.
Add Wet Ingredients First
When using a blender, always pour in the liquid ingredients before adding the dry ingredients. This helps everything blend smoothly and prevents flour from collecting underneath the blades.
Blend Until Smooth
Take a moment to scrape down the sides of the blender if necessary. A smooth batter produces an even cake with a consistent texture.
Don’t Overbake
The cake continues to firm up while cooling, so remove it from the oven as soon as a skewer comes out clean. Leaving it in the oven too long may result in a drier sponge.
Cool Before Frosting
Although the original version is wonderfully rich on its own, a few small additions can create different flavor combinations while keeping the same basic recipe.
Some simple ideas include:
- Stir orange extract into the batter and add freshly grated orange zest for a chocolate-orange version.
- Mix a spoonful of peanut butter into the warm ganache for a chocolate and peanut butter flavor.
- Decorate with grated dark chocolate for an elegant finish.
- Add fresh berries just before serving for a little natural freshness.
These additions complement the chocolate without changing the overall character of the cake.
Serving Suggestions
This cake is delicious served at room temperature because the ganache becomes soft and creamy while the sponge remains moist.
It pairs well with:
- Freshly whipped cream.
- Sugar-free ice cream.
- A cup of coffee.
- Unsweetened tea.
- Fresh berries or a light fruit garnish.
For birthdays or celebrations, a sprinkle of grated dark chocolate over the top adds an attractive finishing touch without requiring extra effort.
Choosing the Right Baking Pan
This recipe works well in several types of cake pans.
Two 8-inch round cake pans create tall, even layers with plenty of space for the ganache filling.
If using 9-inch round pans, the cakes will bake slightly flatter but still have a soft texture.
A rectangular baking dish can also be used if serving the cake in squares instead of layers. Bundt pans are another option, although they generally require a longer baking time.
The batter can even be divided into cupcake tins. Since cupcakes are smaller, they bake more quickly while keeping the same moist texture.
Storing Leftovers
Any leftover cake should be stored in the refrigerator to keep the ganache fresh.
Place the cake in an airtight container or cover it well to prevent it from drying out. It stays fresh for up to four days.
Before serving, allow refrigerated slices to sit at room temperature for a short time. This softens the ganache and brings out the full chocolate flavor.
Freezing Instructions
- This cake freezes very well, making it a convenient dessert to prepare ahead of time.
- There are two easy ways to freeze it.
- The first option is to freeze each sponge layer separately. Once cooled completely, wrap the cakes well before freezing. When ready to serve, thaw the layers and prepare a fresh batch of ganache for assembling.
- The second option is to freeze the fully assembled cake. Place it on a flat tray until completely frozen before wrapping or transferring it into a freezer-safe container. This helps protect the ganache from being damaged during storage.
- With proper wrapping, the cake keeps well in the freezer for up to three months.
- Whether served immediately or prepared ahead for a special occasion, this sugar-free chocolate cake remains wonderfully moist, rich in chocolate flavor, and every bit as satisfying as a classic celebration cake.
Sugar Free Chocolate Cake
 Recipe by admin1
This Sugar-Free Chocolate Cake is rich, moist, and incredibly soft with a deep chocolate flavor in every bite. Made with almond flour, coconut flour, and a sugar-free sweetener, it’s finished with a silky dark chocolate ganache that makes it perfect for birthdays, holidays, or any special occasion. The batter comes together quickly in a blender, making this elegant layer cake surprisingly simple to prepare
16
servings10
minutes35
minutes302
kcalIngredients
7 large eggs
⅓ cup (84g) Greek yoghurt
2 teaspons vanilla extract
⅔ cup (170g) almond milk
3.5 oz (100g) butter, melted
⅓ cup (45g) coconut flour
2½ cups (250g) almond flour
1 cups (90g) cacao powder
1¼ teaspoons (200g) powdered sweetener
3 teaspoons baking powder
2 teaspoons bicarbonate of soda
⅓ teaspoons salt
Directions
- Prepare the Oven and Cake Pans
Preheat the oven to 180°C (350°F). Grease two 8-inch (21 cm) round cake pans generously with butter. If preferred, line the bottoms with parchment paper for easier removal. - Blend the Cake Batter
Add the wet ingredients to a blender first:
Eggs
Greek yoghurt
Vanilla extract
Almond milk
Melted butter
Next, add the coconut flour, almond flour, cacao powder, powdered sweetener, baking powder, bicarbonate of soda, and salt.
Blend until the batter is completely smooth, scraping down the sides if necessary.
No blender? Use a large mixing bowl and an electric mixer until the batter is well combined. - Bake
Divide the batter evenly between the prepared cake pans.
Bake for approximately 35 minutes, or until a skewer inserted into the center comes out clean.
Avoid overbaking, as the cakes will continue to set while cooling.
Allow both cake layers to cool completely before frosting. - Prepare the Ganache
Pour the heavy cream into a saucepan and heat over medium-low heat until it just begins to simmer. Do not allow it to boil.
Remove the pan from the heat and add the finely chopped chocolate or sugar-free chocolate chips.
Leave the mixture undisturbed for 5 minutes.
After resting, stir gently with a spatula until the chocolate melts completely and the ganache becomes smooth and glossy.
Allow it to cool for a few minutes until it reaches a spreadable consistency. - Assemble the Cake
Spread a generous layer of ganache over the top of one cooled cake layer.
Place the second cake layer on top and spread the remaining ganache over the top. If desired, coat the sides as well.
Allow the ganache to set before slicing and serving.
Notes
- Makes 16 servings.
- Net carbs: Approximately 5.5g per slice.
- Always add the wet ingredients to the blender before the dry ingredients for easier blending.
- If the ganache separates, blend it in a food processor until smooth.
- For a smaller cake, halve all ingredients and use 4 medium eggs instead of 7 large eggs.
- The batter can also be baked in a 9-inch round pan, rectangular baking pan, Bundt pan, or cupcake tins. Baking times may vary depending on the pan use
- Optional decoration: Top with grated dark chocolate or homemade chocolate curls.
- For extra flavor, add 1 teaspoon orange extract and orange zest to the batter or stir 1 tablespoon peanut butter into the ganache
- Store covered in the refrigerator for up to 4 days.
- Freeze individual cake layers or the fully assembled cake for up to 3 months. Thaw in the refrigerator and bring to room temperature before serving for the best texture.
Nutrition Facts
- Calories: 302kcal
- Fat: 26.1g
- Saturated Fat: 11.3g
- Carbohydrates: 13g
- Fiber: 7.6g
- Sugar: 1.7g
- Protein: 9.3g