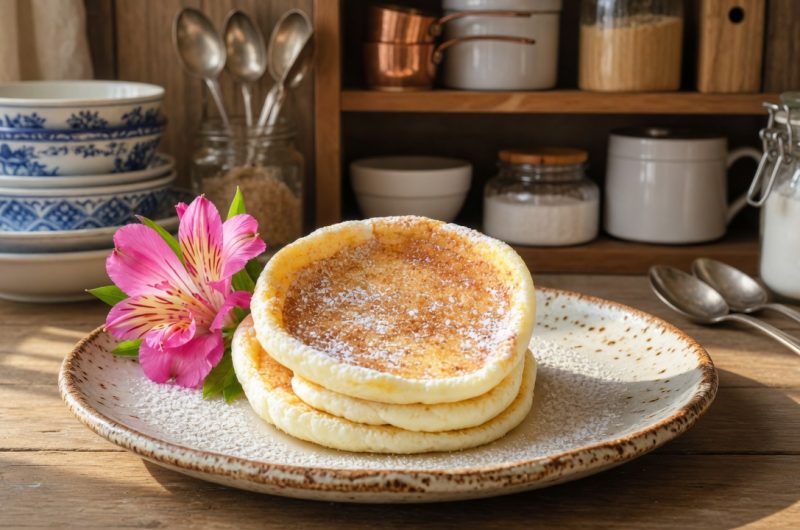
If you follow a carnivore diet or zero carb eating plan, finding breakfast options that feel familiar can be challenging. These carnivore pancakes solve that problem by using only animal-based ingredients to create a fluffy, satisfying breakfast. Instead of flour and sugar, this recipe relies on eggs, gelatin, and collagen to build structure and texture.
The pancakes come out soft and light while keeping you in line with strict carnivore principles. Making them takes a little patience, but the result is worth it when you want something more interesting than just eggs and meat.
How These Pancakes Fit Carnivore Guidelines
Traditional pancakes depend on wheat flour for structure and often include milk and sugar for flavor and texture. This carnivore version eliminates all plant-based ingredients and creates structure through whipped egg whites instead. The recipe uses only eggs, unflavored gelatin, collagen peptides, salt, and animal fat for cooking.
Optional vanilla extract can be added if you include certain extracts in your carnivore approach, though many people skip it to stay completely animal-based. The finished pancakes contain zero carbohydrates and provide high amounts of protein and healthy fats. This makes them suitable for ketogenic diets, carnivore eating, and anyone avoiding grains and sugar.
Why Egg Whites Create Fluffiness
The key to making pancakes without flour is understanding how egg whites work when whipped. Egg whites contain proteins that unfold and trap air bubbles when beaten vigorously. These trapped air bubbles expand slightly when heated, creating a light and airy texture.
When you whip egg whites to stiff peaks, you create a stable foam that holds its shape. This foam becomes the foundation of the pancake batter and gives the finished pancakes their characteristic fluffiness. Without proper whipping, the pancakes will turn out flat and dense, so this step cannot be rushed or skipped.
The Role of Gelatin and Collagen
Gelatin serves as a binding agent that helps hold the pancake structure together during cooking. It adds a slight chewiness and prevents the whipped egg whites from collapsing completely when heated. Unflavored gelatin powder works best because it dissolves easily and does not add any unwanted flavors. Collagen peptides contribute additional protein and create a smoother texture in the finished pancakes.
They also dissolve completely into the egg yolk mixture without leaving any grittiness. Both gelatin and collagen come from animal sources, making them perfectly acceptable on a carnivore diet while providing structural benefits that flour would normally provide.
Choosing the Right Cooking Fat
The type of fat you use for cooking these pancakes affects both flavor and how well they release from the pan. Bacon grease is a popular choice because it adds a subtle smoky flavor and is something many carnivore dieters already have on hand. Beef tallow works well and provides a neutral flavor that lets the egg taste come through. Duck fat creates especially rich flavor and helps the pancakes develop a golden color. Butter can be used if you include dairy in your carnivore approach, though some strict carnivore followers avoid it. Whichever fat you choose, make sure to use enough to prevent sticking without making the pancakes greasy.
Separating Eggs Properly
Start by separating your eggs carefully, keeping the whites completely free from any yolk. Even a small amount of fat from the yolk can prevent the whites from whipping properly. Use clean bowls that have been washed and dried thoroughly, as any grease residue will interfere with foam formation. The easiest way to separate eggs is to crack them over a small bowl and use the shell halves to transfer the yolk back and forth while the white falls into the bowl below. Once you have separated an egg successfully, transfer the white to your mixing bowl before separating the next one. This prevents one broken yolk from ruining an entire bowl of whites.
Whipping Egg Whites to Stiff Peaks
Place the separated egg whites in a completely clean, dry bowl and add a small pinch of salt. The salt helps stabilize the protein structure and makes the foam stronger. Start beating at low speed while gradually sprinkling in the unflavored gelatin powder. Once the gelatin is incorporated, increase the mixer speed to high and continue beating. The whites will go through several stages, starting as foamy bubbles, then forming soft peaks that curl over when you lift the beater. Keep beating until stiff peaks form, meaning the peaks stand straight up without drooping. This usually takes several minutes depending on your mixer power.
Preparing the Egg Yolk Mixture
While the egg whites are being whipped, or immediately after, prepare the yolk mixture. Place the egg yolks in a separate bowl and whisk them until they become smooth and slightly lighter in color. Add the collagen peptides and whisk again until completely incorporated with no lumps remaining. If you are using vanilla extract, add it at this stage and whisk to combine. The yolk mixture will be thick and creamy, providing richness that balances the light airiness of the whipped whites. This mixture also contains most of the fat and nutrients, making the pancakes more satisfying and nutritious than they would be with whites alone.
Folding Without Losing Air
Folding is the most delicate step in making these pancakes and determines how fluffy they turn out. Add about one-third of the whipped egg whites to the yolk mixture first. Use a rubber spatula to fold gently, cutting down through the center and sweeping up around the sides. This initial folding lightens the yolk mixture and makes it easier to incorporate the remaining whites. Add the lightened yolk mixture back into the bowl with the remaining egg whites. Continue folding with the same gentle motion, turning the bowl as you work. Stop folding as soon as you no longer see distinct streaks of yolk, even if the mixture is not perfectly uniform.
Setting Up Your Cooking Surface
Heat your pan over medium heat and add about one tablespoon of your chosen cooking fat. Let the fat melt and coat the bottom of the pan evenly. Before adding any batter, reduce the heat to low. This step is important because high heat will cause the outside of the pancakes to cook and brown too quickly while the inside remains raw. Low heat allows the egg proteins to set gradually and evenly, creating pancakes that are cooked through without burning. A non-stick pan or well-seasoned cast iron skillet works best for these delicate pancakes. Avoid using a pan with a rough or damaged surface that might cause sticking.
Cooking the First Side
Spoon about one heaping tablespoon of batter onto the prepared pan for each pancake. Use the back of the spoon to gently shape the batter into a round circle, but do not press down hard or you will deflate it. Leave space between pancakes since they will spread slightly as they cook. Cover the pan with a lid immediately after adding the batter. The lid traps steam and heat, helping the tops of the pancakes set without needing to flip them multiple times. Cook for approximately eight minutes, checking occasionally by lifting the lid briefly. The bottoms should be golden brown and the tops should look mostly set with just a slight jiggle in the center.
Flipping and Finishing
When the first side is ready, use a thin spatula to gently lift and flip each pancake. Be careful during this step because the pancakes are delicate and can tear if handled roughly. Once flipped, replace the lid and continue cooking for about five more minutes. The second side cooks faster than the first because the pan is already heated through. Check for doneness by gently pressing the center of a pancake with your finger. It should feel set and spring back slightly rather than remaining indented. If the pancakes are browning too quickly on the outside but still feel raw inside, your heat is too high. Remove the finished pancakes from the pan and place them on a plate.
Managing Temperature Throughout Cooking
Maintaining consistent low heat is one of the biggest challenges when making carnivore pancakes. If your heat is too high, the outsides will burn before the insides cook through. If the heat is too low, the pancakes will take much longer and may not develop good color. Watch the first batch carefully and adjust your burner as needed. Some stoves run hotter than others, so the temperature setting that works on one stove might not be right for another. Between batches, you may need to adjust the heat up or down slightly based on how the previous pancakes cooked. Pay attention to how quickly the bottoms brown and adjust accordingly.
Why These Pancakes Deflate Slightly
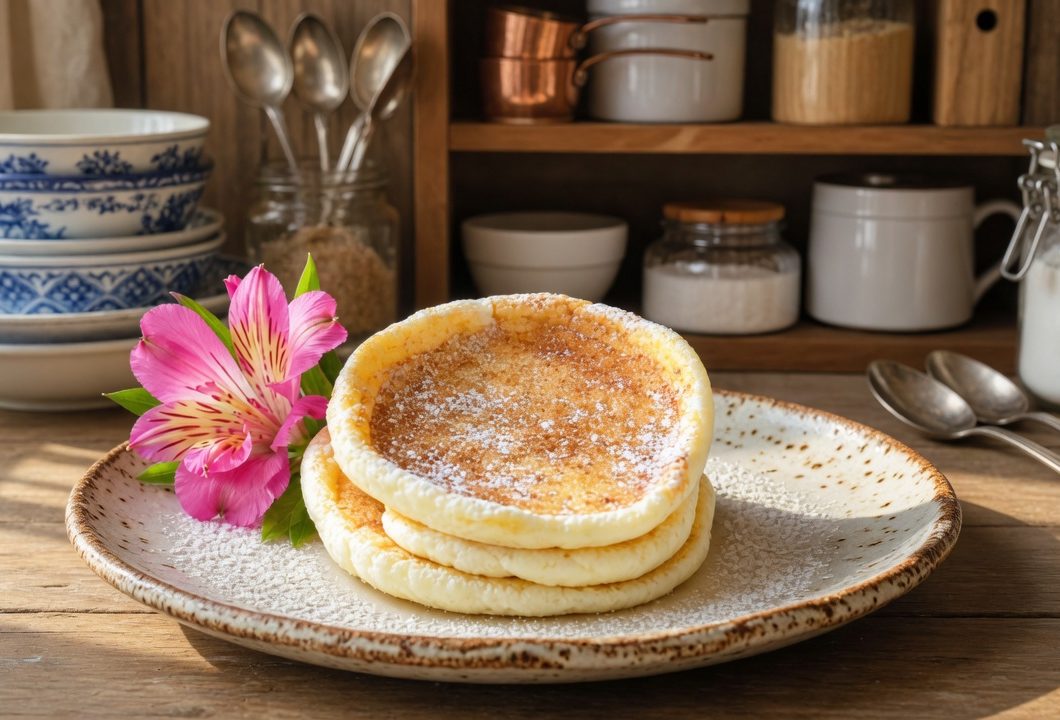
Do not be alarmed if your pancakes deflate a bit after removing them from the heat. Some deflation is normal and expected with egg-based recipes that do not contain flour. The air bubbles in the whipped egg whites expand when heated, but they also begin to collapse as the pancakes cool. The gelatin helps minimize this effect, but it cannot prevent it entirely. Even with some deflation, the pancakes will remain thick and soft with a pleasant texture. They will not be as dense as a collapsed souffle, but they also will not stay as puffy as they looked in the pan. This is simply how egg-based pancakes behave and does not indicate a problem with your technique.
Keeping Batter Fresh Between Batches
If you cannot fit all your pancakes in the pan at once, you will need to cook them in multiple batches. Keep the remaining batter in the refrigerator between batches to prevent the egg whites from deflating. The cold temperature helps maintain the structure of the whipped whites. Before scooping out batter for the next batch, give it a very gentle stir to recombine any separated liquid, but avoid vigorous stirring that would deflate the foam. Each subsequent batch may be slightly less fluffy than the first as the batter sits, but refrigeration helps minimize this effect. Work as quickly as you can while still cooking each batch properly.
Texture Compared to Regular Pancakes
Carnivore pancakes have a different texture than traditional flour-based pancakes, so adjust your expectations accordingly. They are lighter and more delicate, almost like a thick crepe or a thin souffle. The inside is soft and tender rather than dense or bready. They do not have the chewiness that gluten provides, so they will not feel the same in your mouth as wheat pancakes. Some people describe the texture as being similar to a Japanese souffle pancake, which also relies heavily on whipped egg whites. The pancakes hold together well enough to be picked up and eaten with your hands, but they are more fragile than regular pancakes.
Simple Serving Suggestions
Since these pancakes contain no sweeteners, they can be served with either sweet or savory toppings depending on your preferences and dietary rules. For strict carnivore, melted butter or ghee makes a simple topping that adds richness. Some people enjoy them with heavy cream whipped to soft peaks, which adds a luxurious texture. Crispy bacon pieces can be crumbled on top for a savory breakfast plate. If you include dairy, sour cream or cream cheese can be spread on the pancakes. Some carnivore dieters who include limited amounts of honey use a small drizzle for special occasions. The pancakes are also good served plain, allowing the natural egg flavor to come through.
Storing Leftover Pancakes
Carnivore pancakes can be stored in the refrigerator for up to three days if you have leftovers. Place them in an airtight container with pieces of parchment paper between each pancake to prevent sticking. They will firm up considerably when cold but can be reheated successfully. To reheat, place them in a pan over low heat for a few minutes on each side until warmed through. You can also reheat them in a low oven, though this may dry them out slightly. Avoid microwaving if possible, as it tends to make the texture rubbery. The flavor remains good even after storage, though the texture will never be quite as light as when freshly made.
Freezing for Longer Storage
These pancakes can be frozen for longer storage, making them a convenient make-ahead breakfast option. Let the pancakes cool completely before freezing to prevent ice crystals from forming. Stack them with parchment paper between each pancake, then place the stack in a freezer bag or airtight container. They will keep in the freezer for up to one month. To use, thaw them in the refrigerator overnight, then reheat in a pan over low heat. You can also reheat them directly from frozen, though this will take longer. Freezing does affect the texture somewhat, making them slightly less tender, but they remain perfectly edible and satisfying.
Common Problems and Solutions
If your pancakes turn out flat and dense, the most likely cause is insufficiently whipped egg whites or deflated batter from overmixing. Make sure to beat the whites until truly stiff peaks form, and fold very gently when combining with the yolks. If the pancakes burn on the outside before cooking through, your heat is too high. Reduce the burner temperature and cook more slowly. If the pancakes stick to the pan, you need more cooking fat or a better non-stick surface. If they fall apart when flipping, they may not be cooked long enough on the first side, or your spatula technique needs to be more gentle.
Adjusting the Recipe Size
This recipe can easily be scaled up or down depending on how many pancakes you want to make. Keep the proportions the same when adjusting quantities. For a larger batch, you may want to keep finished pancakes warm in a low oven while cooking subsequent batches. For a smaller batch, simply reduce all ingredients proportionally. Remember that smaller batches of egg whites whip more easily and quickly than larger amounts. If you are making a very large batch, consider whipping the egg whites in two separate batches rather than trying to whip a huge quantity at once, as this can be difficult for some mixers to handle.
Why Low and Slow Cooking Works
Cooking these pancakes at low heat for a longer time is essential for proper texture. Egg proteins coagulate and set when heated, but this process needs to happen gradually throughout the entire pancake. High heat would cause the proteins on the surface to set immediately, creating a crust that prevents heat from reaching the center. The trapped liquid inside would then make the pancake soggy and undercooked in the middle. Low heat allows the proteins to set evenly from the outside in, creating a pancake that is cooked through with a tender texture. The covered pan creates a gentle steaming environment that helps cook the top surface without requiring a flip until the pancake has enough structure to handle it.
Carnivore Pancakes
 Recipe by admin
Fluffy, protein-rich pancakes made with only animal-based ingredients. Perfect for carnivore diet, keto, and zero-carb eating plans. Light texture without flour or sugar.
4
servings10
minutes25
minutes186
kcal35
minutesIngredients
3 large eggs, separated
1 dash salt
1 tbsp gelatin (unflavored, grass-fed)
½ tsp vanilla extract (optional)
3 tbsp collagen peptides (unflavored, grass-fed)
2 tbsp bacon grease (or ghee, butter, avocado oil)
Directions
- Beat egg whites with salt and gelatin until stiff peaks form.
- Whisk yolks with vanilla (if using) and collagen until combined.
- Gently fold whites into yolks.
- Heat grease in pan over low heat. Add batter, cover, cook 8 minutes. Flip, cook 5 minutes.
- Enjoy immediately.
Nutrition Facts
- Calories: 186kcal
- Fat: 14g
- Carbohydrates: 0.4g
- Protein: 14g