When dinner needs to come together quickly, this honey glazed chicken breast is a great option to keep in the regular meal rotation. The chicken is lightly coated with flour, cooked in a skillet, and finished with a simple honey-garlic sauce that turns thick and glossy as it cooks.
What makes this recipe especially convenient is that the chicken does not need to be marinated. A simple scoring technique helps the chicken cook more evenly while also giving the glaze plenty of places to settle into the meat.
The whole process is straightforward enough for a busy weeknight. Once the chicken is prepared, it goes directly into the skillet, gets browned on both sides, and then finishes cooking in the sweet and savory glaze.
Why This Chicken Is So Easy to Make
There are a few things that make this recipe especially practical when you want a flavorful dinner without spending a lot of time in the kitchen.
No Long Marinating Time
There is no need to prepare the chicken hours in advance. The flavor comes from the seasoning, the skillet searing, and the honey-garlic glaze that is added toward the end.
That means you can start preparing the chicken when you’re ready to cook rather than having to remember an earlier step.
Quick Skillet Cooking
The chicken is cooked in one large skillet, which keeps the process simple. The first side cooks for several minutes before the chicken is flipped, and the remaining cooking happens while the glaze simmers around it.
A Simple Sweet-and-Savory Sauce
The glaze brings together honey, garlic, soy sauce, apple cider vinegar, and butter. Honey gives it sweetness, soy sauce provides a salty savory flavor, garlic adds depth, and apple cider vinegar brings a little acidity to balance everything.
As the mixture simmers, it thickens and coats the chicken.
Getting the Chicken Ready
The chicken breasts should ideally be similar in size. The recipe uses 3 medium chicken breasts, about 1 1/2 lbs.
Using pieces that are reasonably similar in size helps them cook more evenly in the skillet.
Before seasoning, place the chicken breasts on a cutting board. The important preparation step is to score the top of each breast.
What Does Scoring the Chicken Do?
Scoring means making shallow cuts across the surface of the chicken without cutting all the way through it.
For this recipe, the cuts are made in a criss-cross or diamond pattern. The cuts should go approximately one-third of the way through the chicken.
This simple step serves more than one purpose.
- It helps the chicken cook more evenly.
- It can help the chicken cook faster.
- It gives the seasoning more surface area to reach.
- It allows some of the glaze to work into the scored areas.
- It creates more flavorful bites once the sauce is added.
The cuts do not need to be extremely deep. The goal is to create a visible pattern across the top while keeping the chicken breast intact.
How to Score the Chicken
Place one chicken breast flat on the cutting board.
Using a sharp knife, make shallow diagonal cuts across the top. Turn the direction of the cuts and make another set of diagonal lines so the two sets cross each other.
The finished surface should have a shallow diamond pattern.
Repeat the same process with the remaining chicken breasts.
Take care not to cut completely through the meat. The scoring should remain shallow enough that the breast stays together during cooking.
Seasoning the Chicken
Once all of the chicken breasts have been scored, season both sides with salt and black pepper, to taste.
Try to season the chicken evenly so that the flavor is not concentrated in only a few areas.
Because the chicken will also be cooked with soy sauce and the honey glaze, there is no need to create a complicated seasoning mixture. Salt and pepper are all that are needed at this stage.
After seasoning, the chicken is ready for the flour coating.
Lightly Dredging the Chicken
The flour is used as a light coating rather than a thick breading.
The recipe calls for:
- 1/4 cup all-purpose flour
- Or cornstarch for gluten-free preparation
Place the flour on a plate or another shallow surface that is large enough to work with the chicken.
Take one seasoned chicken breast and lightly press it into the flour.
Pay particular attention to the scored surface. Pressing the chicken gently into the flour allows some of the flour to settle into the shallow grooves.
Then turn the chicken and coat the other side lightly as well.
Lift the chicken and shake off the excess flour.
Repeat with the remaining chicken breasts.
Why the Flour Is Used
The light flour coating helps create a surface that can brown nicely in the skillet. It also helps the sauce cling to the chicken later.
This is different from heavily breading the chicken. The recipe only calls for a light dredge, so there should not be a thick layer of flour around each breast.
The goal is simply to give the chicken a light coating before it goes into the skillet.
Getting the Skillet Ready
For this recipe, use a large skillet so the chicken breasts have enough room to cook properly.
Place the skillet over medium heat and allow it to heat up.
The recipe uses 4 tablespoons of butter, divided, with the first 3 tablespoons used for searing and the remaining 1 tablespoon added later with the garlic.
If preferred, the supplied recipe also gives 3 tablespoons olive oil as an alternative to the butter.
Once the skillet is hot, add the 3 tablespoons of butter.
A Simple Way to Reduce Butter Splatter
As the butter melts, swirl the pan gently.
This helps the butter melt evenly and can help prevent sputtering caused by the milk solids being trapped underneath the fat.
There is no need to rush this step. Once the butter has melted, the skillet is ready for the chicken.
Searing the Chicken
Place the chicken breasts into the skillet with the scored side facing down.
The chicken should have enough room in the pan to cook without being crowded together.
Cook the first side for approximately 5–6 minutes, until it develops a golden color.
The scoring pattern will now be against the hot skillet, allowing that side of the chicken to brown while the flour coating cooks in the butter.
Avoid constantly moving the chicken around during this first stage. Give it enough time to develop color before turning it over.
When to Flip the Chicken
Once the first side is golden, carefully turn the chicken breasts over.
Cook the other side for about 4 minutes.
At this stage, the chicken should be nearly cooked through, but it does not need to reach its final temperature yet.
That is because the chicken will continue cooking when the glaze is added and allowed to simmer.
The original method describes the chicken at this point as being about 10–15 degrees below its final cooking temperature.
Why the Chicken Finishes in the Sauce
One of the useful parts of this recipe is that the chicken does not have to be completely finished before the sauce goes into the skillet.
After the initial searing, the chicken is nearly cooked through. The glaze is then added, and the chicken continues cooking as the sauce simmers.
This means the chicken gets another opportunity to absorb the flavors from the glaze while it finishes cooking.
The sauce also becomes thicker during this stage, so it can coat the chicken instead of remaining watery.
Preparing for the Honey Garlic Glaze
Once the chicken has been seared on both sides, the pan is ready for the next stage.
Keep the chicken in the skillet and add the remaining 1 tablespoon butter.
Then add the 4 minced garlic cloves.
The garlic only needs a brief time in the pan.
Cooking the Garlic
Stir the garlic with the butter and cook briefly, just until it becomes fragrant.
This should only take a short time.
The goal is to bring out the savory garlic aroma before adding the liquid ingredients. There is no need to cook the garlic for a long period.
Once the garlic is fragrant, the pan is ready for the honey, soy sauce, and apple cider vinegar.
Building the Glaze
The glaze is made from three main liquid ingredients:
- 1/3 cup honey or maple syrup
- 1 tablespoon soy sauce
- 1 1/2 tablespoons apple cider vinegar
Add these ingredients to the skillet with the garlic and butter.
Stir them together so the ingredients combine around the chicken.
The honey provides the main sweetness, while the soy sauce brings a salty, savory note. Apple cider vinegar adds acidity, which helps balance the sweetness and richness.
As everything heats together, the sauce begins to change from a thin mixture into a thicker glaze.
Letting the Sauce Thicken
Allow the glaze to simmer for approximately 2–3 minutes.
While it simmers, spoon the sauce over the chicken.
This is an important part of the cooking process because the chicken continues to cook while the sauce reduces and thickens.
Keep spooning the glaze over the chicken as it cooks. This helps keep the surface coated with the sweet and savory mixture.
The sauce should become thicker during this short simmering period.
The chicken is ready when the thickest part reaches 165°F.
Checking the Chicken Before Serving
The thickest part of the chicken breast should reach 165°F before it is removed from the heat.
This is especially useful because chicken breasts can vary in thickness. Rather than relying only on appearance, checking the thickest part gives you a clear indication that the chicken has reached the required temperature.
Once the chicken reaches 165°F, remove it from the heat.
At this point, the skillet should contain a flavorful glaze that can be spooned over the chicken before serving.
Finishing the Chicken
Once the thickest part of each chicken breast reaches 165°F, the chicken is ready to come off the heat.
The glaze should have thickened during the short simmering time, leaving the chicken coated in a glossy mixture of honey, garlic, soy sauce, and apple cider vinegar.
Carefully transfer the chicken to serving plates.
There is no need to scrape all of the sauce out of the skillet at once. Keep the remaining glaze in the pan so you can spoon it over the chicken just before serving.
Add the Final Garnish
The finishing touch is simple: sprinkle fresh chopped chives over the chicken.
The chives add a fresh-looking contrast to the golden chicken and dark, glossy glaze. They also make the finished dish look more complete without requiring any additional cooking.
Spoon some of the extra sauce from the skillet over each chicken breast.
The chicken is best served warm, while the glaze is still glossy and easy to spoon over the top.
What to Serve with Honey Glazed Chicken
Honey glazed chicken breast is flavorful enough to be the main part of a meal without requiring complicated side dishes.
The original recipe suggests serving it with cooked white rice and simple vegetables such as roasted cauliflower.
With White Rice
A bed of cooked white rice is an easy choice for this chicken.
The rice provides a mild base for the sweet and savory glaze. Any extra sauce can also be spooned over the rice, allowing you to make use of the flavorful glaze rather than leaving it behind in the skillet.
For a simple dinner, arrange the rice on the plate, place the glazed chicken alongside or over it, and spoon some additional sauce over the chicken.
With Simple Vegetables
Roasted cauliflower is another suggested pairing.
The chicken already has plenty of flavor from the glaze, so a straightforward vegetable side works well alongside it.
There is no need to make the entire meal complicated. A simple vegetable and rice are enough to turn the chicken into a complete weeknight dinner.
Keeping the Meal Simple
One of the strengths of this recipe is that the main dish does most of the work.
You can keep the rest of the plate uncomplicated:
- Warm cooked white rice
- A simple vegetable side
- Honey glazed chicken
- Extra glaze spooned over the top
This keeps dinner practical while still giving you plenty of flavor.
Can You Use Chicken Thighs Instead?
Yes. The supplied recipe notes that chicken breasts can be replaced with chicken thighs.
Chicken thighs should reach a final temperature of 170–175°F.
The cooking process can still follow the same general idea, but the important difference is the final temperature.
Because chicken thighs and breasts are different cuts, their cooking times can vary. Keep an eye on the chicken as it cooks rather than relying only on the timing given for the breasts.
The glaze can still be added toward the end so the chicken finishes cooking while the sauce simmers.
What About Chicken Tenders?
Chicken tenders can also be used.
They are smaller and cook faster than full chicken breasts, so they require closer attention while cooking.
If using tenders, watch the skillet carefully to make sure they do not overcook.
The recipe’s honey-garlic glaze still provides the same sweet and savory flavor, but the smaller pieces may reach their finished temperature more quickly.
This can be a convenient option when smaller portions or faster-cooking chicken are preferred.
Gluten-Free Option
The recipe includes an easy flour substitution for those who need a gluten-free version.
Instead of all-purpose flour, use cornstarch for gluten-free Honey-Glazed Chicken.
The purpose of the coating remains the same: give the chicken a light coating before it goes into the skillet and help the glaze cling to the cooked chicken.
There is no need to change the rest of the glaze ingredients according to the supplied recipe.
Honey or Maple Syrup?
The recipe gives you a choice between honey or maple syrup.
Honey provides the sweet flavor traditionally associated with this glaze, while maple syrup can be used as an alternative.
Either option works with the garlic, soy sauce, and apple cider vinegar.
This makes the recipe flexible if maple syrup is what you already have available.
Choosing the Vinegar
Apple cider vinegar gives the glaze its tangy element.
The recipe also notes that it can be replaced with:
- Rice wine vinegar
- White vinegar
The vinegar plays an important role because it balances the sweetness of the honey or maple syrup and works with the savory ingredients in the sauce.
If using one of the suggested alternatives, keep the amount specified in the recipe.
A Few Things That Make the Cooking Easier
Even though this is a simple skillet recipe, a few small details can make the process smoother.
Prepare Everything Before the Skillet Gets Busy
The cooking moves quickly once the chicken is in the pan.
It helps to have the following ready before starting:
- Scored chicken breasts
- Salt and black pepper
- Flour for dredging
- Butter
- Minced garlic
- Honey or maple syrup
- Soy sauce
- Apple cider vinegar
- Chopped fresh chives
Having everything nearby means you do not have to step away from the skillet while the chicken is cooking.
Don’t Skip the Scoring
The shallow diamond pattern is one of the most useful preparation steps in this recipe.
It allows the chicken to cook more evenly and gives the glaze more surface area to reach.
Make the cuts deep enough to create the pattern but do not cut completely through the chicken breast.
Keep the Flour Coating Light
The flour is meant to lightly coat the chicken.
After dredging, shake off the excess before putting the chicken into the skillet.
A heavy coating is unnecessary for this recipe.
Watch the Garlic
Garlic only needs a brief time in the pan before the glaze ingredients are added.
Once it becomes fragrant, move on to the honey, soy sauce, and apple cider vinegar.
This keeps the garlic from spending too much time cooking before the liquid ingredients are added.
Getting the Sauce Just Right
The glaze does not need a long cooking time.
Once the honey, soy sauce, and apple cider vinegar are in the pan, let them simmer for approximately 2–3 minutes.
As the mixture cooks, spoon it over the chicken.
The sauce should become thicker during this time. This is what gives the chicken its characteristic glazed appearance.
If the sauce is still thin at first, give it time to simmer. If the chicken reaches 165°F before the full simmering time is needed, remove it from the heat rather than continuing to cook the chicken unnecessarily.
The key is to finish the chicken properly while allowing the sauce to develop its thicker consistency.
How to Serve the Chicken
Once the chicken has been removed from the heat, transfer it to plates while warm.
Spoon the remaining glaze over each breast.
Finish with chopped fresh chives.
For a simple complete meal, serve the chicken with cooked white rice and roasted cauliflower or another simple vegetable side mentioned in the supplied recipe.
The extra glaze can be spooned over the rice as well.
Storing Leftover Honey Glazed Chicken
- If there are leftovers, allow the chicken to cool to room temperature before storing it.
- Transfer the chicken to an airtight container and place it in the refrigerator.
- The recipe states that refrigerated leftovers can be kept for 3–4 days.
- Keeping the chicken sealed helps maintain its moisture and keeps it ready for another meal.
- The glaze can be stored with the chicken so it can be reheated together.
Freezing the Chicken
The recipe also provides a freezer option.
Honey glazed chicken can be stored in the freezer for up to 3 months.
When you are ready to use frozen chicken, thaw it in the refrigerator overnight.
This gives you a simple way to prepare the chicken ahead of time and save leftovers for another meal.
Reheating Leftovers
To reheat the chicken, warm it in a skillet until it reaches 165°F.
Because the glaze can become thicker as the chicken cools, the recipe suggests adding a splash of water while reheating.
The water helps loosen the sauce and adds moisture as the chicken warms.
Keep heating until the chicken is warmed through and reaches 165°F.
Once reheated, spoon the loosened glaze over the chicken before serving.
How to Keep Leftovers From Drying Out
Chicken breast can lose moisture when reheated, so the sauce is particularly useful here.
Instead of reheating the chicken without anything in the pan, add a splash of water to help loosen the glaze.
Warm the chicken in a skillet rather than simply heating it until it becomes dry.
The goal is to warm the chicken through while keeping some of the moisture from the glaze around it.
Why the Glaze Works So Well
The sauce has a straightforward combination of flavors, but each ingredient has a purpose.
Honey or maple syrup brings sweetness.
Soy sauce adds salty, savory flavor.
Apple cider vinegar contributes acidity and helps balance the sweetness.
Garlic provides a strong savory note.
Butter adds richness and helps bring the sauce together.
Together, these ingredients create a glaze that works especially well with a lightly floured, golden-brown chicken breast.
Keeping the Chicken Juicy
The chicken should not be left cooking for longer than necessary once it has reached the proper final temperature.
The scoring method helps the chicken cook more evenly, while the sauce provides additional moisture and flavor during the final stage.
The chicken is first seared and then finished in the glaze. This gives the outside a golden surface while allowing the sauce to coat the chicken as it finishes cooking.
Checking the thickest part of the breast is the best way to know when it is ready.
Before You Start Cooking
A quick preparation check can make the whole recipe easier.
Chicken
- Use 3 medium chicken breasts.
- Aim for approximately 1 1/2 lbs total.
- Score the tops in a shallow diamond pattern.
- Season both sides with salt and black pepper.
- Lightly dredge in flour.
- Shake off excess flour.
Skillet
- Use a large skillet.
- Cook over medium heat.
- Melt 3 tablespoons butter before adding the chicken.
- Swirl the pan as the butter melts.
Glaze
Have these ingredients ready before you start the sauce:
- Remaining 1 tablespoon butter
- 4 minced garlic cloves
- 1/3 cup honey or maple syrup
- 1 tablespoon soy sauce
- 1 1/2 tablespoons apple cider vinegar
Once these ingredients are ready, the final stage comes together quickly.
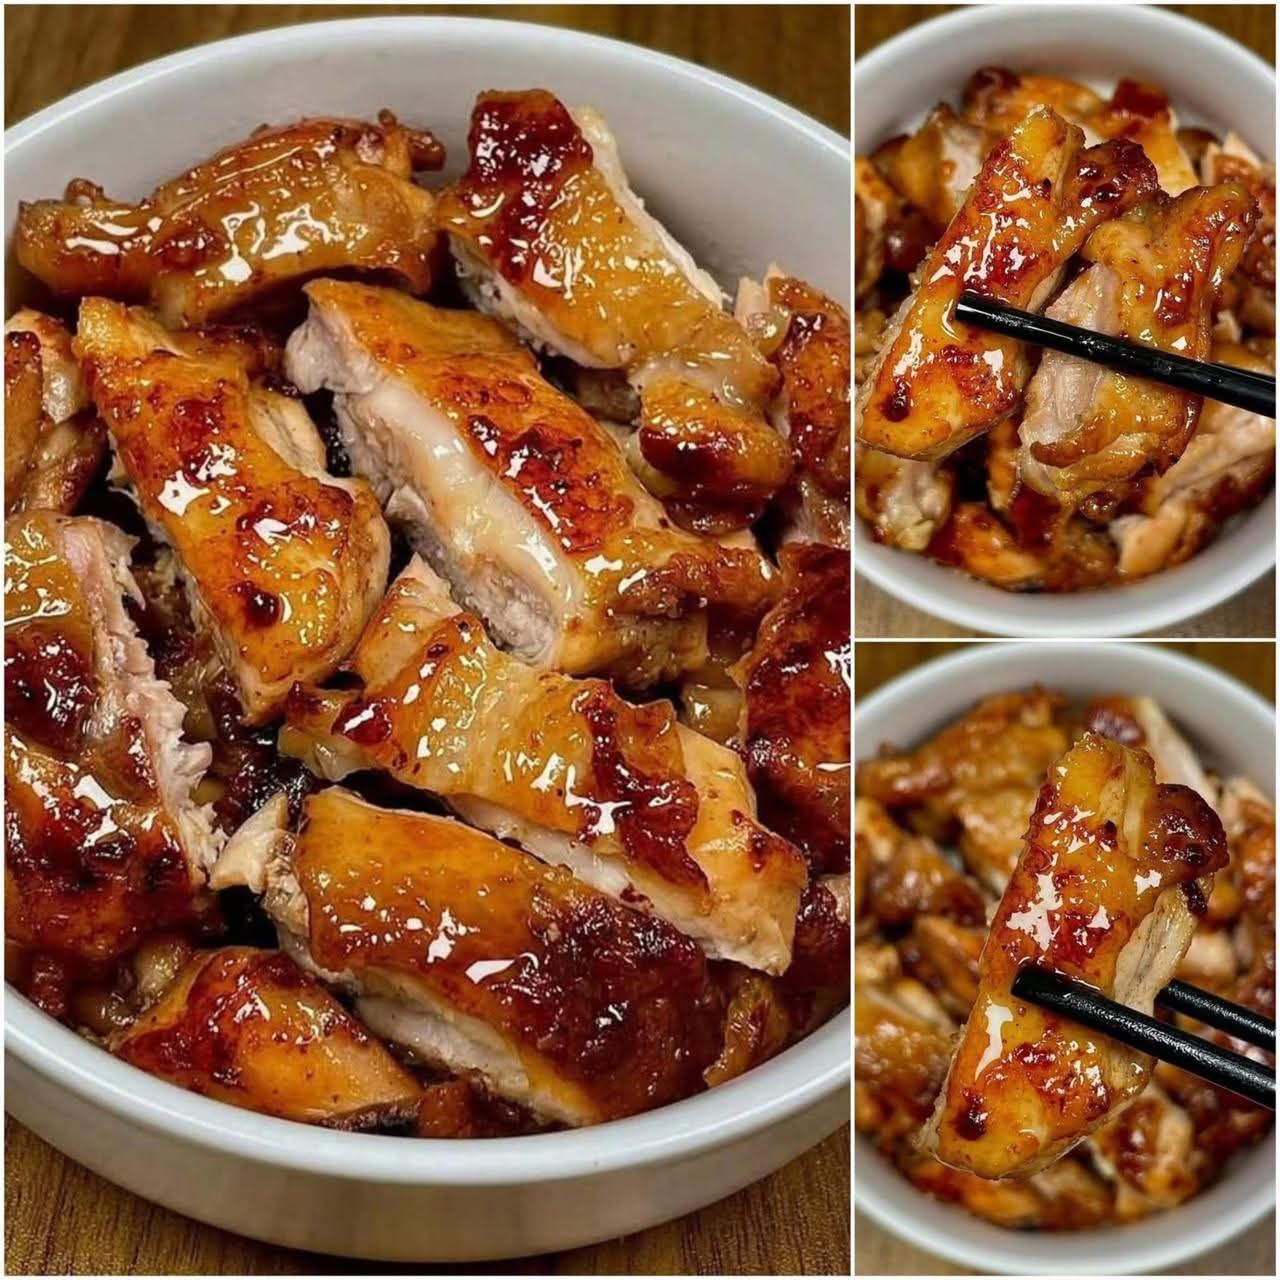
Honey Glazed Chicken
 Recipe by admin1
Sticky, sweet, savory, and quick to prepare, this skillet chicken breast is finished with a honey-garlic glaze and served warm with extra sauce spooned over the top.
4
servings5
minutes10
minutes416
kcalIngredients
- For the Chicken
3 chicken breasts, medium, about 1 1/2 lbs
Salt and black pepper, to taste
1/4 cup all-purpose flour, or cornstarch for gluten-free
4 Tbsp butter, divided (or 3 tbsp olive oil)
- For the Honey Glaze
4 garlic cloves, minced
1 1/2 Tbsp apple cider vinegar
1 Tbsp soy sauce
1/3 cup honey or maple syrup
Fresh chives, chopped for garnish
Directions
- Score the Chicken
Place the chicken breasts on a cutting board.
Using a sharp knife, make shallow criss-cross cuts across the top of each chicken breast to create a diamond pattern. Cut approximately one-third of the way through the meat without cutting all the way through. - Season and Dredge
Season both sides of the chicken with salt and black pepper.
Place the flour on a plate and lightly dredge each chicken breast in it. Press the flour gently into the scored areas, then shake off any excess. - Sear the Chicken
Heat a large skillet over medium heat.
Add 3 tablespoons of butter and swirl the pan as the butter melts.
Place the chicken in the skillet with the scored side facing down.
Cook for 5–6 minutes, or until the first side is golden.
Flip the chicken and cook for another 4 minutes, or until it is nearly cooked through. - Add the Garlic
Add the remaining 1 tablespoon of butter to the skillet along with the minced garlic.
Cook briefly, stirring, until the garlic becomes fragrant. - Make the Honey Glaze
Add the honey or maple syrup, soy sauce, and apple cider vinegar to the skillet.
Stir the ingredients together and allow the sauce to simmer for 2–3 minutes.
While the sauce cooks, spoon it repeatedly over the chicken so the breasts become coated with the glaze. - Check the Chicken
Continue cooking until the thickest part of the chicken reaches 165°F.
Once it reaches the proper temperature, remove the skillet from the heat. - Garnish and Serve
Transfer the chicken to serving plates.
Spoon the extra honey glaze over the top and sprinkle with freshly chopped chives.
Serve warm.
Notes
- Score the chicken only about one-third of the way through.
- Keep the flour coating light and shake off excess flour.
- Swirl the skillet while melting the butter to help prevent splattering.
- Have the glaze ingredients ready before starting the final cooking stage.
- Spoon the glaze over the chicken while it simmers.
- Remove the chicken from the heat once the thickest part reaches 165°F.
- Keep extra sauce with the chicken when storing leftovers.
- Serve the chicken warm with the extra glaze spooned over the top.