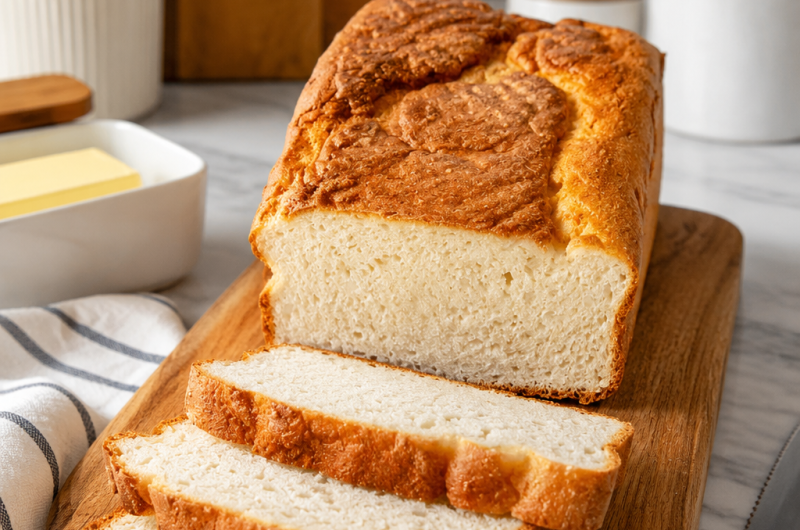
Finding a homemade bread that fits into a low-carb lifestyle can be challenging, especially when you want something that feels like traditional bread. After trying different recipes in my own kitchen, this keto bread has become one I come back to again and again. It has a soft texture, a light crumb, and a mild flavor that works well with both sweet and savory toppings. Whether I’m making breakfast toast, a quick sandwich, or serving it alongside soup, this loaf always turns out satisfying.
One of my favorite things about this recipe is how simple it is. It uses only a handful of ingredients, most of which are common in keto baking. Even though it doesn’t contain wheat flour or gluten, the finished loaf has a pleasant chew and slices beautifully once cooled. It also toasts well, making it a great choice for everyday meals.
Unlike many low-carb breads that feel heavy or dry, this version stays soft and airy. The secret is taking a little extra care when preparing the batter, especially when whipping and folding the egg whites. Those simple steps create a lighter loaf without making the process difficult.
If you’re looking for a bread recipe that fits a keto lifestyle without sacrificing texture, this homemade loaf is worth adding to your regular baking routine.
Why This Keto Bread Popular
There are many reasons I enjoy making this recipe, but these are the ones that stand out every time I bake it.
Soft and Light Texture
Many gluten-free breads can become dense or crumbly, but this loaf stays surprisingly soft. Every slice has a light texture that feels much closer to traditional white bread than most keto alternatives.
Perfect for Everyday Meals
This bread is versatile enough for almost any meal. I often use it to prepare sandwiches, toast it for breakfast, or enjoy it with butter while it’s still slightly warm.
Simple Ingredients
Although keto baking sometimes requires specialty products, this recipe keeps things fairly straightforward. The ingredients work together to create a loaf with good structure while keeping carbohydrates low.
Great for Meal Planning
I usually bake one loaf at the beginning of the week and keep it ready for quick breakfasts and lunches. It freezes well too, making it convenient whenever I want homemade bread without baking another loaf.
What Makes This Recipe Different?
One thing I appreciate about this bread is its balanced texture. Some keto breads rely heavily on eggs and develop a strong egg flavor, while others become dry because of too much coconut flour. This recipe combines almond flour with a smaller amount of coconut flour, creating a better balance between softness and structure.
Another important feature is the whipped egg whites. Instead of simply mixing everything together, the egg whites are beaten until stiff and folded gently into the batter. This extra step creates tiny air pockets that make the bread feel lighter.
The result is a loaf that’s sturdy enough for sandwiches but still tender enough to enjoy on its own.
Ingredients
Each ingredient has an important role in creating the finished loaf.
Almond Flour
Almond flour forms the main base of this bread. Using finely ground blanched almond flour produces the smoothest texture. Coarser almond meal may create a grainy loaf, so I always choose finely milled almond flour whenever possible.
Coconut Flour
Only a small amount of coconut flour is needed. It absorbs moisture and helps strengthen the bread without making it overly dense.
Baking Powder
Fresh baking powder provides lift during baking and helps create a lighter texture.
Unsalted Butter
Melted butter adds richness and keeps the loaf moist. If I need a dairy-free version, I simply replace it with the same amount of melted coconut oil.
Egg Whites
Egg whites are one of the most important ingredients in this recipe. They provide structure, help the loaf rise, and create the airy texture that makes this bread so enjoyable.
Sea Salt
A small amount of salt balances the flavors and enhances the overall taste of the bread.
Optional Ingredients
Although the basic recipe works well on its own, I usually include the optional ingredients because they improve both flavor and texture.
Sweetener
A small amount of keto-friendly sweetener helps balance the flavors. It doesn’t make the bread sweet but creates a more neutral taste similar to traditional sandwich bread.
Xanthan Gum
Adding a little xanthan gum improves the chewiness of the finished loaf and helps each slice hold together better.
Cream of Tartar
When whipping the egg whites, cream of tartar helps stabilize them, making it easier to achieve stiff peaks. This simple ingredient can make the bread more consistent, especially for beginners.
Equipment Needed
Before starting, I like to gather everything so the process goes smoothly.
You’ll need:
- Food processor
- Large mixing bowl
- Hand mixer or stand mixer
- Rubber spatula
- Loaf pan
- Parchment paper
- Measuring cups and spoons
- Cooling rack
Having everything ready before mixing helps prevent the whipped egg whites from losing volume while searching for equipment.
Before You Begin
- There are a few simple preparations that make a big difference in the final result.
- First, allow the egg whites to come to room temperature. They whip much faster and create more stable peaks than cold egg whites.
- Next, line the loaf pan with parchment paper, leaving extra paper hanging over the sides. This makes removing the bread much easier after baking.
- Finally, preheat the oven before mixing the batter. Once the egg whites are folded in, it’s best to bake the bread without delay so the batter keeps as much air as possible.
- Spending just a few extra minutes preparing these details helps produce a loaf that rises better, bakes more evenly, and has the soft texture that makes this keto bread a favorite in my kitchen.
Step-by-Step Instructions
Once everything is measured and ready, making the bread becomes much easier. I like to work slowly during the mixing stage because preserving as much air as possible is what gives the loaf its soft texture.
Step 1: Prepare the Oven and Pan
Before mixing the ingredients, I preheat the oven to 325°F (163°C). While the oven heats, I line a small to medium loaf pan with parchment paper, allowing a little extra paper to hang over the sides. This makes lifting the bread out of the pan much easier after baking.
Having the pan prepared ahead of time means I can transfer the batter immediately once it is mixed.
Step 2: Mix the Dry Ingredients
Into a food processor, I add:
- Almond flour
- Coconut flour
- Baking powder
- Sea salt
- Sweetener (if using)
- Xanthan gum (if using)
I pulse everything several times until the ingredients are evenly combined.
Next, I pour in the melted butter and pulse again until the mixture becomes slightly crumbly. At this stage, the mixture should not look like a smooth dough. A coarse texture is completely normal.
Step 3: Whip the Egg Whites
This is the most important step in the entire recipe.
Using a clean mixing bowl, I add the egg whites along with the cream of tartar if I’m using it.
With a hand mixer or stand mixer, I beat the egg whites until stiff peaks form.
To check if they are ready, I simply lift the beaters. The peaks should stand upright without falling over. Another easy test is carefully tilting the bowl. Properly whipped egg whites should stay firmly in place.
Taking enough time here makes a noticeable difference in how light the finished loaf becomes.
Step 4: Combine the Mixtures
Instead of adding all the whipped egg whites at once, I gently fold only half of them into the food processor mixture.
I pulse just a few times until everything is barely combined.
The goal is not to make the batter perfectly smooth. Overmixing at this stage removes the air that was created while whipping the egg whites.
Step 5: Fold Carefully
I transfer the mixture from the food processor into the bowl containing the remaining whipped egg whites.
Using a large rubber spatula, I gently fold everything together.
Rather than stirring, I slowly lift the batter from the bottom and fold it over the top until no white streaks remain.
This step requires patience, but it is worth taking the extra time. Gentle folding keeps the batter light and airy.
Step 6: Fill the Pan
I spoon the batter into the prepared loaf pan and smooth the surface with the spatula.
Before baking, I gently push the batter slightly toward the center so the loaf develops a nicely rounded top as it rises.
Baking the Bread
- The bread bakes in two stages.
- First, I bake it uncovered for about 40 minutes.
- Once the top turns a beautiful golden brown, I loosely cover it with aluminum foil.
- Then I continue baking for another 30 to 45 minutes.
- Covering the loaf prevents the top from becoming too dark while allowing the center to finish cooking completely.
How I Know It’s Done
- Many breads can be checked with a toothpick, but this recipe is a little different.
- Instead, I gently press the center of the loaf.
- If it feels firm and doesn’t make a soft squishing sound, it’s ready.
- For even better accuracy, I check that the internal temperature reaches 200°F.
- Once baked, I leave the bread in the pan for several minutes before transferring it to a cooling rack.
- Cooling completely before slicing is essential because the inside continues setting as it cools.
Helpful Baking Tips
A few small habits have helped me achieve consistent results every time.
- Use room-temperature egg whites.
- Measure ingredients carefully.
- Avoid overmixing after adding the egg whites.
- Always fold instead of stirring.
- Bake until the center is fully cooked.
- Let the bread cool completely before slicing.
- Store leftovers properly to keep the texture fresh.
Common Mistakes to Avoid
Underbaking
Removing the bread too early is one of the biggest reasons the center becomes wet or collapses.
Breaking the Egg Whites
Mixing too aggressively removes the air that gives the loaf its fluffy texture.
Cold Egg Whites
Cold egg whites are harder to whip and usually produce less volume.
Too Much Flour
Adding extra almond or coconut flour changes the balance of the recipe and can make the loaf dry.
Serving Ideas
This bread is incredibly versatile, which is one reason I bake it so often.
Some of my favorite ways to enjoy it include:
- Toasted with butter.
- Spread with nut butter.
- Topped with mashed avocado.
- Used for grilled cheese sandwiches.
- Filled with turkey, lettuce, and mayonnaise.
- Served with chicken salad or egg salad.
- Paired with warm soup.
- Served alongside a fresh green salad.
- Used for French toast.
- Enjoyed with olive oil or chimichurri.
Its mild flavor pairs well with almost any topping.
Storage
- After the loaf has cooled completely, I store it in an airtight container in the refrigerator.
- Unlike regular bread, keto bread keeps better when chilled.
- It stays fresh for about one week.
- Whenever possible, I slice only the pieces I need rather than cutting the entire loaf at once.
Freezing
- For longer storage, I freeze individual slices.
- I place parchment paper between each slice before storing them inside a freezer-safe bag.
- This makes it easy to remove only the number of slices I need.
- The bread freezes well for up to 6 months.
Reheating
- The easiest way to refresh frozen or refrigerated slices is in the toaster.
- The heat restores the soft interior while giving the outside a light crispness.
- If preferred, slices can also be warmed in the oven for a few minutes until heated through.
Frequently Asked Questions
Can I make this bread dairy-free?
Yes. Replace the butter with the same amount of melted coconut oil.
Why did my bread sink?
This usually happens when the bread has not baked long enough or the egg whites lost too much air during mixing.
Can I skip the xanthan gum?
Yes. The bread will still bake successfully, although the texture may be slightly less chewy.
Do I have to use the sweetener?
No. It simply balances the flavor and does not make the bread noticeably sweet.
Is this bread suitable for sandwiches?
Absolutely. The slices are sturdy enough to hold fillings while remaining soft and tender.
Can I toast it?
Yes. Toasting enhances both the flavor and texture, making it perfect for breakfast or snacks.
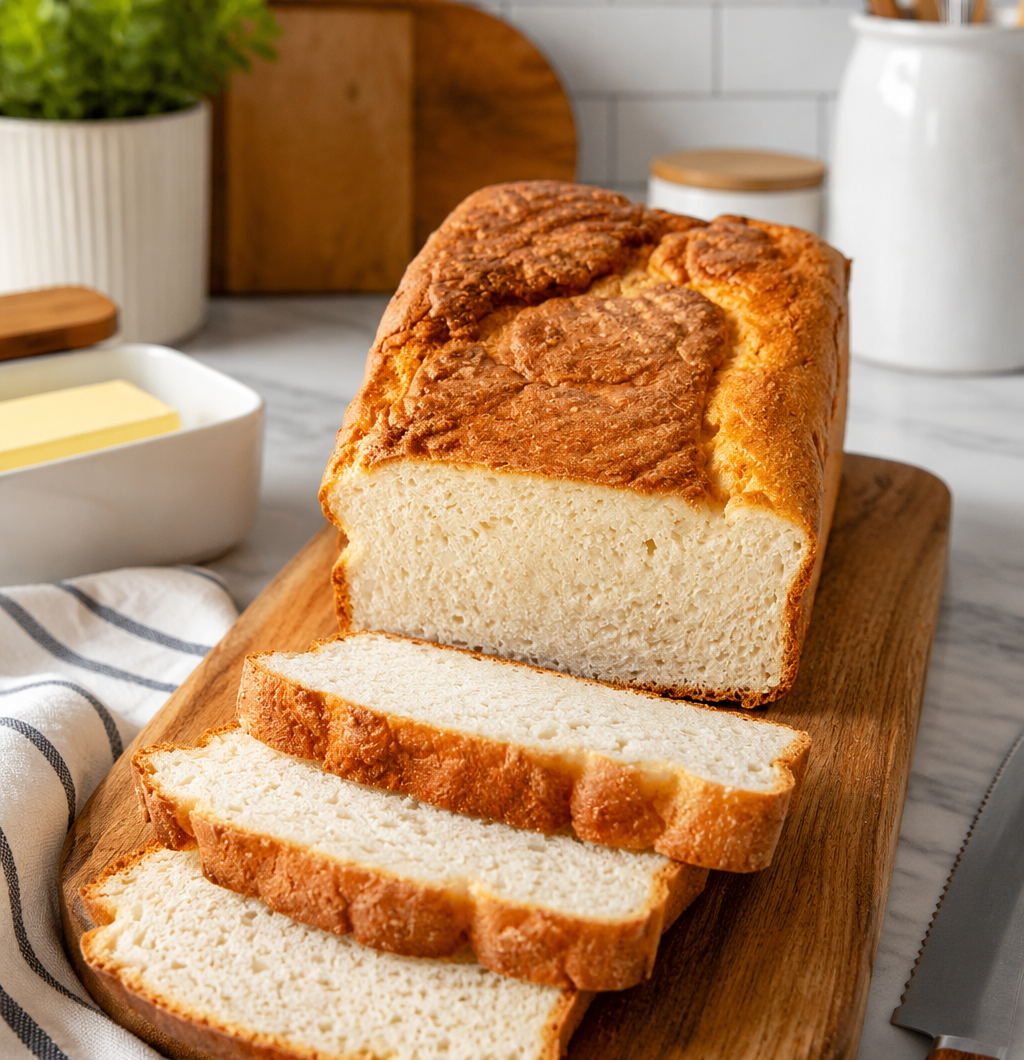
The Best Homemade Keto Bread Recipe | Low Carb & Gluten-Free
This homemade keto bread is soft, light, and perfect for everyday meals. Made with simple low-carb ingredients, it’s ideal for sandwiches, toast, or serving alongside your favorite soups and salads.
1
servings10
minutes1
hour10
minutes82
kcalBasic Ingredients
1 cup Wholesome Yum Blanched Almond Flour
1/4 cup Wholesome Yum Coconut Flour
2 tsp Baking powder
1/4 tsp Sea salt
1/3 cup Unsalted butter (or 5 tbsp + 1 tsp; measured solid, then melted; can use coconut oil for dairy-free)
12 large Egg whites (~1 1/2 cups, at room temperature)
- Optional Ingredients
1 tbsp Besti Monk Fruit Allulose Blend (can use any sweetener or omit)
1/4 tsp Xanthan gum (for texture – omit for paleo)
1/4 tsp Cream of tartar (to more easily whip egg whites)
Instructions
- Preheat the oven to 325°F (163°C) and line a loaf pan with parchment paper.
- Pulse the almond flour, coconut flour, baking powder, sea salt, and optional sweetener and xanthan gum in a food processor. Add melted butter and pulse until crumbly.
- Beat the egg whites with cream of tartar (if using) until stiff peaks form.
- Fold half of the egg whites into the flour mixture, then gently fold everything into the remaining egg whites.
- Transfer the batter to the prepared loaf pan and smooth the top.
- Bake for 40 minutes, cover loosely with foil, and continue baking for 30–45 minutes, or until the loaf is firm and the internal temperature reaches 200°F (93°C).
- Cool completely before removing from the pan and slicing.
Notes
- Use room-temperature egg whites for the best volume.
- Fold the egg whites gently to keep the bread light.
- Allow the loaf to cool completely before slicing.
- Store in the refrigerator for up to 1 week or freeze individual slices for up to 6 months.
Nutrition Facts
- Fat: 7g
- Carbohydrates: 1g
- Fiber: 2g
- Sugar: 1g
- Protein: 4g