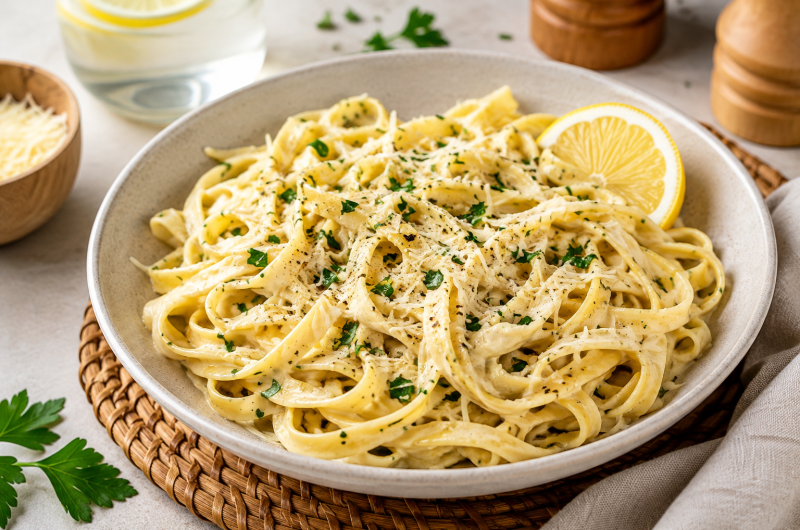
Homemade gluten free pasta is much easier to make than it might seem. The dough uses only a few basic ingredients, and once everything is mixed together, the main thing to focus on is getting the right texture. A good gluten free pasta dough should feel smooth and supple while still being firm enough to handle. It should not be sticky, but it also should not feel so dry that it cracks or crumbles when you work with it.
This dough can be used for several different pasta shapes. It works particularly well for simple shapes such as tagliatelle, fettuccine and pappardelle, but the same dough can also be rolled thin enough for ravioli, tortellini and lasagna.
What goes into the dough
The main ingredients are:
- 200 g (1⅔ cups) plain gluten free flour blend, plus extra for kneading and dusting the pasta
- 1 tsp xanthan gum
- 3 US large/UK medium eggs
- ½ tbsp olive oil, optional
The gluten free flour blend forms the base of the dough. Different blends can absorb moisture differently, so the finished dough may occasionally need a small adjustment. That does not mean the recipe has gone wrong. If the dough feels too dry, a little extra egg can help bring everything together. If it feels too soft, a small amount of additional flour can make it easier to handle.
Xanthan gum is important here because there is no gluten in the flour to provide elasticity. It helps the dough hold together and gives it enough flexibility to be rolled into thin sheets without immediately falling apart. If the gluten free flour blend already contains xanthan gum, use only ½ teaspoon rather than the full amount.
The eggs do more than simply bind the ingredients. The yolks add richness, while the whites contribute to the flexibility needed when rolling the dough. The olive oil is optional and makes the finished dough feel a little smoother.
Mixing everything together
Start by placing the gluten free flour blend and xanthan gum in a bowl. Whisk them together thoroughly so the xanthan gum is evenly distributed throughout the flour.
Make a well in the middle of the dry ingredients. Add the eggs and, if using it, the olive oil.
Begin mixing until the flour and egg start coming together. At first, the mixture will look rough and uneven. That is completely normal. Keep working it until there are no large patches of dry flour and the mixture begins to form a shaggy dough.
At this stage, resist the temptation to add a lot of extra flour or egg all at once. Gluten free flour blends can behave differently, so it is better to judge the dough by how it feels.
Kneading the gluten free dough
Lightly flour the work surface and turn the dough out onto it. Knead the dough for about 2–3 minutes.
With ordinary wheat pasta, kneading is partly about developing gluten. That is not the goal here because this is gluten free pasta. Instead, kneading helps distribute the ingredients evenly, removes dry flour pockets and gives the dough a smooth consistency.
The dough should eventually form a smooth ball.
Look for these signs:
- It should feel fairly firm.
- It should not feel excessively dry.
- It should form a smooth ball without breaking apart.
- It should not crumble when pressed.
- It should not be sticky against your fingers.
- The surface should look reasonably smooth rather than rough and floury.
If the dough feels crumbly or refuses to come together, it may simply need a little more moisture. This can happen when the particular gluten free flour blend being used absorbs more liquid.
To correct a dry dough, whisk up a whole egg and add it gradually. Use only as much as needed to bring the dough to the right consistency.
If the dough is too wet or soft, add a small amount of additional gluten free flour. Work it in gradually rather than adding a large amount at once.
The goal is a dough that is easy to handle and strong enough to survive the rolling process.
Dividing the dough
Once the dough is smooth and properly formed, divide it into four equal pieces. These portions will eventually become four nests of pasta.
Only work with one piece at a time. Gluten free dough can dry out while it is sitting uncovered, so keep the remaining portions protected.
Wrap the unused pieces in plastic wrap/cling film, or cover them with a damp tea towel. This simple step makes a noticeable difference. If the surface of the dough dries out, it can become more difficult to roll and may develop cracks around the edges.
Preparing the first piece
Take one portion and place it on a lightly floured work surface. Use a rolling pin to flatten it into a long oval or rough rectangle.
The first few passes are not really about getting the final thickness. Instead, the aim is to create a smooth sheet that will pass through the pasta machine evenly.
Fold the flattened dough into thirds, just as you would fold a letter. Rotate it by 90 degrees so that the open ends face toward and away from you.
Roll it out again into a long rectangle. Keep it only slightly thicker than the widest setting of the pasta machine. This makes it easier to feed the dough through without forcing it.
If using the KitchenAid pasta roller attachment, the widest setting is 1.
Pass the dough through this widest setting.
The sheet may not look perfectly smooth after the first pass. That is expected. Fold it into thirds again, rotate it 90 degrees and use the rolling pin to make another long rectangle.
Again, keep the dough only slightly thicker than the widest pasta-machine setting.
Pass it through setting 1 for a second time.
After these passes, the dough should look much smoother and more even. The edges may still be a little rough or craggy, and you may notice a few tiny cracks. There is no need to worry about small imperfections.
For a neater sheet, use a sharp knife or pizza cutter to trim away the rough edges.
Rolling the sheet thinner
Once the first sheet is smooth, it is ready to be rolled to the thickness needed for the pasta shape.
Move to the next narrower setting, which is 2 on the KitchenAid pasta roller. Pass the pasta sheet through this setting twice.
Continue moving through the narrower settings, passing the sheet through each setting twice.
A light dusting of flour can be used whenever the pasta begins to feel sticky or difficult to handle. Do not over-flour it, though. The purpose is simply to keep the sheet moving smoothly through the rollers.
Passing the pasta through each setting twice helps create a sheet that is smooth and evenly rolled rather than one that changes thickness from one section to another.
For fettuccine, tagliatelle or pappardelle, a final setting of 4 works well. If a thinner sheet is wanted for ravioli or tortellini, continue to setting 5.
Because the dough is gluten free, it will not have quite the same elasticity as traditional wheat pasta. You may see a tiny crack along an edge from time to time. As long as the sheet remains intact and can be handled normally, there is no need to start over.
A little rustic character is perfectly fine. The important thing is that the pasta sheet is strong enough to cut, shape and cook.
Once the pasta sheet has been rolled to the thickness you want, the hardest part is done. From here, it is simply a matter of choosing a shape, cutting the pasta and deciding whether to cook it right away or save it for later.
For a first batch, simple shapes are the easiest place to start. Tagliatelle, fettuccine and pappardelle do not require complicated shaping, and they are especially forgiving when making gluten free pasta at home.
Choosing a pasta shape
The rolled sheet can be turned into several types of pasta. A knife works perfectly well if a pasta machine is not being used for cutting.
For tagliatelle, fettuccine or pappardelle, simply cut the sheet into strips of the desired width.
A pasta machine with a cutting attachment can also be used. Feed the sheet through the appropriate cutter and let the strips fall onto the work surface.
If using a knife, make sure it is sharp. Clean, steady cuts will give the pasta more even edges and help the individual strands cook at a similar rate.
There is no need to make every strand absolutely identical. Homemade pasta naturally has some variation, and that is part of its appeal.
Preventing the pasta from sticking
Fresh pasta can stick together surprisingly quickly, especially after it has been cut. Give the pasta a generous dusting of extra gluten free flour.
Gently toss the strands so that the flour reaches the surfaces that might otherwise stick together.
Once the pasta has been dusted, gather it loosely into nests. Avoid pressing the nests together too firmly. Keeping them loose makes it easier to separate the pasta when it is time to cook.
At this point, the pasta can either go straight into boiling water or be stored.
Cooking fresh gluten free pasta
When cooking the pasta immediately, bring a pot of water to a full boil. Add a generous pinch of salt.
Place the fresh pasta into the boiling salted water and cook for approximately 4–6 minutes, depending on the texture preferred.
Fresh gluten free pasta can cook fairly quickly, so it is worth checking it rather than relying only on the clock. The exact cooking time can vary depending on the thickness of the pasta and the shape being cooked.
If the pasta has been rolled particularly thin, it may need less time. Thicker strands can take a little longer.
Once cooked, the pasta is ready to serve with whatever sauce or toppings are being prepared alongside it.
Handling the pasta while cooking
Because this is homemade gluten free pasta, it is worth treating the strands gently. Put them into the boiling water carefully and avoid overcrowding the pot.
The flour used for dusting the pasta helps prevent the uncooked strands from sticking together, but once the pasta enters the water, the pieces should have enough room to move freely.
If making several nests at once, cook them in a suitable amount of boiling water rather than packing too much pasta into a small pot.
The finished pasta should be tender while still having enough texture to hold its shape. Fresh pasta has a different feel from dried pasta, so checking a piece near the end of the cooking time is the simplest way to decide when it is ready.
Keeping fresh pasta in the refrigerator
If the pasta is not going to be cooked immediately, it can be stored in the refrigerator for up to one day.
Before storing it, make sure the pasta is generously dusted with flour so the strands do not stick together. Place the pasta into an airtight container and refrigerate it.
The flour is particularly important here because freshly cut pasta contains moisture. Without enough flour between the strands, the pieces can stick together and become difficult to separate later.
When you are ready to cook the refrigerated pasta, separate the nests gently and place the pasta into boiling salted water.
Freezing homemade gluten free pasta
For longer storage, the pasta can be frozen for up to one month.
Start by dusting the pasta generously with flour. Arrange the pasta on a lightly floured baking sheet in a single layer.
Place the baking sheet in the freezer for approximately 1 hour, or until the pasta has hardened.
Once the pieces are firm, transfer them to a freezer (Ziplock) bag and return them to the freezer.
Freezing the pasta individually first helps keep the pieces from sticking together in one large mass. Once frozen, the pasta can be stored more conveniently in the bag.
There is no need to thaw the frozen pasta before cooking it. Put it into boiling salted water while still frozen.
Frozen pasta will usually need around 1–2 minutes longer to cook than fresh pasta.
Why drying this pasta is not recommended
It might seem convenient to hang homemade pasta somewhere and let it dry completely, but this particular dough contains a lot of eggs and therefore has a considerable amount of moisture.
Improperly dried and stored pasta can become mouldy. For that reason, it is better to avoid treating this pasta like a dry commercial pasta.
The simplest choices are:
- Cook the pasta immediately.
- Keep it in an airtight container in the refrigerator for up to one day.
- Freeze it for up to one month.
These options make it much easier to prepare the pasta ahead without relying on a long drying process.
A few things to keep in mind
The consistency of the dough is one of the most important parts of the whole recipe. Gluten free flour blends do not all behave exactly the same way, so the amount of moisture the flour absorbs can vary.
If the dough is dry and crumbly, add extra egg gradually.
If it is too soft or wet, work in a little more flour.
If the pasta sheet develops a tiny crack along the edge, do not worry unless the crack becomes large enough to affect the sheet. Gluten free dough does not have the same stretch as wheat-based pasta, so small imperfections are normal.
Another useful habit is to keep the dough portions covered while working. Only expose the piece currently being rolled, and keep the remaining portions wrapped or covered with a damp tea towel.
When rolling, flour the work surface lightly and dust the pasta as needed. Too much flour can make the dough unnecessarily dry, while too little can cause sticking.
Rolling by hand
A pasta machine is convenient, but it is not essential. The dough can also be rolled with a rolling pin.
Work with one portion at a time and roll it gradually until you have a long, thin sheet. Folding the dough into thirds, rotating it 90 degrees and rolling it again helps create a smoother sheet during the early stages.
Continue rolling until the dough reaches the thickness needed for the shape being made.
For simple pasta strips, aim for a thin but manageable sheet. For filled pasta such as ravioli or tortellini, the sheet can be rolled thinner.
The same principle applies whether using a machine or rolling pin: keep the dough smooth, work patiently and prevent unused dough from drying out.
Finishing the batch
Once all four portions have been rolled and cut, the pasta can be shaped into nests and either cooked or stored.
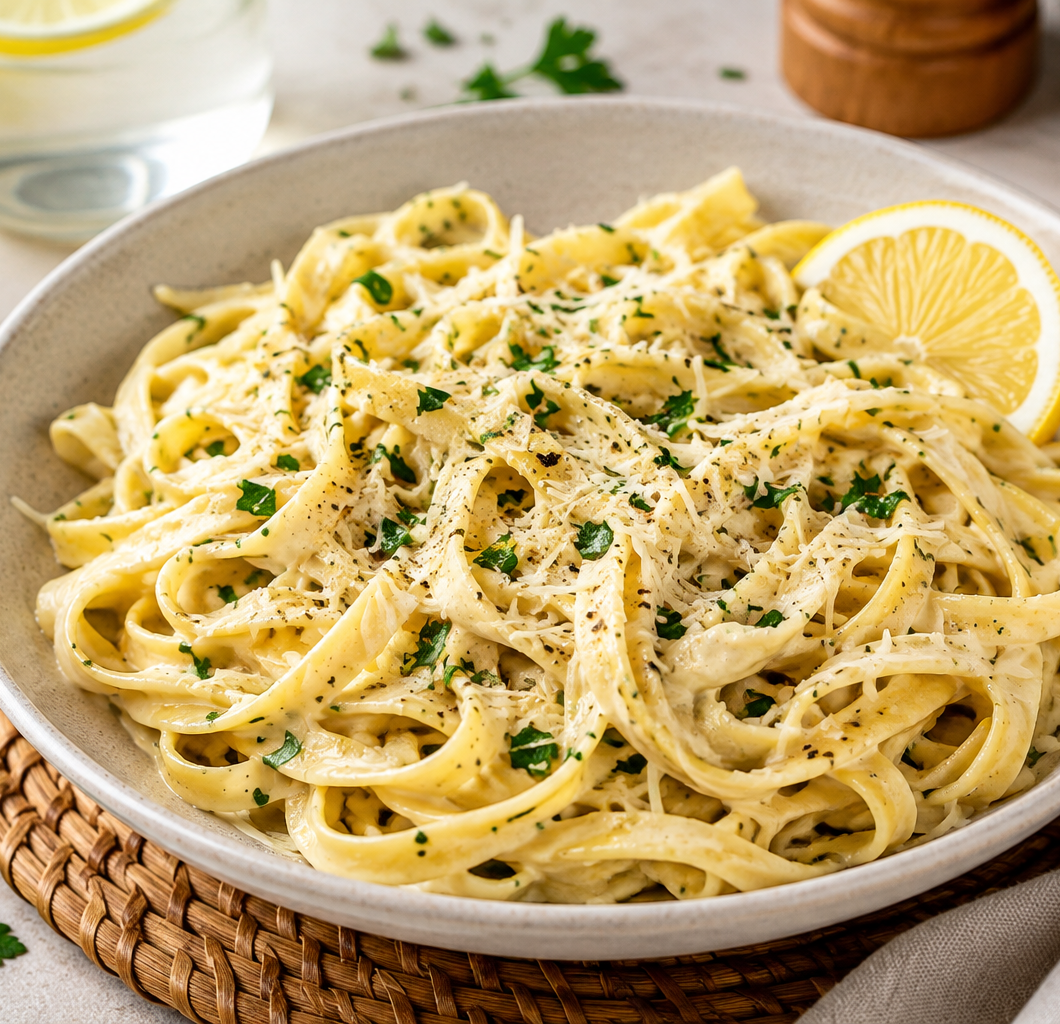
The finished quantity is four 2½ oz (70 g) nests of gluten free tagliatelle or pappardelle, enough to serve approximately 2–4 people, depending on appetite.
The process is straightforward once the first sheet has been rolled. The dough comes together quickly, and the combination of flour, xanthan gum and eggs gives it enough structure to be rolled into useful pasta sheets without wheat flour.
The most important thing is not to chase perfection. A slightly uneven edge or a tiny crack does not prevent the pasta from being delicious. As long as the dough is smooth, firm, flexible enough to roll and not sticky, it is ready to go.
With the pasta cut and dusted, all that remains is to cook it in salted boiling water for about 4–6 minutes, or freeze it for later use.
Homemade Gluten Free Pasta
 Recipe by admin1
This homemade gluten free pasta uses a simple combination of gluten free flour blend, xanthan gum and eggs to create a smooth pasta dough that can be rolled by hand or with a pasta machine. The dough can be used for tagliatelle, fettuccine, pappardelle, ravioli, tortellini and lasagna.
The recipe makes four 2½ oz (70 g) nests of gluten free tagliatelle or pappardelle, serving approximately 2–4 people.
4
servings30
minutes5
minutes247
kcalIngredients
200 g (1⅔ cups) plain gluten free flour blend, plus extra for kneading and dusting the pasta
1 tsp xanthan gum
If the gluten free flour blend already contains xanthan gum, use only ½ teaspoon.3 US large/UK medium eggs
½ tbsp olive oil, optional
Directions
- Make the Pasta Dough
- Whisk together the gluten free flour blend and xanthan gum until evenly combined.
- Make a well in the center of the flour mixture.
- Add the eggs and olive oil, if using.
- Mix everything together until a shaggy dough forms.
- Transfer the dough to a lightly floured surface.
- Knead for 2–3 minutes, until the dough becomes smooth and supple.
- The finished dough should be fairly firm but not too dry.
- Make sure the dough forms a smooth ball without cracking or crumbling.
- If the dough feels dry or crumbly, whisk a whole egg and add it gradually until the dough reaches the right consistency.
- Divide the dough into four equal pieces.
- Keep the pieces you are not working with covered in plastic wrap/cling film or under a damp tea towel.
- Roll the Pasta Dough
- Take one portion of dough and roll it on a lightly floured surface with a rolling pin into a long oval or rough rectangle.
- Fold the dough into thirds, like a letter.
- Rotate it 90 degrees and roll it again into a long rectangle.
- Keep the dough only slightly thicker than the widest setting of your pasta machine.
- Pass the dough through the widest setting, 1 on the KitchenAid pasta roller.
- Fold the pasta sheet into thirds again.
- Rotate it 90 degrees and roll it out again with a rolling pin.
- Pass it through setting 1 for a second time.
- Trim any rough or craggy edges with a sharp knife or pizza cutter if desired.
- Move to setting 2 and pass the pasta sheet through twice.
- Continue through each narrower setting, passing the sheet through each setting twice.
- Lightly dust the pasta with flour whenever needed to prevent sticking.
- Use setting 4 for fettuccine, tagliatelle or pappardelle.
- Use setting 5 when you want a thinner sheet for ravioli or tortellini.
- Cut and Shape the Pasta
- Cut the pasta sheet with a sharp knife or the cutting setting on your pasta machine.
- Cut it into tagliatelle, fettuccine, pappardelle or your preferred pasta shape.
- Dust the cut pasta generously with extra flour.
- Gently shape the pasta into nests.
- Cook immediately or store using one of the storage methods below.
- Cook Fresh Pasta
- Bring a pot of water to a full boil.
- Add a generous pinch of salt.
- Add the fresh pasta to the boiling water.
- Cook for approximately 4–6 minutes, depending on the thickness and preferred texture.
- Check the pasta toward the end of the cooking time to make sure it reaches the texture you prefer.
Notes
- Different gluten free flour blends can absorb different amounts of moisture.
- If the dough is too dry or crumbly, gradually add extra egg until it comes together.
- If the dough is too wet or soft, add a small amount of additional flour.
- The dough should be smooth and firm but should not feel sticky.
- Keep unused dough portions covered so they do not dry out while you work.
- Lightly flour the work surface and pasta sheet as needed during rolling.
- Do not worry about tiny cracks along the edges of the pasta sheet. Gluten free dough does not have the same elasticity as regular wheat pasta.
- Make sure the cut pasta is generously dusted with flour before forming nests to prevent the strands from sticking together.
- The recipe makes four 2½ oz (70 g) nests of gluten free tagliatelle or pappardelle.
- The finished amount should serve approximately 2–4 people, depending on appetite.